


de Havilland DH-112 Venom
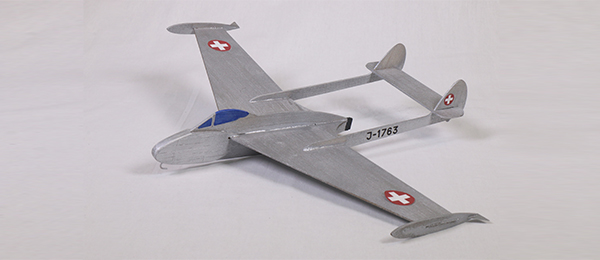
Written by Mark Freeland An easy-to-build all-sheet semiscale hand- or catapult-launch glider Free plans and build photos As seen in the May 2016 issue of Model Aviation.
Download Free Plans
Click here for page one of the Venom plans Click here for page two of the Venom plans (stabilizer only)Supplies needed
• Two 1/16 x 4 x 10-inch balsa sheets • One 1/16 x 3 x 10-inch balsa sheet • One 1/16 x 1-1/2 x 6-inch balsa sheet • A sharp hobby knife • Sandpaper • Two #8 washers • GlueFollow these steps to build your own Venom.
To make a catapult launch, you also need a 6-inch dowel handle with a loop of 3/32 x 18-inch rubber strip for the launcher. Photocopy the plans and attach them to wood sheets with a glue stick, tape, or low-tack adhesive. Use medium 1/16-inch balsa sheet for an indoor glider. To make a stronger outdoor glider, substitute 3/32-inch balsa sheet, and widen the slots to match. I recommend using a slow-drying glue for assembly. Cut out the parts with a sharp knife. Get help with this if you’re uncomfortable using sharp tools. The angle of the slot in the tailbooms and rear top surface is important. Both tailbooms should be identical. Remove the paper patterns from the wood and sand all of the parts before assembly because this is easier than doing it afterward. Glue the wing halves together with one wingtip raised 31/2 inches from the building board. Reinforce this joint with a glue fillet. Glue the fin to the end of the tailboom and leave a 1/16-inch gap for the stabilizer to slide into the fin. When the glue is dry, slide the stabilizer into the slots on both tailbooms and glue it in place. The tailbooms should be parallel and perpendicular to the leading edge of the stabilizer. Leave the tailboom bottom edges on a flat surface while the glue dries.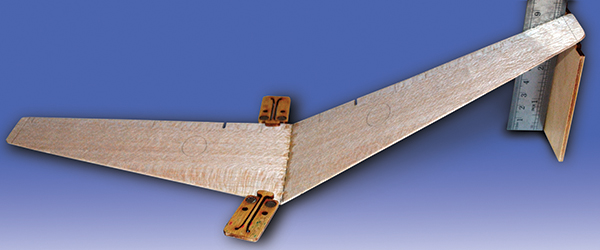

Slide the two-piece wing into the slot in the fuselage’s main body. Align it so that it is centered and has equal dihedral (upswept angle) on both sides, then glue it in place. When it is dry, slip both tailbooms onto the rear of the wing, slide them into the slots on the wing, and glue them in place. Glue the side cheek doublers on each side of the fuselage. Next, glue the wing root fillets between the rear of the wing and the fuselage. Make sure to align them with the wing’s surface. Add the optional wingtip tanks if desired.


For a catapult glider, cut out a hook as shown by the dashed line on the plans, or bend a wire hook as shown. Drill a 1/32-inch hole up into the fuselage, and epoxy the hook into the hole. Cut two 1 x 5/8-inch sandpaper grips, trim them to shape as shown on the plans, and glue them on each side of the fuselage under the wing root fairings.

Decorate the glider as you want. You can use markers, paint, etc. Look on the Internet for color schemes from which to choose. There are many! Cut out the cockpit and other decal patterns from the plans and glue them on (if you like). Add weight to the nose (I used washers and clay) to balance the glider at the front tips of the tailbooms. Test glide and adjust the balance to achieve the best glide. Turns can be adjusted by adding a pea-size piece of clay under one wingtip. Trim the aircraft for a left-hand turn if you are launching with your right hand. If you use a catapult, launch the de Havilland with a 45° bank angle at 45° to 60° from the horizon. With practice, you can achieve glide times of 20 seconds or more. Don’t forget to add your name and address to the model in case it gets away. If you prefer not to cut out your own parts, a laser-cut kit is available from Retro RC LLC & Campbell’s Custom Kits. —Mark Freeland [email protected]
Sources
Retro RC LLC & Campbell’s Custom Kits (248) 212-9666 www.retrorc.us.comThis Month's Issue

Join the AMA
![]()


3 comments
Venom Glider
Venom glider plan
Venom
Add new comment