


Old School Model Works Robinhood 25
Written by Jerry Smith New laser-cut kit gives a nod to World Engines Product review As seen in the September 2018 issue of Model Aviation.
Specifications
Model type: Laser-cut kit Skill level: Intermediate to expert Wingspan: 51 inches Wing area: 400 square inches Wing loading: 18 ounces per square foot Weight: 3 to 3.5 pounds Power: .25 glow or equivalent electric; 60-amp ESC; 3S LiPo battery; 9 x 4.5 to 9 x 6 propeller Construction: Precision-cut balsa and plywood kit with quality, brand-name hardware Needed to complete: Wheels, pushrods, clevis, tail wheel, covering, power system, and radio gear Price: $89.95Test-Model Details
Radio system: Spektrum DX9 transmitter; Spektrum AR6200 receiver; four Hitec HS-225BB servos Power system: Cobra 2814/12 brushless outrunner; Cobra 50-amp ESC; 3S 2,200 mAh battery; APC 9 x 4.5 propellerPluses
• The parts fit well. • It’s easy to assemble. • It has no bad flying habits. • It’s fun to build.Minus
• The plans could use more detail.Product Review
The Robinhood 25 is the first in a series of back-in-the-day, laser-cut kits based on a 1980s classic that was originally offered by World Engines. The new company that produces the kit is called Old School Model Works, based in Liberty Township, Ohio, a suburb of Cincinnati. It is headed by Mark Lanterman, whose interests are producing simplified, laser-cut kits of airplanes of the past and to entice more modelers into building them. The company went live earlier this year. Many will likely remember World Engines and John Maloney. John sold a series of Robinhoods all the way up to a 99-inch wingspan version. He even produced an engine called the Maloney 125 to fly the airplane. It wasn’t very powerful, roughly 20cc in size, and needed an electric starter to crank it. Some of the people who worked there included Dave Brown, Jack Port, Gene Steincamp, Tony Frackowiak, and Jim Lanterman. Mark also spent some time working there. The Robinhoods were popular airplanes in their day, and now Mark has brought one back with modern manufacturing techniques for you to build and fly. The Robinhood 25 laser-cut kit comes in a well-packaged box. The laser-cut sheets are packaged in a plastic sleeve and the stick balsa is bundled with the plans rolled around it. The prebent wire landing gear is also in a plastic sleeve. Quality hardware is provided by companies such as Du-Bro and Sonic-Tronics. A set of 24 x 36-inch plans are included. Supplied by the modeler are the radio, power requirements, pushrods, clevises, 2- to 3-inch wheels, tail wheel, and covering. The well-written construction manual has smaller pictures. Realizing that some of the steps might not be shown as clearly as you want, larger color photos are available on the company’s website. I found the commentary that is included with each step to be helpful. The end of the manual has the laser-cut sheets printed out. Each sheet has a number and each part is numbered on the sheet. These numbers are keyed to the plans. It’s pretty hard to go wrong with this method. The Robinhood can be built “old-school” as a three- or four-channel aircraft. It can be flown with glow or electric power. I chose to build mine with four channels and electric power.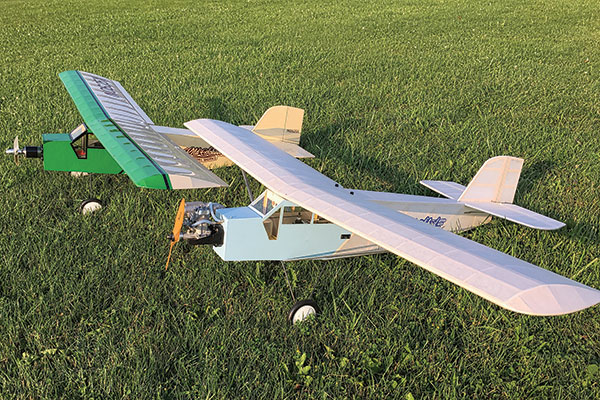
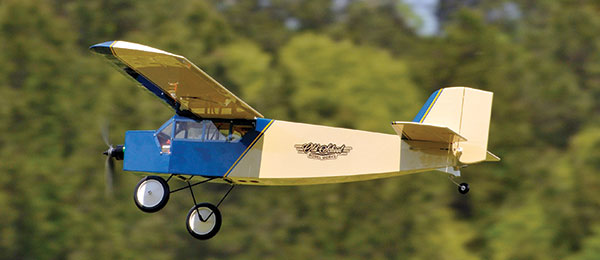
The Robinhood can be powered with either a .25 glow engine or equivalent electric motor.
Wing
During the build, I removed only the parts needed from each sheet so as not to lose any. The manual starts with building a wing panel. After laying down a spar, the wing panels are constructed from the wingtip toward the wing root. After gluing the wingtip parts together with a rib, the assembly is placed on the lower spar. Two shear webs are keyed into the rib on either side of the spar, followed by a rib with two more shear webs working progressively toward the wing root. I tried several methods of installing the ribs and shear webs.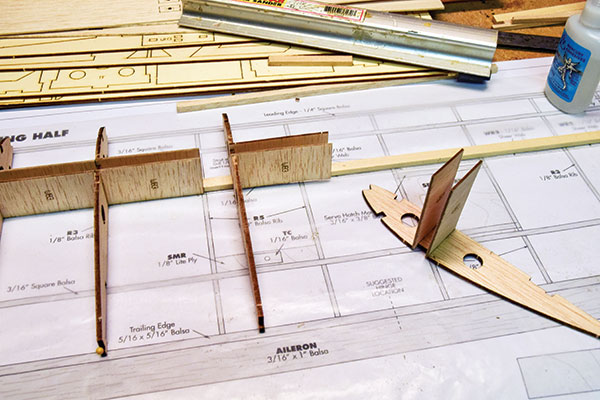
The author tried several methods of installing the rib and shear webs. What worked best was to lay a rib down on waxed paper, install a shear web on both sides in the vertical position using thin CA glue, pick up the assembly, lay it on the spar, and slide it up against the preceding rib. Holding the shear webs down and flat against the spar, wick some thin CA adhesive in the joints.
What worked best for me was to lay a rib flat on a piece of waxed paper. I installed the shear webs in a vertical position and wicked in some thin CA adhesive, lifted the assembly and placed it on the spar, and slid it against the installed rib and shear webs. Holding the shear webs down and flat against the spar, I wicked in some thinner CA glue. Installing the shear webs along with the build provides perfect rib spacing, as well as holding them vertical. In this case, it provides a strong box spar down the middle of the wing. The only work here is sanding the trailing edge to match the rib contour. The extra-long dihedral brace fits in the box spar with spacers. This is a strong, well-constructed wing. You should never have a wing failure. The front wing hold-down is unique, much like the original. Wing struts are included as an option but are not functional.
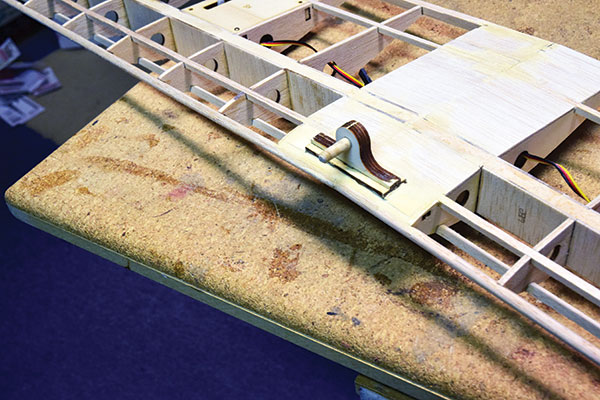
The forward wing hold-down is unusual. The original Robinhood had a plastic fitting to hold the dowel. The hold-down works fine.
Fuselage
The fuselage is built in the traditional way with light plywood in the front and stick structure in the back. When I first looked at the plans and saw 1/4-inch square longerons, I thought to myself that this fuselage would be stout. The two sides are assembled from the front. The formers key into the side with a lock fit and square up the fuselage. The tail is pulled together and the cross sticks are inserted. All of the the parts fit well. Before covering, I installed Du-Bro 500 Lazer Rod casings for the tail control surface linkage. I also installed servo rails and mounted the elevator and rudder servos. I mounted the ESC on the bottom of the battery tray with Velcro under a removable hatch. I also sheeted the section behind the rear landing gear strut, putting in holes for the air to pass through. I was pleased with how well the fuselage turned out.Tail Surfaces
The built-up tail surfaces are not sheeted. Most airplanes of this size have sheeted tail surfaces. The only laser-cut parts here are the stabilizer tips and center section. They are laminated to give the proper thickness. The elevators are joined with a 1/4-inch dowel. I ran out of 1/4 x 1/2-inch balsa and needed a 2.5-inch piece to finish the inside end of one elevator, so I glued two pieces of 1/4-inch balsa together to finish it. [The manufacturer shared that if the steps in the manual are followed in order, there should be no shortage of wood.]Landing Gear
The prebent landing gear is 1/8-inch music wire and must be soldered together. I mounted the two struts on the fuselage, aligning the ends of the struts. I had to tweak the bends to achieve a good fit.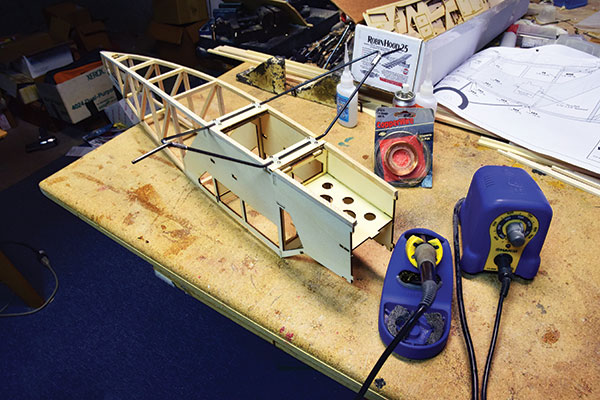
The prebent landing gear needs some tweaking to fit at the strut ends. They were mounted on the fuselage with the supplied hardware then tack-soldered to hold them in place. The joint was wrapped with 24-gauge copper wire and soldered with Stay Brite solder.
When I was satisfied with the fit, I tacked the ends together with Stay Brite solder. This held the ends while I wrapped the joint with 24-gauge copper wire (not supplied). After wrapping, I applied solder to the joint then cleaned the wire gear with alcohol and painted it black. I like Sullivan Tail Wheel Brackets (S859) because they are easy to mount and they take the shock off of the servo. They come in three sizes according to the weight of the airplane. The kit provides a piece of light plywood for you to mount it on. I used a 1-inch Sullivan tail wheel to complete the unit.
Finish It
I covered my Robinhood with cream MonoKote and trimmed it in metallic blue with a yellow pinstripe set on the blue. The best part of building your own airplane is that you can trim it the way you want. Your airplane is a one of a kind and not the usual one of many.How Does It Fly?
I charged the batteries and headed to the field for the maiden flight. Setting it down on the runway, I taxied around to check out ground handling. The Robinhood did great with its wide landing gear. When I advanced the throttle, it was quickly in the air and needed some down-trim right away. I found that it was more power/trim sensitive than I prefer. Even at half throttle, it wanted to climb. With a small amount of throttle, I made the approach and landed with no problem. I checked out the wing incidence and found 3° in the wing. I shimmed up the back of the wing and took half of that out. Once again in the air, it was considerably better. I trimmed it for level flight, hands off, then performed some mild aerobatics.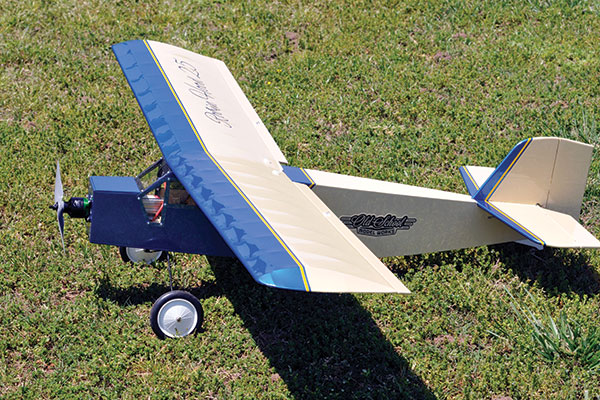
The 51-inch model uses readily available hardware and is easy to store and transport.
I got approximately 6 minutes of flight time on a 3S 2,200 LiPo battery with my power setup. If you are more aggressive with the throttle, your time will be less. After it was trimmed and tweaked, I found the Robinhood to be a great little sport flier that is capable of typical aerobatics, and has no bad habits.
Conclusion
By my standards, the Robinhood was overengineered; however, when completed, it presented itself as a rugged sport flier that is able to take abuse. It came out at the advertised weight. This is not a beginner’s kit, but it can be built by someone with moderate building skills. The fit of the parts was excellent, as was the supplied material. The plans were well done, except I felt that they needed more detail, such as the motor thrustline and control horn location. The construction manual included good commentary. An intermediate pilot should experience no problem flying the Robinhood. I found the kit to be enjoyable to build, and I look forward to seeing more of Mark’s yesteryear kits. —Jerry Smith [email protected]Manufacturer/Distributor:
Old School Model Works (513) 755-7494 www.oldschoolmodels.comSources:
Du-Bro (800) 848-9411 www.dubro.com Sullivan Products (410) 732-3500 www.sullivanproducts.com Innov8tive Designs (734) 457-5788 www.innov8tivedesigns.comThis Month's Issue

Join the AMA
![]()


1 comments
Robinhood 25 from Old School Model Works
Add new comment