


Tower Hobbies Sport GP/EP ARF

Written by Greg Gimlick A larger model for little money Product review As seen in the April 2017 issue of Model Aviation.
Bonus video
Specifications
Model type: Low-wing sport ARF Skill level: Intermediate Wingspan: 60.2 inches Wing area: 592.8 square inches Airfoil: Semisymmetrical Length: 48.7 inches Weight: 72 to 76 ounces Wing loading: 17.49 to 18.46 ounces per square foot Power system: .46 to .55 two-stroke glow; .70 four-stroke glow; 925-watt brushless motor; 60 to 75-amp ESC; 4S 14.8-volt LiPo battery 3,300 mAh minimum Radio: Minimum four-channel Construction: Balsa, plywood, and iron-on covering Needed to complete: Minimum four-channel transmitter; receiver; servos; engine or power system; glues; threadlocker Street price: $119.99Test-Model Details
Motor used: Great Planes RimFire .32 42-50-800 outrunner brushless ESC: Castle Creations Talon 90 Battery: FlightPower 4S 4,000 mAh 25C LiPo Propeller: XOAR 13 x 7 Radio system: Futaba 14SG transmitter; Futaba S9650 servos; Futaba R617FS FAAST receiver Ready-to-fly weight: 79.2 ounces Wing loading: 19.22 ounces per square foot Flight duration: 8 to 10 minutesPluses
• Easy assembly. • Cowl mounting tutorial. • Built up construction. • Great color scheme. • Good flight characteristics. • Attractive price.Minus
• Cowl shape can make using some ESCs difficult.Product Review
My first thought as I unboxed the Tower Hobbies Sport GP/EP ARF was that there were no wrinkles in the covering. I’ve become used to seeing some from being stored and shipped in containers, but this model was perfect. Everything was nicely wrapped and protected.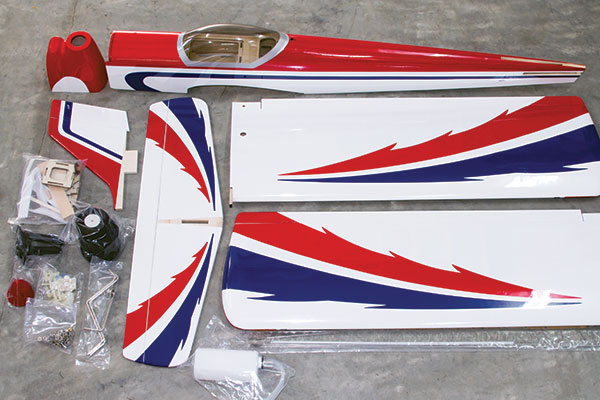
All of the parts are out of the box and the covering looks great.
The three-color covering scheme was nicely designed and applied. The uniquely shaped fiberglass engine cowl is beautifully done with a flawless paint job.
Assembly
Before assembling the model, read the manual as usual. I know I always suggest this, but it’s extremely important. Check the Tower Hobbies website to see if there are any updates to the manual. At the time of my build, there weren’t. The next step is to go over the covering and reinforce the bonding with your covering iron. It’s tempting to skip this step when the model looks as good as mine did, but do it just the same. You’ll be glad you did.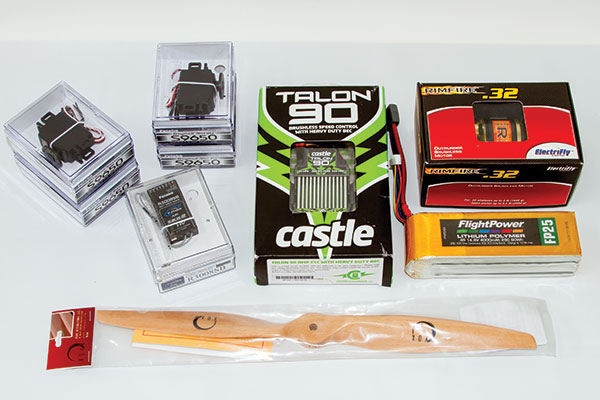
These are the additional components needed to complete the Sport GP/EP ARF.
If you haven’t ordered your motor system, you’ll need to do that and acquire the appropriate adhesives. I chose the recommended RimFire .32 and FlightPower 4S LiPo battery. Tower recommends the Castle Creations Phoenix Edge Lite 75 34-volt 75-amp ESC. This is where I should have gone. I had a Castle Creations Talon 90 ESC in the drawer so I thought I would use that and save a little money. Size became an issue when I assembled the motor mount, and it was clear that the Edge Lite 75 would work better without having to modify the ESC mount. I was able to use my Talon 90 by making a ramp to allow the extra length of the ESC to go into the lower extrusion of the cowl. This is something to be aware of if you stray from the recommended gear.
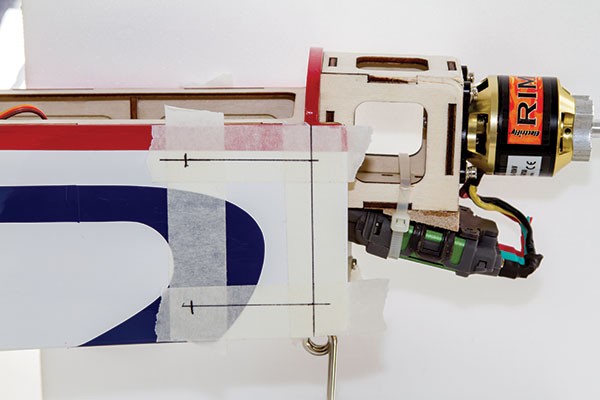
Installing the Talon 90 ESC requires some modifications to fit the cowl's shape. The fuselage is taped and measured for drilling the cowl retention screws.
Assembly begins by installing the servos in the wing using the preinstalled strings to fish your wires to the center. The aileron hinges are already glued in place, but give them a tug to be sure they are secure, as were mine. Use CA adhesive to reinforce the mounting holes after you’ve drilled them. The aileron horns do not employ backplates so the screws must be secured to the wood. Clevises and right-angle bends with keepers secure the control rods in the usual fashion. The preformed landing gear must be installed so that it angles back toward the wing’s trailing edge. The inset keeper slots are a nice feature; everything is flush with the wing’s surface. The wing panels are joined with an alignment pin and spar joiner using 30-minute epoxy. The fuselage is next and it goes together quickly. If you plan to use electric power, there are cooling air exit holes in the bottom that should be opened and the covering sealed with your iron. Next epoxy the horizontal and vertical stabilizers in place. That can be done as a single assembly or separately, but if you choose the latter, be sure to prevent glue from getting into the vertical stabilizer slots. Ensure that everything is square with the wing before final gluing. After that is complete, install the pushrods into the preinstalled guides and fit them to length with the horns. The tail control horns use a backplate, so you’ll drill those holes all the way through and harden them with CA adhesive. The nose wheel steering assembly is done next and bolted to the firewall. Detailed instructions are provided for installing either your motor or engine. I chose to go with electric power, so I assembled the pieces of the motor mount provided in the kit. The engine mount and fuel tank are also provided.
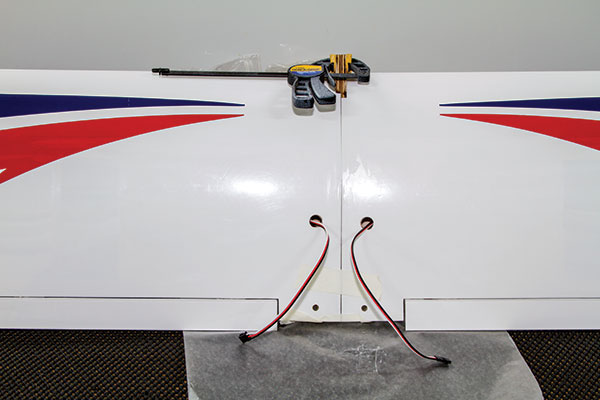
The wing halves are epoxied together and then taped and clamped until the adhesive has cured.
The motor mount is a sturdy assembly and predrilled to fit the recommended motor perfectly. Because of the cowl’s shape, it’s necessary to slightly bevel the front corners of the mount as shown in the manual. After the motor or engine is in place, follow the detailed instructions for drilling the cowl as necessary to access needle valves, etc. Because mine is electric, I only needed to slightly open up the main hole and the chin scoop for cooling air. If you’ve ever wondered how to get a cowl aligned and drilled so that the screws secure it properly to the firewall, you’re in for a treat. The manual lays out a beautiful tutorial on how to go about this and end up with perfect results. It’s a reference lesson worth keeping in your library! Futaba S9650 digital servos fit right into the precut holes and can be bolted down without any modification. I needed a couple of 9-inch extensions for the ailerons.
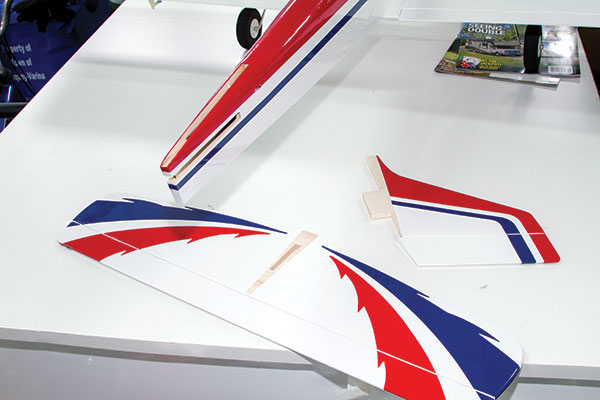
The tail pieces are laid out and ready to be glued in place. They are keyed for perfect alignment.
I mounted the Futaba R617FS FAAST receiver on the servo deck where there would ordinarily be a throttle servo. If you’re building the Sport as a glow model, there is room above the deck inside the fuselage for the receiver. With everything mounted below the fuselage deck, there is a cavernous space to mount your flight battery and adjust the center of gravity (CG).
Control Throws and CG
The CG range is from 21/4 to 31/4 inches behind the wing’s leading edge. For the test flight, I set mine slightly ahead of the midpoint and was happy with that. After several flights, I moved the CG back to the midpoint and like it there. My control throws were set as outlined in the manual and are comfortable at both high and low rates. I used 25% exponential on all surfaces.Flying
I get to fly many styles of airplanes, but it’s always a joy to find a good, solid sport airplane for everyday flying. The Sport is definitely one of those models. It looked good on the ground and I hoped it would be that way in the air. I wasn’t disappointed. Power and control going down the runway were excellent and it lifted nicely off the ground for a strong climb. After a couple of trips around the pattern to get a feel for it, I was ready to see how it would perform. The RimFire .32 on a 4S LiPo battery is a system I had used before, so I was confident in its ability to spirit this airplane around the sky.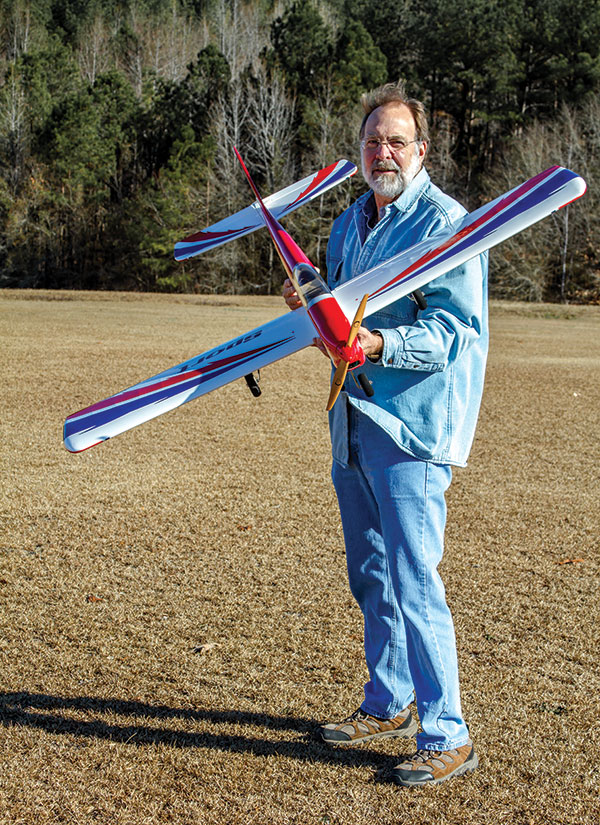
The author displays the Tower Hobbies Sport GP/EP ARF. This is a nice airplane at a reasonable price!
First up was a stall test, which was no big deal. It mushed along before finally breaking into a stall, dropping its nose and gently recovering when I centered the controls. There was no tendency to snap or break to either side. Rolls were nicely axial, given the Sport’s low-wing design and slight dihedral. Inverted flight required a bit of elevator, but it seemed as comfortable inverted as it was upright. Loops can be nice, big, and round, or tightened up depending on your preference. Cuban 8s look great. The Sport will make a nice aerobatic trainer for a pilot looking to hone his or her skills. I was happy to see that there was power and control authority for some outside maneuvers, too. Landings are a breeze, and require no special attention. It’s a happy landing with or without power, and the model slows beautifully. The wheels were big enough to handle my grass field without any problem, and ground handling is excellent.
Conclusion
It has been a while since I’ve owned a low-wing sport model and it was a refreshing fix after an extended period of flying some rather “interesting” airplanes. This airplane displayed no bad habits, or, as my buddy, Wayne, said when he flew it, “It just doesn’t have an ill bone anywhere in there.” It felt like an old friend before it was 50 feet in the air. I always keep a trainer in the hangar, but I’m going to expand that and keep a sport airplane, too. It’s a great aerobatic trainer and one that will allow any pilot to practice precision maneuvers without the fear of being bitten by the model. The Sport GP/EP ARF is an honest flier at an incredible price point. Tower Hobbies nailed it when the company tacked its name on this one! —Greg Gimlick [email protected]Manufacturer/Distributor:
Tower Hobbies (800) 637-6050 www.towerhobbies.comSources:
ElectriFly (800) 637-6050 www.electrifly.com FlightPower (800) 637-6050 www.flightpowerbatteries.com Castle Creations (913) 390-6939 www.castlecreations.comThis Month's Issue

Join the AMA
![]()


3 comments
Tower Hobbies Sport 60 review
Tower Hobbies Sport 60 review
Motor mount help
Add new comment