Build a Home for Your Phantom
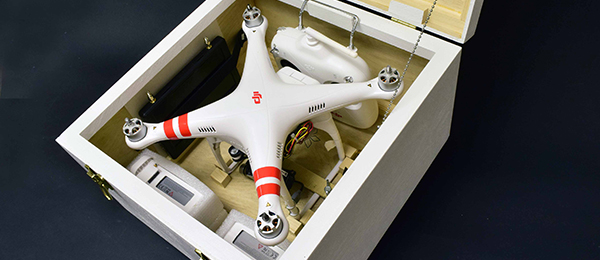
Article and photos by Jerry Smith In one or two evenings create a the perfect carrying case for a DJI Phantom.
Drones these days are all a buzz. We have eight in our local club and after watching them fly for a while I got interested. Being interested in photography this would enable me to take video and stills from a different viewpoint. So I bought a Phantom and began to fly it with that in mind. Absolutely marvelous the way it performed its magical flight. It rode around in the back of my van for a couple weeks when I began to think this little fella needs a home. A sudden stop might put it in unwanted flight into the back of the front seat. So I looked online to see what was available in the way of a case. What I found was very expensive. More than I wanted to pay. It was then I began to think of building my own case and what it would look like. I wanted a case just large enough to house the Phantom and everything related to it such as extra batteries, a FlySight Black Pearl screen for FPV, sun shield, extra propellers, antennas and other related stuff. After carefully measuring the Phantom I determined a size of 15” x 15-1/2” x 9-1/2” high would be perfect for the case I had in mind. Now for the material and a trip to Home Depot. Here I found a 2’ x 4’ piece of ¼” plywood. Not the kind with the wild grain but furniture grade stuff with a good surface finish. While there I purchased a 1 x 4 x 6’ pine board also. This is all the wood material required to build my case. Not bad for a little over $13.
A Perfect Size
Back in the shop I laid out the parts required to build the case on the plywood. The sides, top and bottom, and the sides for the top. I figured I would have to make another trip to Home Depot for, more wood. When the layout was complete I couldn’t believe my eyes. Bingo! That sheet of plywood was the perfect size for all the parts required with very, very little useable waste! The good lord was looking down on me. Of course you will need a table saw to cut out the parts. If you don’t have a saw seek out a friend who has one and have him help you. Once the parts are cut out you are ready for the build and of course, all excited. The Build This should not take you over one evening to build once the parts are cut out. Two or three if you are slow and want the enjoyment. One of the things I did was to use screws and glue to hold it together. The screws helped hold things in place while the glue was curing allowing me to keep on working. Once the case is assembled fill all the cracks and dents with filler. Being a modeler I used balsa filler. I sanded it with 220 paper and readied it for painting. I painted mine white, to match the Phantom, using Glidden Interior Semi-gloss. Two coats did the job. To restrain the top from opening over too far I used a metal beaded chain. I soldered a washer on each end and used a No. 2 servo screw to fasten it in place. You can also use a chain or even a chord for that purpose. I made the top separate. I could have made it all in one piece and sawed the top off. That would have been a perfect fit for top and base however, then it would have taken another piece of plywood. So I chose the less than perfect way of doing it for economy. If your Phantom has the long landing gear it may not fit in the case. Mine has the ½” spacers and there is some extra room in the cover. Also this case was not designed with prop guards in mind. They do have prop guards that snap on and are easy to remove and can be stored in the case. I know you will enjoy building your home for the Phantom. It was a fun project for me. And the best part of all. When you get ready to fly your Phantom you will have everything you need all in the case. Follow along with the pictures to see how I built my home for the Phantom. You will find it an easy build. My good friend Greg Roper designed the vinyl cut graphics for my case. It is available from him in red, blue, and black for $10 PP.Bill of Materials
- (1) ¼” 2’ x 4’ Handy Panel Sande plywood 2.
(1) 1 x 4 x 6’ no. 2 Whitewood Board 3.
(1) 4-7/8” Door Pull Galvanized 4.
(1) 1.5” non-removable Pin Hinge Brass 2pk 5.
(1) 2-3/4” x1-1/2” Chest Latch BB 2pk 6.
(24) #6 x ¾ Flat Head Wood Screw 7.4 0z White Glue 8.
(2) 1/4-20 X 1”Bolt 9.
(2) 1/4-20 Hex Nuts 10.
(2) ¼-20 Wing Nuts
Build Photos
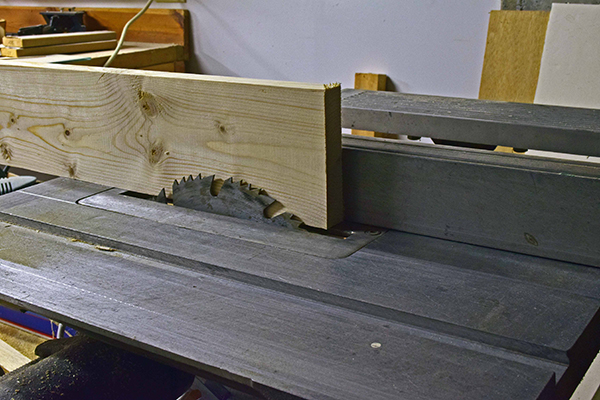 Cut 4- 15” pieces from the 1 x 4 plank. Place a piece between the saw blade and the fence to get the proper measure for the width you need. You should be able to get 4 pieces from each 15” piece. You will need 12 pieces requiring 3- 15” pieces of plank. Cut 1 piece from the extra remaining 15” piece to be used for backing the hinges and chest latches.
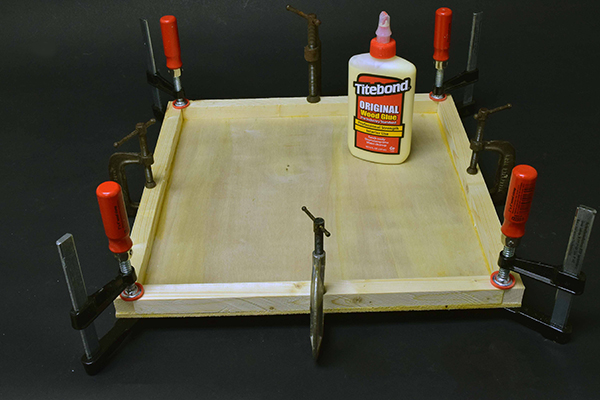 Glue a ¾” sq. rail to both sides of a 15” x 15” ply piece using white glue. Make it flush with the edges and ends. Clamp them in place. Now fit in a ¾” sq. piece between the 2 outside pieces making them flush with the ends. Use clamps until cured. This will be the bottom. Now make another just as you did above for the top.
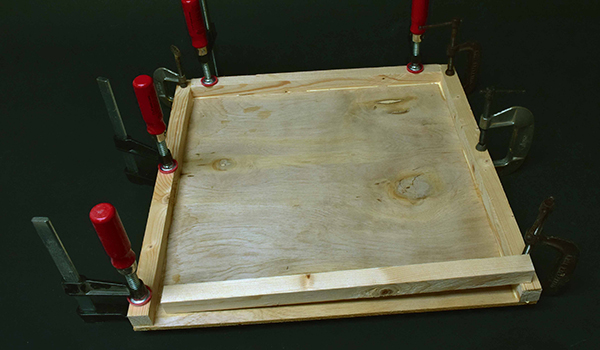 Stack the four 8” x 15” sides and tape them together. Locate and stack the 1-1/2” side for the top and tape them together. Layout the holes for the screws. Make them ½” from the side, 2” in from each end with one in the center. Drill a 7/32” hole at all locations. Because you are using a flat head screw you will have to countersink the holes for the screw head. I made mine a little deeper and used filler to make the hole flush. It’s up to you.
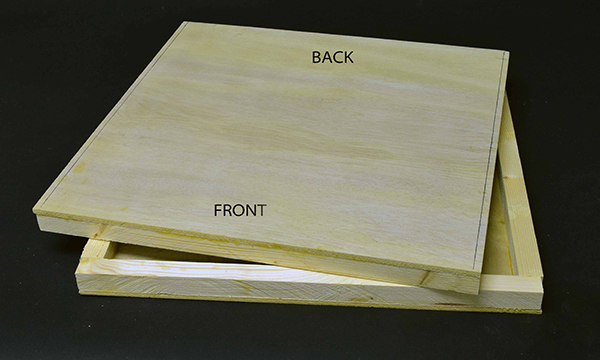 With the top and bottom rails installed and complete remove ¼” from each side of them. This will make the case size 15” x 15-1/2”. The 15-1/2” length will be the front and back of the case. Mark the base and top “front” and “back” as shown.
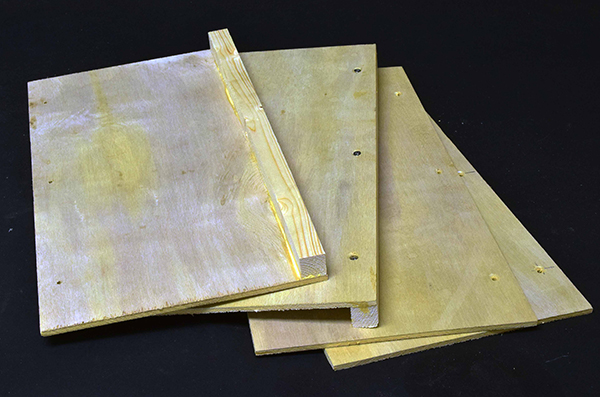 Locate the 4- 8” x 15” pieces of ply and glue a rail to one side of two of them only. Note: if you countersink the screw holes make sure they are on the outside. Align flush with sides and end. Apply glue and clamp in place. Next install 3 #6 flat head x ¾” wood screws in the pre-drilled holes. Remove the clamps. The screws will hold it in place until the glue cures.
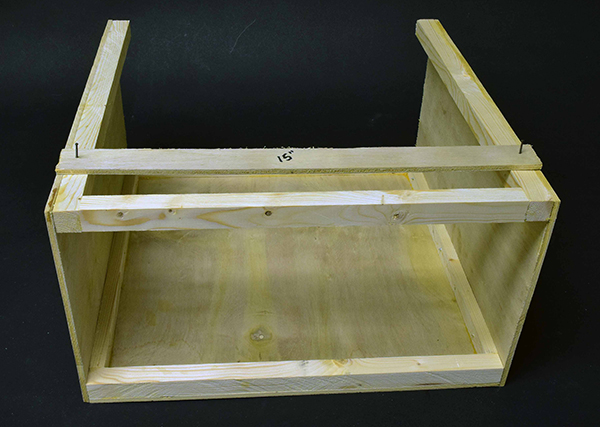 Glue the two sides with the rails to the base. Align and install the screws in each of them. Be sure to glue these two sides on to the base where you removed the ¼”making it 15” across with the sides installed. Cut a scrap piece 15” long and tack it to the top ensuring 15” at the top end. Now glue on the side, align and install the screws. Glue on the other side using the same method. This completes the case base.
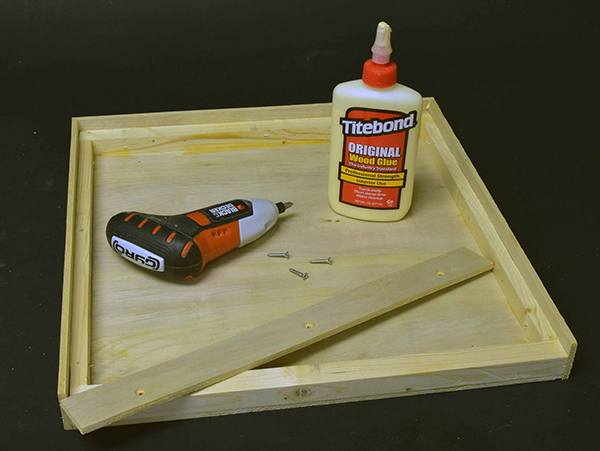 Locate the other 15” x 15” piece with rails. Hopefully you cut a ¼” off of each side. This will be the top. Glue on the sides and install the screws. Align the sides flush with the top and ends. Once completed it should match up with the base if you were accurate with your measurements.
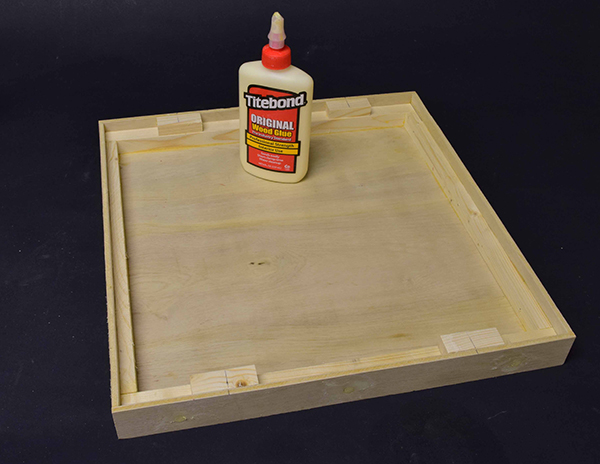 Cut 4- 2” lengths of rail from the extra piece I told you to cut. Glue these in as shown in the photo. Locate them 3-1/2” on center in from each end. These will be backing for the screws in the hinge and chest latch. It will be necessary to cut down the thickness so they will fit flush with the sides of the top.
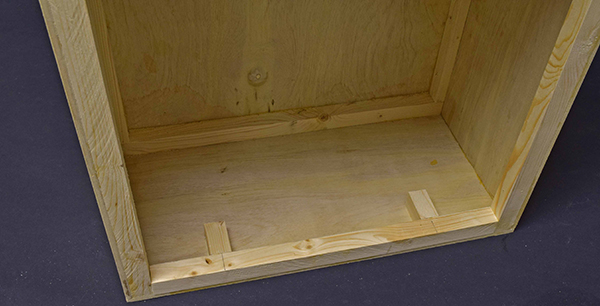 Cut 2- 1-1/2” pieces of rail and glue them in the front of the case as shown. Locate them 3-1/2” on center in from each end. These are backing for the screws in the chest latch.
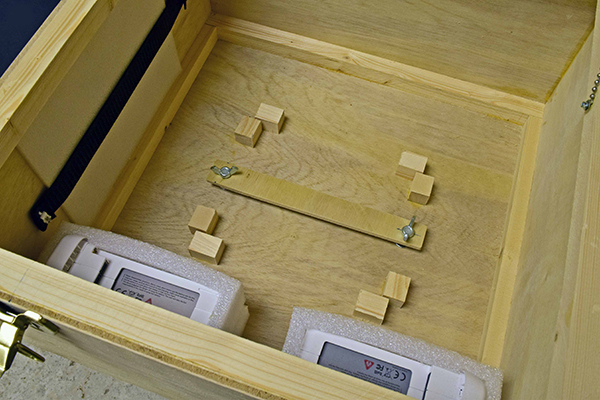 Place the Phantom in the center of the case. Cut 8- 1” pieces from the rail stock. Glue a block in the case at the end of each landing gear 4 places. Leave a little clearance. Now glue a block on the side of the gear, near the end block 4 places. These blocks will keep the Phantom from wandering around in the case. Next drill a ¼” hole on each side of the gear in the center. Draw a centerline on a scrap piece of ply. Hold it under the ¼”holes sighting through them to see the centerline. Now match drill the ¼” holes into the scrap piece. This will be the hold down bar. Clean it up after holes are drilled. Install the ¼” bolts from the bottom, thread on a ¼” hex nut and tighten. Install hold down bar and thread on wing nuts.
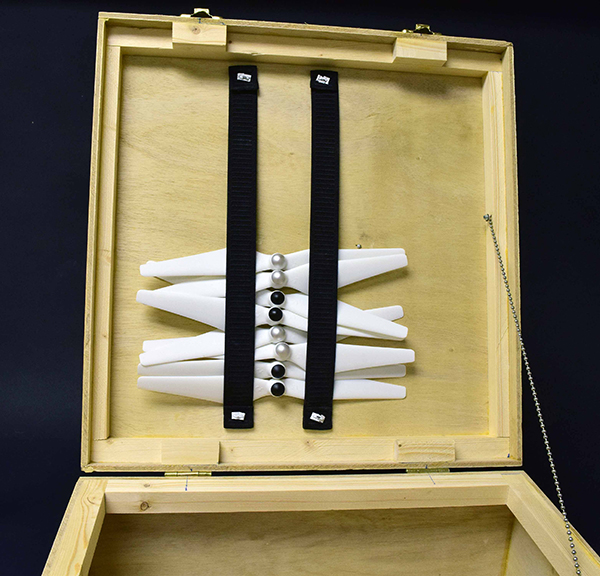 I used 1”elastic wide bands and stapled them to the inside of the top to store my props. You can also staple bands along the sides to hold extra parts such as your FPV LCD, antennas, and other related and needed parts.
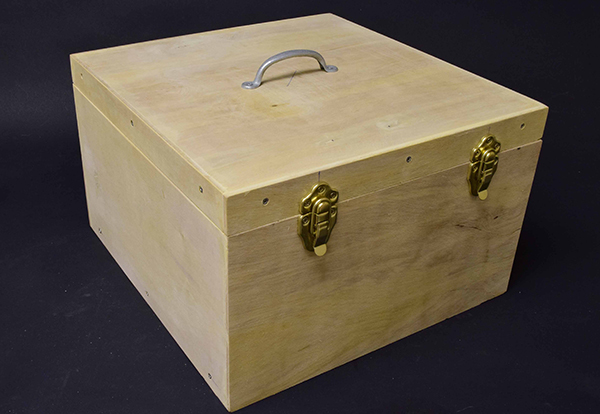 Finished case before painting with hardware installed.
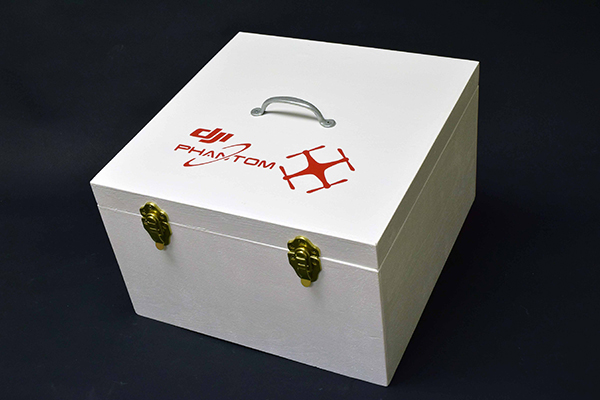
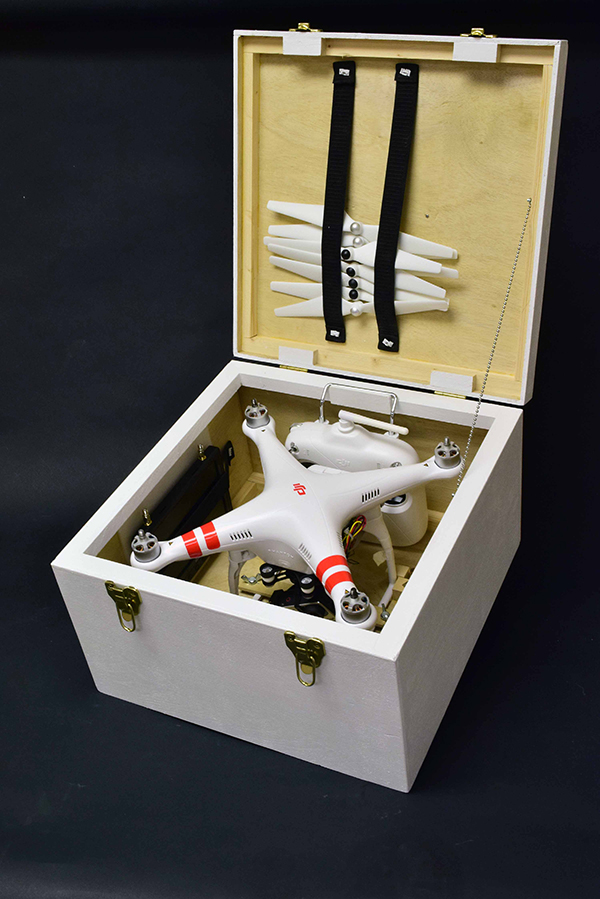
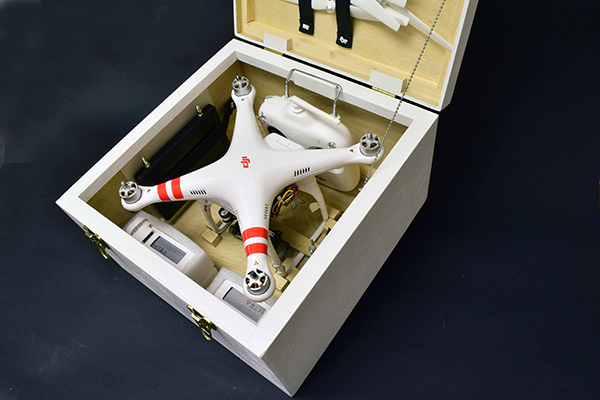



3 comments
Looks like a nice case
very well done
Phantom case
Add new comment