


UMX Air Tractor BNF Basic With AS3X And Safe Select

UMX Air Tractor BNF Basic With AS3X And Safe Select
Crop-dust fields that are small or large
By | [email protected]
As seen in the April 2024 issue of Model Aviation.
I HAVE A SOFT SPOT for agriculture airplanes, so this already had a leg up on some other choices that I was looking at. I’ve had Giant Scale Ag Wagons and larger sport scale agriculture airplanes but never a small UMX-size version, and this just screamed "Buy me!" when I saw the press release.
As soon as I opened the box, I was impressed. I love the boxes that UMX airplanes come in because they double as carrying cases to protect them. I can toss them in the RV storage bins and haul them with me. The details molded into the airframe are spectacular, and the first time I plugged a battery in, the lights just wowed me!
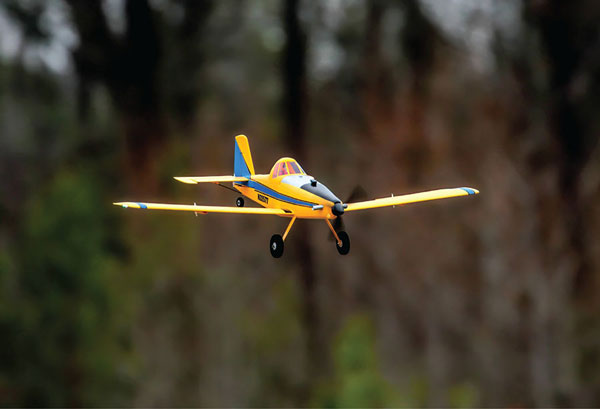
The joy of flying this airplane is low and slow in a scalelike fashion. The author has become a great "imaginary" cropdusting pilot.
Assembly
If you’re looking for a building project, you’ll be disappointed, but if you’re looking for instant gratification, it doesn’t get any closer than this. The airplane is fully assembled when you open the box; the only required action is to charge a battery and find the balance.
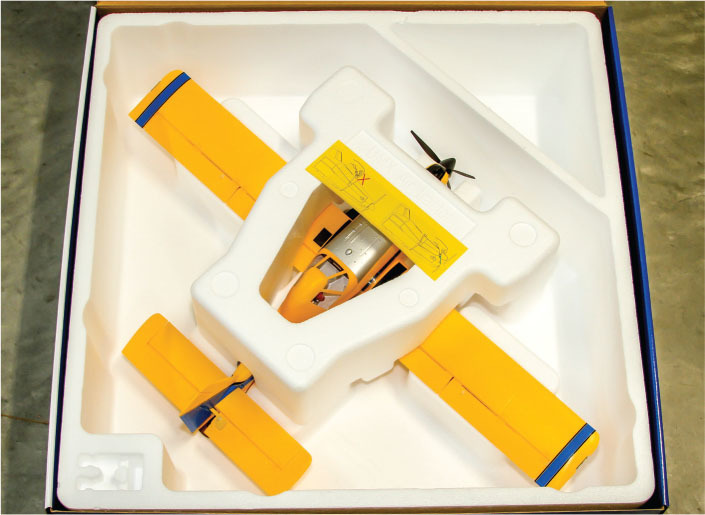
The shipping box includes an instruction label that shows how to remove the hatch. This is great for storing the airplane when not flying.
Programming is as easy as it can be. In E-flite’s usual fashion, the company provides charts with settings for each of its radios. I found the sequence for my Spektrum iX14 easy to follow. You certainly don’t need a radio as fully featured as an iX14, but that is my go-to radio and the one that I own. A simple six-channel Spektrum radio will do nicely and exploit all of the features of the built-in flight controller.
A close examination of the components will reveal a control board with an integrated receiver and ESC, along with two linear servos for the tail feathers. Each wing has linear servos for the ailerons buried within the wing and they are adjustable by tweaking the "U" in the control rod. The tail surfaces can be adjusted the same way.
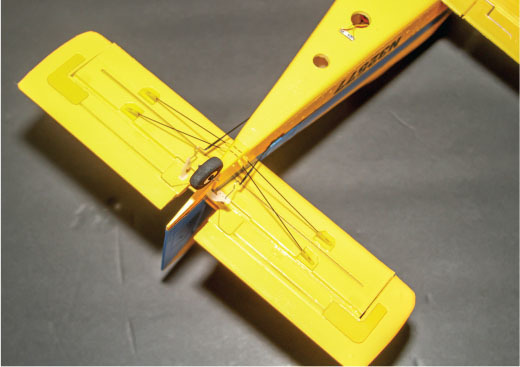
The tail surfaces are all braced and have adjustable control rods.
There is a little diagram inside of the foam shipping box that raises a question when you first open it, but it quickly becomes clear. It shows where to grasp the battery access hatch to remove it. There is a small, vertical piece at the rear of the hatch that would appear to be a handle, but if you pull that, you’ll end up breaking something. Grasp the front sides of the hatch gently and pull up. If you squeeze the sides too hard, you’ll crack them. Be gentle! The hatch is held on by small magnets.
Aside from attaching Velcro to the battery and positioning it for the proper center of gravity (CG), that completes construction.
At a Glance

 Specifications
Model type: Microscale low wing
Skill level: Intermediate to expert
Wingspan: 27.64 inches (702mm)
Wing area: 97 sq. in.
Airfoil: Flat bottom
Length: 17.76 inches (451mm)
Weight: 136 grams (4.7 ounces)
Motor: 1208-2150 Kv brushless outrunner
Radio: Six-channel radio
Construction: Foam
Price: $169.95
Materials required: Six-channel transmitter and a 2S or 3S battery
Test-Model Details
Motor: 1208-2150 Kv brushless outrunner (included)
ESC: Integrated into receiver/control board (included)
Battery: 3S or 2S 300 mAh LiPo (required)
Propeller: 120mm × 70mm three-blade (included)
Radio system: Spektrum iX14 transmitter
Ready-to-fly weight: 5.7 ounces (162 grams) with a 3S battery
Flight duration: 5 to 8 minutes
 Pluses
- Factory-installed LED landing, navigation, and strobe lights.
- Easily accessible battery compartment.
- Scale details.
- AS3X and SAFE.
- Cool factor!
Test-Airplane Settings
- Elevator: High rates: 100% and 20% exponential; low rates: 70% and 10% exponential
- Ailerons: High rates: 100% and 20% exponential; low rates: 70% and 10% exponential (Because I have a threeposition switch, I set up mid rates with 85% and 15% exponential for both.)
- CG position: 29mm from the LE
 Manufacturer/Distributor
E-flite/Horizon Hobby
www.horizonhobby.com/e-flite-1
Control Throws and CG
There are no control throws listed for the airplane, but the setup guide lists settings for high and low rates, plus exponential. I used these and haven’t measured the exact amount of throw, but they are fine with whatever the factory settings give you. The guide uses 10% exponential and say’s that you can increase that after initial flights. I’ve increased mine to 20% high rate and 10% low rate, but you can adjust them to your style and comfort.

The aileron servos are buried in the wing and have adjustable control rods.
The CG is listed as 29mm from the leading edge (LE), plus or minus 2mm. I have mine set right at the 29mm point and am happy with it there. It’s easily adjusted by moving the battery.
AS3X and SAFE
The receiver is set up from the factory to use SAFE and AS3X, but you can turn SAFE off by a series of switch toggling that is explained in the manual. I left SAFE on switch position zero and AS3X on position 1. The preprogrammed receiver is "locked," so if you attempt to use Forward Programming in your transmitter, you’ll find that it’s not available to change settings. The factory settings for both SAFE and AS3X seem to be more than adequate.
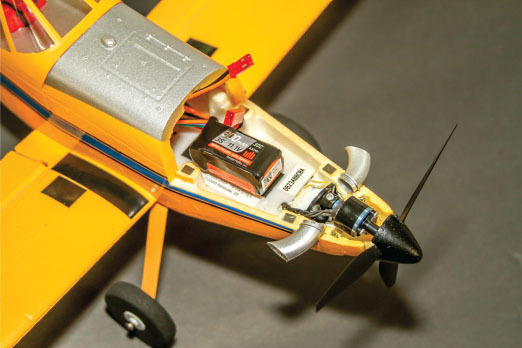
The 3S battery pack balanced well in this position. There was plenty of room to adjust.
Flying
The hardest thing about getting a new airplane is waiting for the weather to cooperate. Our test-flight day was a cool, cloudy, 48° day with 6 to 8 mph wind. I’ve since flown it in wind of 10 mph gusting to 16. Although not exactly fun, the little airplane handled it better than expected. The manual recommends hand launching in SAFE mode and allowing the Hand Launch Assist mode to help you. This senses the hand launch and puts in a bit of up-elevator to assist with the initial climb before it returns to normal SAFE mode settings. This seemed to work quite well, and the hand launches were uneventful.
Our field is short grass, so I thought a takeoff from the ground would be possible. I did that multiple times without any issues. If your grass is tall, the wheels might not be up to the task, even though the airplane has plenty of power.
I found the settings in SAFE mode to be mild, but they provide plenty of control throw to remain within the confines of a small field. A word of caution: When you decide to go from SAFE to AS3X, be sure to fly straight and level with neutral controls, otherwise the transition can be quite exciting … ask me how I know. Because SAFE generally requires more control input than AS3X, if you flip the switch, your excessive inputs will immediately take effect and laughs from the pits will ensue.
I’ve flown the airplane on 3S and 2S and both provide plenty of power for comfortable flying and aerobatics. The 3S is very sporty, and seldom do I ever go to full throttle. The full complement of aerobatics is available to you, depending on your skill and need for thrills. On 3S power, you can even sustain a hover for a short bit, and outside loops are strong.
Stalls were uneventful, and spins were easily recovered from by relaxing the controls and letting it fly out. Inverted flight took a slight bit of elevator to sustain, and rolls were very scalelike. The flaps have two settings and, considering how small everything is, they’re surprisingly effective.
The joy of flying this airplane is low and slow in a scalelike fashion. I’ve done a bit of crop-dusting in full-scale helicopters—never in a fixed-wing aircraft—but as I was doing inside corners, I felt like I was back in the Bell 47 trying not to snag potato vines on the booms. Hey, maybe I can fashion some booms for it.
Conclusion
This has quickly become one of my favorites! It’s just plain fun to look at, and with the sun shining on the bright yellow paint job, I find myself fantasizing about real crop-dusting. There aren’t any bad habits to cause alarm, and the stabilization seems well tuned to the tiny airframe. The option of 2S or 3S is nice for using packs that you might have for other airplanes.
The 2S setup will allow for basic sport aerobatics, and 3S becomes insane if you want. The LED lights are surprisingly visible, even in daylight, and make orientation even easier. After witnessing my test flights, there was no shortage of pilots volunteering to fly it while I shot photos.
SOURCES:
Spektrum RC
This Month's Issue

Join the AMA
![]()


Add new comment