Article by Paul Gentile.
Why you might want this tool in your workshop.
See two additional sidebars, bonus photos, and a video.
Featured on page 55 in the October 2013 issue of Model Aviation.
The 3-D printer is the newest tool in the workshop. The first time watching a 3-D object being printed can be awe inspiring. For me, 3-D printing brings forth memories of the “Star Trek” episodes where the computer is asked to replicate an object and a few seconds later, the object materializes. It is hard to not be excited when you realize we are not far off from the reality of that scenario.
Of course there are a few more steps in the process and we have not yet made the leap to cellular replication, but the ability to design an object and then have that object materialize is no longer science fiction. If you do not have a 3-D printer in your workshop today, it may not be long before you do.
3-D printing is also known as additive manufacturing. Other tools in the shop such as mills, drills, laser cutters, CNC machines, and similar tools remove materiel to create a finished object. A 3-D printer combines layers of material to create an object.
Plastics, powders, wood particles, foods, and metals are all possible print materials depending on your budget and the 3-D printing technology you are using. While hobby-grade 3-D printers can be bought as kits for under $300, high-end printers can jump to a six- or seven-figure range. Similar to 2-D paper printers, the price range offers a large variance in features and quality.
As with standard old paper printing, you start with a digital file on a computer then send it to the printer and within a period of time you have a printout. In the case of 3-D printing, the printout is a three-dimensional, physical object instead of an image on a piece of paper.
So you want a 3-D printer, but where do you start? What printer is right for you? I wish I could give a list of printers and compare them on their merits so you could choose the one that makes it to the top of the list, but new printers, new features, and new technologies are entering the marketplace every day.
Image
Andrew Lindsey (R) explains his latest 3-D print to an eager crowd at FUBAR labs.
Image
A Mendel 90 3-D printer is of the RepRap lineage and uses an xyz axis to print.
While I was writing this article, Stratasys, the creators of the Fused Deposition Modeling (FDM) process, purchased MakerBot Industries, possibly creating a whole new direction for 3-D printer options.
RepRap printers, such as the Printbot SIMPLE, retail for roughly $300 and can fit next to your keyboard, while other printers are larger than a 4 x 8 sheet of plywood. I want to help you narrow down some of the key features and research venues to start your search for a 3-D printer.
Make a list of what you want and do not want from the printer. Price may be a guiding factor, but not if you have to build it yourself.
Some key considerations could include: What is the purpose for the printer? What is the size and type of objects you want to print? What materials do you want to need to print with? What software works with the printer? Can you upgrade the hardware or software later? What is your budget? Are you willing to scratch build a printer, build from a kit, or do you want a ready-to-print printer? Answering these questions seems daunting, but with a little research you will see some trends in the printers that pique your interest.
There is plenty of online information about 3-D printing and I have included a list of key websites in the “Sources” section for your reference. If you learn best with hands-on knowledge, then visit your local Makerspace or Hackerspace. These are clubs that are part of the Maker movement where like-minded people come together to share do-it-yourself (DIY) knowledge in all areas of interest.
I often find many AMA members who are Makerspace members. There are hundreds of Makerspaces worldwide, and all of them that have Open Hack Nights where the public can come and learn.
It was my interest in 3-D printing that led me to join Fair Use Building and Research (FUBAR) Labs. When I first joined FUBAR, we had a CupCake CNC and now we are in the process of adding a Lulzbot AO-101 3D Printer and a large-format 3-D printer. Several members have their own 3-D printers and several others work with 3-D printers.
Our vision at FUBAR is to build an entire digital fabrication lab that members can regularly utilize. A Fab Lab is a great alternative to buying your own printer, because it is a place where collaboration and knowledge can be shared.
If you are in New Jersey, you are welcome to come and check us out at FUBAR Labs in Highland Park. In addition to scheduled workshops, every Thursday night is Open Hack Night at FUBAR and every Sunday the space is open to the public. Our schedule and contact information is on the FUBAR Labs’ website. We welcome new members and willingly share our experience.
If you are in the San Francisco or New York area, a visit to the annual Maker Faire and the 3-D Printer Pavilion is another way to see many 3-D printers. Smaller Maker Faires hosted across the country are also good places to see 3-D printers in action.
Image
Walter Taylor’s printed sailplane is free on Thingverse.com. RTP or ready-to-print RC airplanes are born. Photo courtesy of Walter Taylor.
Image
William O’Dell designs and prints RC parts for airplanes. This is one of his custom, three-blade spinner designs. Photo courtesy of William O’Dell.
Another alternative to buying or building a 3-D printer is to use a 3-D printing service. Services such as Shapeways allow you to create, upload, and print objects. Shapeways has numerous high-end 3-D printers as well as easy-to-use software for turning your ideas into reality.
The choice of materials is also an advantage with using a service. Shapeways has dozens of materials from which to choose and you can even print using materials such as stainless steel. Shapeways is unique in that it allows you to sell your designs online. The only downside to a service is that it is not instant gratification; you will need to wait on the mail for your print.
Knowing what you want to print is an important part of your printer research. You should know what materials (filaments) are possible to print in in the machine you choose. Although there are dozens of materials available, the two most popular materials with which to print are polylactic acid (PLA) and acrylonitrile butadiene styrene (ABS).
Other materials include metals, woods, sugars, composites, silicon, and ceramics. Each material has pros and cons. Melting point, color, strength, biocompatibility, translucency, fume toxicity, and cost are all considerations. Many of the DIY FDM printers are versatile enough to allow you to switch between material types. Filaments are frequently being developed for new applications.
ABS and PLA are thermoplastics. ABS is a popular material because of its low cost and availability. ABS is generally found in household products such as toys. Although ABS is a general term, there are at least five variants of ABS formulas for applications that range from medical devices to car lamp lenses.
For printing, ABS needs a temperature, ranging from 215° to 250° C (420° to 480° F). Despite the higher temperature, ABS is easier to extrude, requiring less force. Its extrusion characteristics make it better for printing small, detailed parts, but ABS can warp when used to print large objects unless using a printer with a heated printing bed.
PLA is a biodegradable polymer that can be produced from fermented crops such as corn. PLA is stable when printed and does not require a heated printing bed. ABS has a better surface finish than PLA, but PLA is better for prints that need to be stronger or are used in hard-wearing applications. These qualities make PLA harder to push through the extruder and reduce the ability to print finer details.
Another point to consider in material selection is recyclability. A roll of filament might not seem expensive at first, but after a few dozen prints, the costs add up. Some innovative designers have turned to creating their own filaments with DIY filament extruders. The extruders melt either raw material or recycled material and then extrude the filament into a strand ready for the printer.
Image
The Cupcake CNC by Makerbot Industries has been compared to the Apple I computer and how it influenced a whole generation of an industry. Photo courtesy of Makerbot Industries.
Image
The Makerbot Replicator2 printing out a radial engine. The Replicator 2 can print with a resolution of roughly 100 microns. Photo courtesy of Makerbot Industries.
Image
ReplicatorG software converts a digital 3-D model into G-code for printing. Image courtesy of Makerbot Industries.
Now let’s discuss software and CAD, CAM, and G-code. This is the part where many people’s eyes glaze over with fear, but don’t be afraid. 3-D printing has also led to simplification in the world of 3-D digital design.
Whether you are designing your own objects or downloading them from the Internet, you will need a 3-D CAD software package. A few years ago, decent 3-D CAD software could cost you hundreds or thousands of dollars and it took weeks to learn how to use. They still do cost that much if you want to design critical systems for your profession, but for the rest of us, 3-D CAD is often free and easy to use!
Autodesk has been working hard with the 3-D printing community to ensure that. Its latest acquisition, Tinkercad.com, means that in just a few short minutes you could design a 3-D, ready-to-print object. Other excellent free choices for 3-D CAD include 3DTin.com, SketchUp, OpenSCAD, Wings 3D, Scupltris, Autodesk 123D, Blender, POV-Ray, and FreeCAD. Of course, you can use any professional 3-D CAD design system.
After you’ve designed your 3-D object, you then need to export it to a STL file. STL is not the only choice, but is the most widely used format for printing stereolithographic CAD files. Depending on the printer you are using, the next step is to prep the STL file for print using software such as ReplicatorG.
The software will slice the file, converting the 3-D object into layers. It will also generate a G-code file which uses xyz coordinates and special codes to tell the printer what to do. Those who have done any CNC machining or laser cutting will recognize G-code which dates back to the 1950s. After the slicing is done you are ready to print. Click print and watch your object come to life.
With 2-D ink printing, the type of printer, the ink, and the paper influence the quality of the final print. A dot-matrix printer isn’t expected to create high-quality photos, and the same is true of 3-D printing. Use the right printer for the right job.
3-D printing has limitations that are a result of the size and resolution of the printer and the characteristics of the printing material. A low-end, hobby-grade, 3-D printer can generally produce detailed, complex objects.
As with a dot matrix printer where you can see the dots that make up the print, 3-D printing has a resolution as well. If you look at the object closely enough, you can see the visible layers of the print. The surface is not smooth. With a higher-end the printer and the more money you spend, you can get a better resolution.
To save a few dollars and for prints in ABS plastic, the surface can be smoothed out with acetone. Some dip and brush acetone to smooth the prints. A more popular technique involves a heated acetone vapor chamber that slowly melts the layers into a glossy finish.
Perhaps one of FDM printing’s biggest limitations is the amount of color variations. Single-head printers mean that only one material can be fed through at a time. Some new designs are begging to incorporate two, three, or even four heads so that multiple materials can be used in a print. Full-color printing, such as the prints from 3D Figureworks, requires high-end, six-figure machines.
As with any creative group of people, designers have found that limitations do not mean barriers. Many of the 3-D printing materials can be dyed using readily available fabric dyes. Of course, you can always paint your object, just as you would any plastic model or part.
For aeromodelers, 3-D printing opens up a world of possibilities. A scale builder could design scale details from original blueprints and print them out on his or her desktop.
Multicopters have developed in the same era as 3-D printing and many multicopter designs and parts are printed on workbenches around the world. Many of those multicopter part designs are shared freely online and you can download the digital files and print out your own parts. 3-D printing is shortcutting the process from idea to flight.
When I think of the possibilities for 3-D printing, I get excited. Just imagine you are getting your airplanes ready on a Friday night for a weekend of flying. In your rush to load the van you smash your favorite airplane’s aileron and snap the hinge. The hobby shops are closed, purchasing online will take days, and you want to fly tomorrow. No problem; just print one.
Perhaps one day, companies such as Horizon Hobby, Hobbico, and Du-Bro will have online catalogs of 3-D parts that, for a small fee, you can download and print. One enterprising AMA member is already doing that. William “Odie” O’Dell of San Diego is designing and printing custom propellers, spinners, landing gear, servo mounts, and other parts for fellow modelers. If you have your own printer, you can download his designs for free via his Thingverse profile Odie-Wan.
How about taking it one step further and printing out an entire airplane? That is what an engineering team did at the University of Southampton in 2011. The team designed and printed an electric RC airplane that required no tools to assemble. Dubbed the Southampton University Laser Sintered Aircraft (SULSA), the airplane had a 6.5-foot elliptical wingspan and flew at more than 100 mph.
Image
This Delta printer’s print head is connected to the three vertical linear actuators, unlike traditional, fixed xyz axis printers. An advantage of a Delta printer is speed.
Image
Mechanical and aerospace engineering professor, David Sheffler (L), with the “printed” airplane’s creators, Steven Easter (center), and Jonathan Turman. Photo courtesy of the University of Virginia.
Shortly after, in the summer of 2011, two brothers, Steven Easter and Jonathan Turman, both engineering students at the University of Virginia, printed their own RC airplane. The airplane also had the same wingspan, but unlike the SULSA, it was similar in design to a Sig Kadet.
Both of these airplanes are engineering milestones for aeromodeling and 3-D printing. Both had a team of engineers and high-end, expensive 3-D printers, but inspired by these projects, 3-D hobbyists quickly set their sights on printing out airplanes with their RepRap homebrew printers.
Walter Taylor is one of those people. Walter is a sailplane enthusiast and was unhappy with reproducing airfoils through traditional building methods. He could only approximate the correct shape and design and wanted a way to create an exact airfoil.
So he modeled airfoils on his computer and started printing them out. He then moved on to other parts of the airplane. Before long he had a whole airplane ready to print. Walter says that 3-D printing allows him to build complex airplane designs while sitting at his desk, and he only needs a few simple hand tools such as a file and some drill bits.
He no longer needs a dedicated area, workbench, scroll saw, drill press, harsh chemicals, and hundreds of invested man-hours to create an airplane. It still takes many hours to print, but once started, he can walk away and enjoy doing something else while replacing man-hours with printer hours.
3-D printing is popping up in workshops and on desktops everywhere. Although the dizzying array of choices might make one want to wait before trying it, there is no denying that 3-D printing is here to stay.
For an aeromodeler, the possibilities are endless. With innovators such as Steven Easter, Jonathan Turman, Walter Taylor, Michael Christou, and countless others, we have entered a new phase of model aviation. We can now add a new entry to the list of model aviation acronyms. We now have airplanes that can be RTF, ARF, PNP, BNF, or RTP—ready to print.
—Paul Gentile
[email protected]
Bonus Photos
Sidebar: 3D FigureWorks at the Toledo R/C Expo
Image
For any model aviation enthusiast, the Toledo R/C Expo is a highlight of the year and this year was no exception. One vendor that received a lot of attention was 3D FigureWorks. The company had the ultimate scale detail: you! Jay Smith talks with one of the founders of 3D FigureWorks. Learn more at www.ModelAviation.com/3DFigureWorks.
Sidebar: The History of 3-D Printing
Image
Jay Smith takes us back to 1976 to the birth of the inkjet printer and follows the evolution into 3-D printing. Learn how in the 1980s early 3-D printing was first being developed laying the groundwork for the technology today.
Read the entire history at www.ModelAviation.com/3Dhistory.
Video: Other Valuable Building Tools
Other Remote Video URL
This video features the song "Music" by Rare Game, available under a Creative Commons' Attribution license.
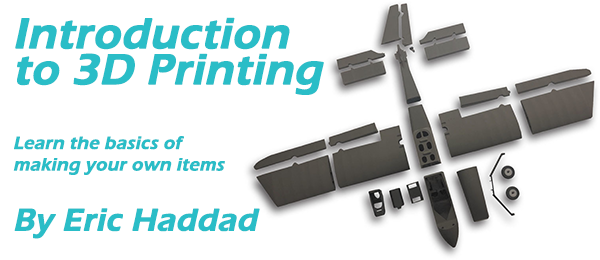
Written by Eric Haddad Learn the basics of making your own items As seen in the August 2020 issue of Model Aviation. "The coolest toys don’t have to be bought; they can be built. In fact, sometimes
Learn the basics of making your own items By Eric Haddad Photos by the author [email protected] Originally seen in the August 2020 Model Aviation "The coolest toys don’t have to be bought; they
Written by Jim T. Graham 3D Printing and RC Column As seen in the January 2019 issue of Model Aviation. Jim T. Graham [email protected] W hat does 3-D printing have to do with the RC hobby? I was
So, 3d printing has really started to come into aviation. I do hope 3d printing brings to aviation all that is claimed in an article I read. (http://3dprinthq.com/the-future-of-aviation-shaped-by-3d-printing/). 3D printed planes with virtual rooms. That'd be really awesome.


Comments
3-D printing
Truly Amazing!
3d
This makes me want to get back to scratch building!
price
Hoping the printers and materials continue to drop in price so I can get my hands on this.
Great Prospects
So, 3d printing has really started to come into aviation. I do hope 3d printing brings to aviation all that is claimed in an article I read. (http://3dprinthq.com/the-future-of-aviation-shaped-by-3d-printing/). 3D printed planes with virtual rooms. That'd be really awesome.
Add new comment