
Written by Troy Hamm
This military trainer makes a great sport model.
Product Review
As seen in the June 2018 issue of Model Aviation.
Specifications
Model type: Semiscale ARF Wingspan: 56.5 inches Wing area: 536.7 square inches Length: 46.2 inches Weight: 80 to 88 ounces Power system: .46 to .55 two-stroke; .70 four-stroke; or 925-watt electric Radio: Four-plus-channel radio; four or five servos Price: $159.99Pluses
• Preinstalled control surfaces. • Fast assembly. • Good instructions. • Decal set included. • Pilot figure included. • Well built. • Flies great.Minuses
• The instrument panel decal wouldn’t adhere to the painted wood panel.Bonus Video
Product Review
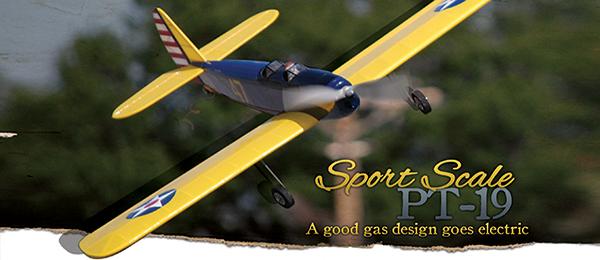
The Fairchild PT-19 is a low-wing, open cockpit, two-passenger, conventional-geared aircraft that was designed to be a primary trainer. Fairchild received its first order for the PT-19 from the U.S. Army Air Corps in 1939. The PT-19 was also used by the Royal Air Force and the Royal Canadian Air Force. Several versions of the PT-19 were built with a variety of inline engines. The PT-19 airframe was later adapted to use a Continental radial engine and designated the PT-23. More than 7,000 PT-19s were built in all. The Great Planes PT-19 was shipped in one medium-size box. All of the components were sealed in heavy plastic and I found no damage. The PT-19’s construction is balsa and light plywood with Top Flite MonoKote covering. The cowling is constructed of high-quality fiberglass and the quality of the paint work is exceptional. One nice feature is the factory-installed control surfaces; they are prehinged and already glued in place. The Great Planes PT-19 Sport Scale .46/EP ARF is a versatile airframe that can be powered by glow or electric. I chose an O.S. Max .46 AX II two-stroke engine with a Bisson Pitts muffler to power my PT-19. For the radio equipment, I used a Futaba T14SG transmitter, Futaba R2006GS receiver, and five Tactic TS X25 mini digital servos. A Tactic switch harness, four Tactic 12-inch servo extensions, and a LiFe Source 1,300 mAh receiver battery completed the list of electronic equipment used.Image

The Great Planes PT-19 is ready for assembly.
Assembly
Included with the PT-19 is a 23-page instruction manual with black and white pictures. The first section in the manual is called “Preparation.” This section instructs a builder on how to use a covering iron to reshrink any loose covering on the airframe. It only took 10 minutes to get the wrinkles out of the covering. If the airplane will be powered by a glow engine, the manual recommends sealing the firewall and motor box with either epoxy or CA adhesive. I thinned 30-minute epoxy with a few drops of rubbing alcohol and used a brush to apply it to the firewall and motor box. The next section covers the wing assembly. Included with the kit is a section of 1/2-inch heat-shrink tubing, which is used to secure a servo extension to the aileron servos. When the servo is secured in place in the wing, the control horn and servo linkage were installed. I used 30-minute epoxy to secure the two wing halves together. After the epoxy on the wings has fully cured, the main landing gear is installed in the wing. One nice feature of the kit is the landing gear wires come with preground flat spots for the wheel collars to attach to. This completes the wing construction.Image

The landing gear and landing gear strut covers fit well and look great.
Fitting the wing to the fuselage is the next step in the assembly process. An addendum is included with the manual that explains the test-fitting process. If the wing tab doesn’t fit in the slot in the fuselage former, a simple adjustment will provide a good wing-to-fuselage fit. My wing fit perfectly and did not require any adjustments. I used 30-minute epoxy to secure the vertical and horizontal stabilizers in place. The epoxy provides a strong bond and allows plenty of time to ensure that the stabilizers are perfectly aligned with the fuselage and the wing. After the epoxy has dried on the stabilizers, the tail wheel assembly is installed in place with three screws. The manual has a separate section for mounting either an electric or glow powerplant. The glow engine installation section details everything needed to install an O.S. Max .46 AX II with either a standard or a Bisson Custom Mufflers Pitts muffler. Installing the motor mount on the firewall requires drilling four 5/32-inch holes. The mount is then bolted in place with the included hardware. The builder will need a #36 drill bit and a 6-32 tap to mount the engine on the motor mount. All of the components needed to install the throttle servo are included in the kit, as well as a glow fuel tank and glow fuel line. The instructions are very thorough and it takes less than a half hour to install both. Installing the cowling is the next step in the Great Planes PT-19 build. The key to getting a nice-fitting and nice-looking cowling is to take your time and go slowly. Cutting the cowl is always one of the last steps in completing an airplane, and many modelers are so anxious to finish their airplane and get it flying that they rush through this part of the assembly. The instruction manual does a great job of explaining how to cut the relief holes for the cylinder head, carburetor, and muffler exit. I used a rotary tool and sanding drum to make the cutouts in my cowling. The manual recommends wearing eye and breathing protection when cutting fiberglass, which is good advice.
Image

The O.S. Max .46 AX and Bisson muffler work well on the PT-19.
If the PT-19 is built as an electric-powered aircraft, no cutting on the cowling is required. Great Planes provides two cowl attachment options. A cowl ring is included for flush mounting the cowl, or the cowl can be secured with two screws on each side. A Great Planes aluminum spinner nut was used to secure the APC 11 x 6 propeller in place. The rudder and elevator servos were installed in the fuselage using the mounting hardware that was included with the servos. After the rudder and elevator control horns were screwed in place on the control surfaces, the pushrods were attached to the servos. The six-channel Futaba R2006GS S-FHSS receiver and LiFe Source 1,300 mAh battery pack were secured in the fuselage with the included hook-and-loop material. Installing the receiver switch in the side of the fuselage completed the radio installation. The last assembly step is installing the instrument panel decals, pilot figure, crash protector, and the two windscreens on the hatch assembly. Two instrument panel decals are included with the kit. The larger decal is installed on the rear front cockpit panel. The decals did not adhere well to the painted cockpit panel, so I applied Pacer Formula 560 Canopy Glue to the back of each instrument panel decal before installing it.
Image

The instrument panel and pilot figure add a nice scalelike touch to the PT-19.
Pacer Formula 560 Canopy Glue was also used to secure the crash protector and the windscreens. The canopy hatch assembly is held in place with a single spring-loaded canopy latch. This allows quick hatch removal with no tools necessary. The remaining decals were installed in the locations pictured on the PT-19’s box. They give the airplane a nice look. Great Planes even included a decal for the owner’s name, address, AMA number, and FAA registration number. I placed it on the underside of the wing near the wingtip. I programmed my Futaba T14SG transmitter with the control surface deflections that were suggested in the manual. The manual did not recommend exponential settings. I programmed my transmitter with a negative 30% on low rate and a negative 40% on high rate for the elevator, rudder, and ailerons. Negative exponential is used for Futaba radios; some other brands use positive exponential. The last step in programming the transmitter was setting the failsafe and the throttle cut. The manual recommends a center of gravity (CG) of between 23/4 and 33/4 inches back from the wing’s leading edge when measured at the fuselage. With the radio equipment installed as pictured in the instruction manual, my model’s CG fell in the middle of that measurement. The Great Planes PT-19 was ready for its first trip to the flying field.
Flight Report
At the flying field, the PT-19 was given a range check and a thorough preflight inspection. The O.S. Max .46 AX II engine started easily and had a great throttle transition with the factory needle-valve settings. The Bisson Pitts muffler did a good job of quieting the engine noise.Image

There is plenty of room in the fuselage for the electronic equipment and fuel tank.
The Great Planes PT-19 tracked straight on takeoff and was airborne in less than 100 feet. For straight-and-level flight, the PT-19 required two clicks of right rudder trim and only one click of up-elevator trim. The O.S. Max .46 AX II provided more than ample power for the PT-19. The climbout and vertical performance are impressive. Although the test flights were flown on a windy Kansas day, the PT-19 was stable and handled the conditions without difficulty. I found that the roll rate was slightly slow while on low rate settings, but with the high rate setting selected, the PT-19 easily performed basic aerobatic maneuvers, including rolls, loops, and spins. I found that the PT-19 was stable while flying inverted. Roughly a third forward stick (on high-rate elevator setting) was required to maintain straight-and-level inverted flight. I did not experience any bad flying characteristics with the PT-19—no tendencies to tip stall or snap roll when the airspeed is slowed down for landing.
Image

The Great Planes PT-19 easily completes takeoffs and landings.
Overall, the PT-19 is a relaxing airplane to fly. Takeoffs are easy and it lands at approximately the same speed as most trainers. This was my first experience using Tactic TSX-25 Mini Digital servos. I am impressed at how well they center and provide a locked in feel with the aircraft.
Conclusion
Assembling the Great Planes PT-19 is straightforward, and the instruction manual explains each step well. The quality of the included hardware is good, and the fit and finish of the airframe are excellent. Pilots of nearly every skill level will find themselves at home flying this model. The Great Planes PT-19, combined with the trouble-free operation of the O.S. Max .46 AX II, makes for a great-looking and great-flying airplane.—Troy Hamm [email protected]


Comments
Servos
Just wondering, do you have to use the mini servos or can you use standard?
Still servos
There are laser cuts to cut out for standard servos in the fuselage. Wings had txs20 mini on mine. Hs225mg might fit or hs5245 digitals.
Add new comment