
Five modelers share builds and how the centennial company has shaped their hobby
DOWNLOAD FREE TISSUE TEMPLATES!
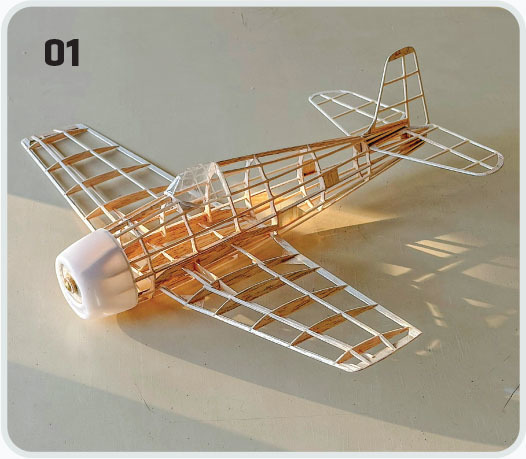
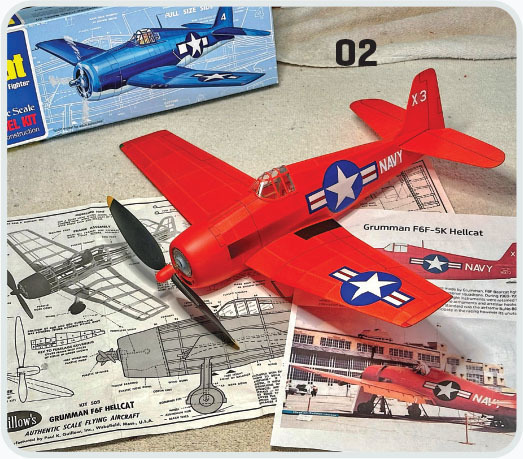
This year marks the 100th anniversary of Paul K. Guillow, Inc., more commonly known as Guillow’s, a company that has helped shape an untold number of modelers throughout the years. To celebrate this impressive accomplishment, several modelers have collaborated to build Guillow’s airplanes and share how these kits and designs have helped shape their hobby experiences.
Tom Hallman
As an 11-year-old in the mid-1960s, framing my first balsa Scale model airplane was quite the challenge. After building and flying a 30-inch wingspan Thermic Trooper a few weeks earlier, I knew that I was ready for the next stage of modeling: rubber-powered Free Flight (FF).
My dad had taken me to the local Kassel & Samsel Hobby Shop in downtown Pottstown, Pennsylvania, which was possibly the coolest place on earth to hang for this eager preteen. There it was on the shelf alongside many other colorful boxes: the Guillow’s F6F Hellcat kit. It was 16-1/2 inches of rubber-powered glory, guaranteed to fly because "balsa flies better," of course!
With my dad’s guidance, I was able to build, cover, and then fly the model in our backyard. It was maybe only a circle or two, but the Hellcat did fly, which hooked me on model building for a lifetime.
Sixty years later, a new kit of the same Hellcat was the obvious choice for my first build to honor Guillow’s 100th anniversary. Surely, I have learned a few things since then, so I was looking forward to this challenge.
The model was built as part of my fleet for the Flying Aces Club (FAC) Nats that was held this year on July 15-18 in Geneseo, New York, where a Guillow’s challenge was included within the 40-plus events. We were allowed to make a few modifications, but using the kit wood, decals, and the plastic parts was required. It was okay to thin the sheet wood or narrow the formers, plus you could create a wider nose block to allow for more of a rubber cross-section.
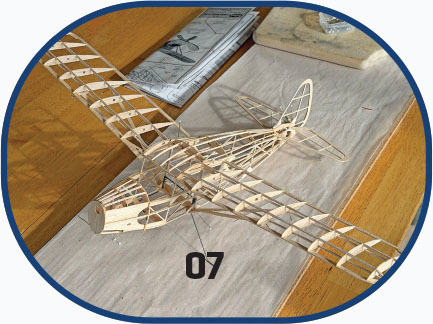
The build was straightforward, although I did prefer to create a stronger, single-panel wing rather than slab-sided wing panels. I decided on the bright orange-red color scheme, as what was seen on the older drone versions of the Hellcats. I figured that if it flew into the corn, I’d have a much better chance of finding it over the classic dark blue scheme.
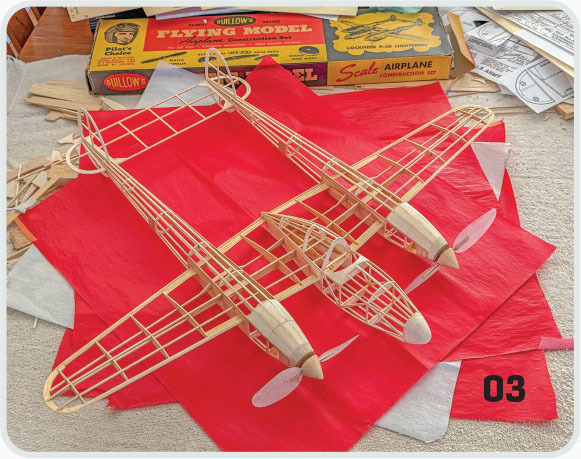
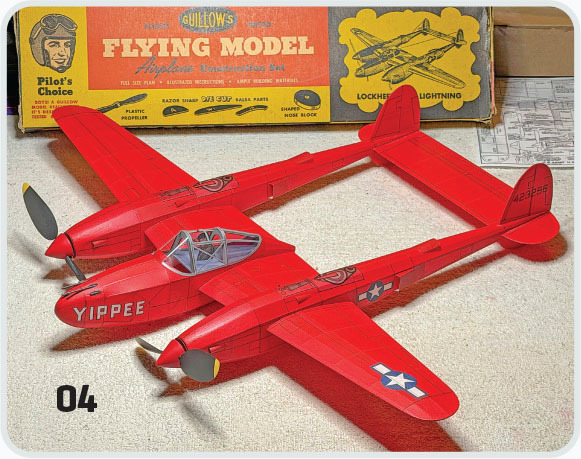
My second model for the challenge was the 24-inch wingspan twin P-38 Lightning from the 1940 Guillow’s plans, which led to the company’s kit of the same model in 1948. It’s a charming design with flat sides on the fuselage and nacelles, but it brilliantly maintains the classic look of the sleek Lightning. The kit was perfect for any young model builder who had tuned into aviation during World War II.
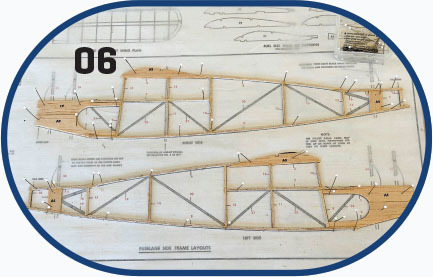
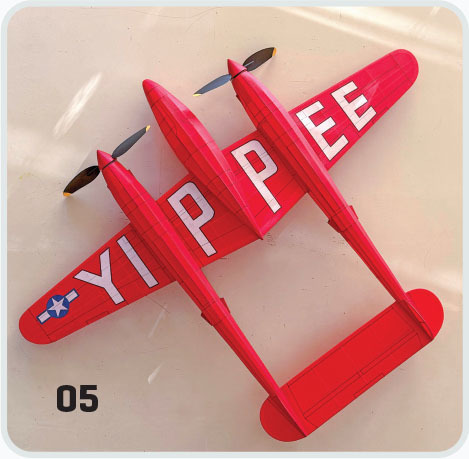
Before I was born, my father had filmed a red P-38 at the 1947 National Air Races in Cleveland, Ohio. Having watched his 8 mm films dozens of times since I was five or six years old, I longed to have my own model of that P-38. I chose the red YIPPEE color scheme, which celebrated the 5,000th P-38 produced during the war that went on to fly in a nationwide war bond tour.
Again, I designed the wing as one piece, adding two lengths of 1/16-inch-diameter bamboo on the top spar to strengthen the panels across the nacelles. I also increased the rudder and stabilizer area a slight amount to aid with flight stability. Otherwise, the model was built to the plans.
Guillow’s gave me a strong foundation on which to build as a young modeler. I’m thrilled to have come full circle, and I look forward to being able to give these classic designs that my dad might have flown 80 years ago another ride into the blue.
Paul Kohlmann
Compared to the rest of this group, I’m a relative newcomer to the Guillow’s scene. Although I’d been tempted by Guillow’s box art since I was a kid, it wasn’t until I was in college that I tried my hand at building one.
Needing something to offset the stress of schoolwork, I developed an irresistible urge to do something with my hands. A 25-inch wingspan Focke-Wulf Fw 190 from the 400 series of Guillow’s models fit the bill. I found the plans easy to follow and I impressed my roommates with the finished model. However, none of us knew much about FF aircraft, and I didn’t get past the glide-testing. Somehow that model disappeared when my buddies helped me move after graduation. I’m pretty sure that somebody sat on it, but to their credit, none of them has cracked throughout the past 30 years.
Although I only had one previous Guillow’s build under my belt, that’s not to say that I hadn’t been influenced by Guillow’s models. I’ve been fascinated while following the many Guillow’s RC conversions that can be found in the RCGroups forums and have learned a lot about shaving weight and stowing electronics in small airframes.
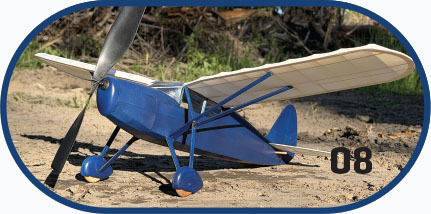
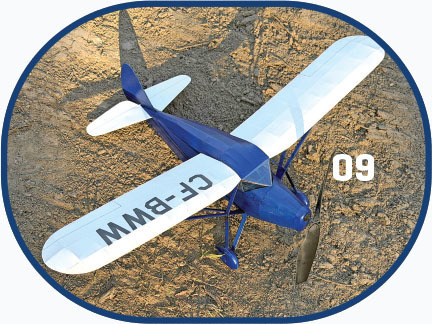
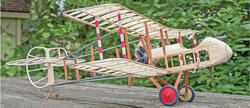
When I was asked whether I’d like to join a group build to celebrate Guillow’s centennial, I jumped at the chance. I initially thought that I’d revisit the Fw 190 406 kit but convert it to RC. After mulling it over, though, I decided to get out of my normal RC warbird lane; instead, I picked up a Fairchild 24 (Kit 701) and built it for FF.
Although this didn’t help the Guillow’s company directly, I felt that my nostalgia would be maximized if I built a "crunch wood" kit, as the vintage die-cut kits are lovingly known. I followed the kit instructions to the letter during the build. I only deviated slightly while I was in the covering phase by using Mod Podge as adhesive and waterborne polyurethane as a sealer rather than the traditional dope. The kit’s tissue was painted with latex paint, and the markings were cut from the painted tissue.
I did add a little extra bracing to the airframe to strengthen some critical joints and to minimize wrinkles in the covering. Other than that, my Fairchild is bone-stock.
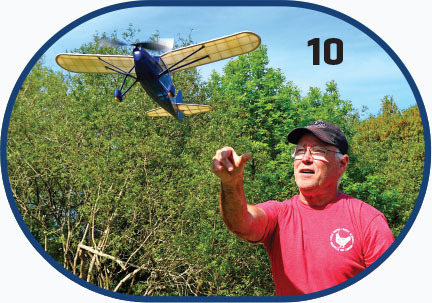
Once the Fairchild was completed, I took my time glide-testing it. To get started, I watched one of Tom Hallman’s YouTube videos about the subject, which helped a lot. Tom’s lessons were aligned with the instructions from Guillow’s but were much more detailed.
The combination landing gear/lift struts do a good job of approximating those on the full-scale aircraft, but they are a bit fragile. As I expected, one side broke while the glide tests were underway. If I had it to do over again, I’d trim to the airframe before adding anything delicate.
With that said, the model was trimmed in the morning without the rubber powerplant and was flown under power in the afternoon. FF was a lot more fun than I expected! Watching the little model fly longer with each increase in the motor wind count really did transport me back to my childhood. My wife was rolling her eyes as I sprinted around the back field chasing the airplane. I think I even skipped a little.
Derek Micko
As I reflect over my 40 years of aeromodeling, there are two foundations that have helped shape how I still experience this hobby: my father and Guillow’s. I believe the first model my dad and I built together was the 900-series Hawker Typhoon. I still recall the exciting box art and the light gray tissue during the construction. It was a great beginner model and made for a fun father/son building experience.
Throughout my childhood, I received Guillow’s kits as birthday and Christmas gifts; each one helped to expand my building and flying skills. Many years later during the COVID lockdown, I started building Guillow’s models again. Their size allows them to be built on a kitchen or card table, and they can be completed in a couple of evenings.
After picking up a couple of kits (including some of the newer laser-cut versions), I was impressed with how "complete" they are for the modeler—so much so that I started to collect them and now have everything from the 500-series Messerschmitt Bf 109 to the 2000-series Consolidated B-24.
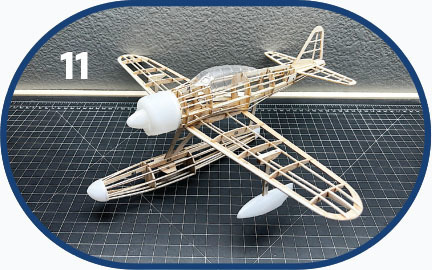
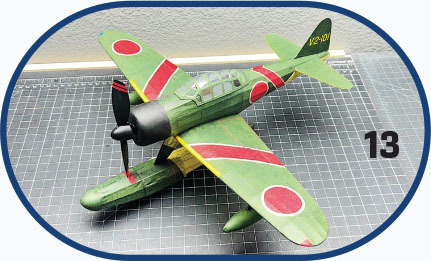
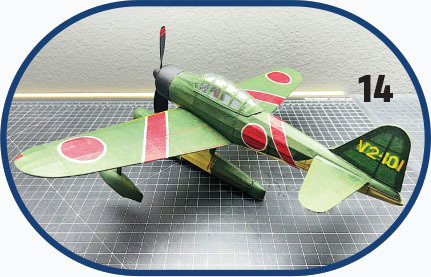
For this article, however, I chose to do the Nakajima A6M2 Rufe, the floatplane version of the famous Japanese Mitsubishi Zero fighter from WW II. With a wingspan of 16.5 inches, the kit features laser-cut balsa, plastic parts, and plans/instruction manuals. It was a fun build. I recommend a thorough review of the plans because there are some details/notes on them that are very helpful for a successful build.
A couple of additional tips for this model (and others) would be to take a picture of the full "Fuselage" plans with your phone. This can be referenced while building on the "Keel" plans. For places on the fuselage where there are compound curves, test the flexibility of the stringers on different "sides;" quite often, they are more flexible in one direction than others.
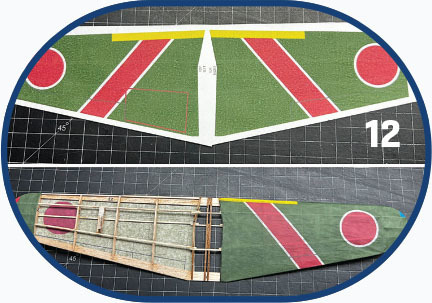
A tip that I picked up from Tom was to add scrap balsa to build up the leading edge (this can be seen in the uncovered pictures of his Hellcat and my Rufe). I finished the model off with printed tissue templates, one of the few departures from the stock kit; however, I did use the tissue provided with the kit. Should you want to use the same templates, they are available as free downloads on the Model Aviationwebsite in the online version of this article.
Michael Myers
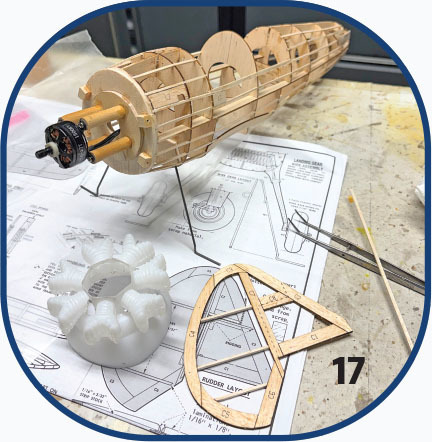
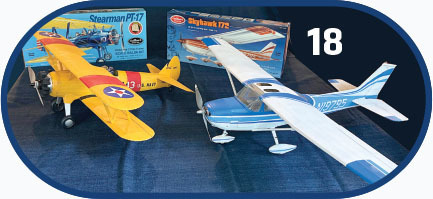
To commemorate the 100th anniversary of Guillow’s models, I completed two of their stick-and-tissue airplanes— a Stearman PT-17 and a Cessna Skyhawk 172— and converted both from traditional rubber-powered kits into four-channel electric RC. Each project took approximately a month to complete, and both airplanes have successfully flown. These builds allowed me to blend traditional balsa construction techniques with modern RC systems while maintaining the essence of the original kits.
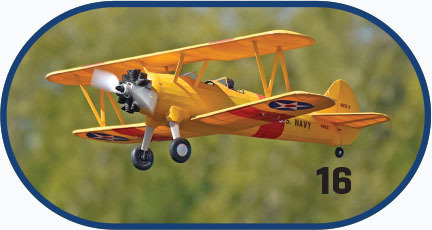
The first model that I built was the Stearman PT-17. After assembling the balsa framework, the model was covered with Polyspan. I used Cover Grip adhesive, a sealing iron to adhere the edges, and a heat gun to shrink the material tightly without distorting the frame. Although Polyspan weighs approximately twice as much as tissue, it significantly enhances the structural integrity of the fuselage and wing. Once it was covered, it was sealed with nitrate dope and finished with airbrushed butyrate. All of the paint, including the sealer, increased the weight of the airplane by just 0.3 ounces.
For power, I used a 1,500 Kv brushless motor paired with a two-cell 380 mAh battery, a 15-amp ESC, and an 8 × 4 propeller. The motor mount was cut from 1/8-inch plywood with four holes drilled for 5/16-inch dowels, creating a lightweight and easily adjustable mounting system. The finished 28-inch Stearman weighs just 9.7 ounces.
Component access—one of the most challenging tasks in converting FF to RC—was straightforward because of the two open cockpits. The forward cockpit provides battery access, while the rear cockpit allows servo access. Compact 2-gram servos provide sufficient torque while remaining small enough to mount cleanly inside the structure. The rudder uses a pull-pull system with thin nylon-coated steel leader wire, and the elevator is driven by 0.025-inch wire routed through the fuselage. Servos mounted inside the lower wing control the ailerons. To facilitate ground handling, a length of .025-inch wire was fashioned into a skid and attached to the underside of the rudder behind the non-moveable tailwheel.
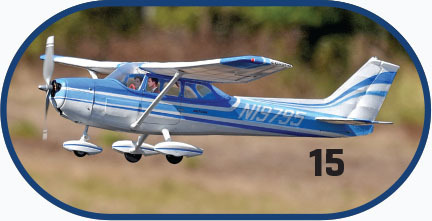
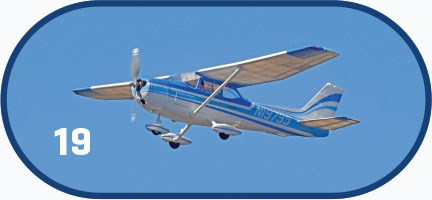
The Cessna 172 Skyhawk was similarly built according to the plans. After scalloping the formers—a crucial step for achieving clean lines on the fuselage— the Skyhawk was covered with Polyspan, sealed with nitrate dope, and then airbrushed with white butyrate. The colors were done with latex paint. To apply the paint, I used vinyl masking tape, sealing the tape edges with the basecoat color. This process prevented any bleed-through and resulted in sharp trim lines.
The 36-inch Skyhawk, equipped with a 1,500 Kv brushless motor, two-cell 380 mAh battery, 12-amp ESC, and a 7 × 6 propeller, weighs a total of 12.5 ounces, ready to fly. Battery access is provided through a magnetic hatch that is located in the forward fuselage. Additionally, the wing and canopy can be removed to reach the servos. The rudder utilizes the same pull-pull configuration, and the 2-gram rudder servo also controls the steerable nose gear.
FF airplanes are designed for a power-on ascent and a power-off glide. RC electric is meant for controlled, level flight. To compensate, simply wait for a very calm day and use just enough throttle to keep it in the air. With proper trim, these airplanes fly quite scalelike.
Throughout both builds, I adhered to the kit’s original design and materials, except for covering material and the necessary modifications to accommodate the radio components. By preserving the integrity of the original plans while adapting them for electric RC, I was able to honor the tradition of these classic aircraft while bringing them into the modern era.
Pat Tritle
Being a lifelong modeler, Guillow’s kits and the aircraft built from them have certainly played a big part in developing my modeling skills. I’ve learned a great deal about building FF balsa models from them. These kits were—and still are—a great way to get young builders started. Guillow’s kits are really hard to beat, whether they are built straight from the box or are used for experimenting and learning how to modify kits to produce even better flying models as experience blossoms and modeling skills grow.
For that reason, when someone comes to me asking how to best get started building, I always suggest starting with a Guillow’s kit to learn the basics. These kits are well engineered and will teach the basics of assembly sequence and plans reading, as well as other modeling skills that will come in handy later.
A couple of my all-time favorite Guillow’s builds are the Fairchild 24 (Kit 701LC) and the Super Cub 95 (Kit 303LC), having built a few of each throughout the years. Those date back to the die-cut days, although both kits are now offered with laser-cut parts. Another favorite is the Aeronca Champion (Champ; Kit 301LC), which is one of the builds I completed especially for our well-deserved tribute to Guillow’s. The 900-series kits, although a bit more "Stand-Off Scale," also build up nicely and are apt to fly well.
Although there have been exceptions, I generally tend to build Guillow’s kits as static display models. However, to build a more capable flyer, the finished models can be lightened by removing excess wood from the fuselage formers to reduce weight or even by replacing the formers with lighter wood using the original parts as cutting patterns. In some cases, I like to add a bit of extra wood to the wing’s leading edge to form a more rounded profile, which not only allows for easier, smoother tissue covering but also improves the flying quality of the models.
Back in the 1960s, I even converted a couple of Guillow’s kits to Cox-powered U-Control (Control Line) and found them to be worthy flyers as well.
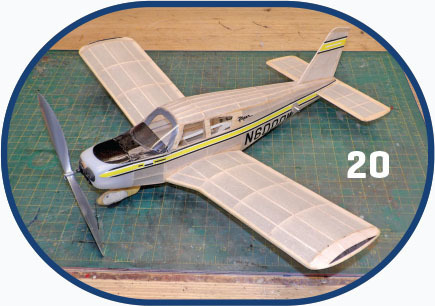
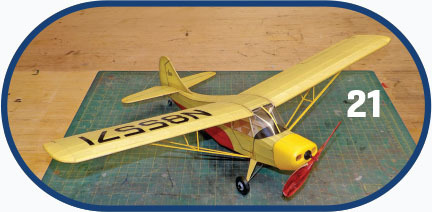
At the moment, I have five completed Guillow’s kit-built models gracing the ceiling in the shop, including the aforementioned Fairchild 24 and Aeronca Champ, in addition to the Piper Cherokee (Kit 307), the Cessna L-19 Bird Dog (Kit 902), and the Fly Boy (Kit 4401), which is a terrific flyer and literally flew right off the building board. I also have several kits on the shelf, including a few of the 200-, 300-, 700-, 800-, 900-, 2000- and 4000-series kits, as well as the discontinued Boeing B-29, so when the mood strikes, construction can get underway.
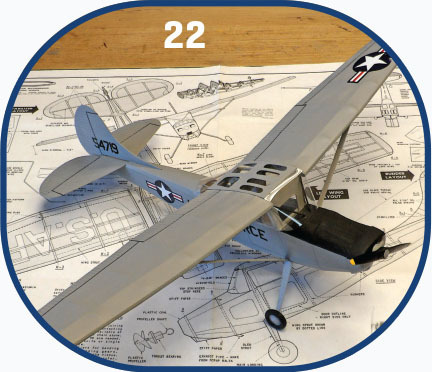
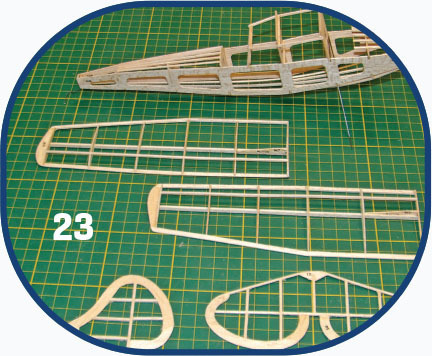
The two models that I picked to build specifically for the 100th anniversary tribute are the Aeronca Champ and the Cessna L-19 Bird Dog. The Champ was built basically unmodified from the recently released laser-cut kit. It went together without a hitch. The parts fit was excellent, the plans are clear and concise, and the written instructions, although somewhat dated in their terminology, were well done and offered everything that was needed to complete the build. The Champ was built for static display, but all of the provisions are there should I decide to fly it.
For those who intend to fly the model, it’s not a bad idea to beef up the landing gear; that seems to be the weak point on a few of the 300-series models.
The 900-series Bird Dog was also built for the tribute basically straight from the box. The kit was cleanly die-cut, so the parts were easily removed from the balsa sheets. It was also old enough that it included paper decals, not the waterslide type that are provided in the more recent kits.
Ironically, the die-cut sheets, although labeled as 1/20 balsa, were actually cut on 1/32 balsa sheets. Despite that, the kit went together well. These kits require the stringer notches in the fuselage formers and the spar notches in the wing ribs to be hand-cut using the provided patterns. The parts fit in both kits was excellent, and all of the cutting patterns were provided for the clear plastic windows and paper fairings. All fit well, with little or no trimming required.
We wouldlike to offer a big thank youto the good folks at Guillow’s for providing us with 100 years of faithful service to countless numbers of modelers, both young and old alike, and especially for filling the needs of those of us who, as kids, cut our teeth on these same kits, often spawning a lifetime of modeling. Thatis a track record that Guillow’s can take great pride in, not only now, but in the years to come.
SOURCES:
Tom Hallman’s MaxFliArt YouTube Channel
National Free Flight Society (NFFS)
Fun Scale Models YouTube Channel
Michael H. Myers: Radio Control Airplanes
RCGroups
Model Aviation




Comments
Add new comment