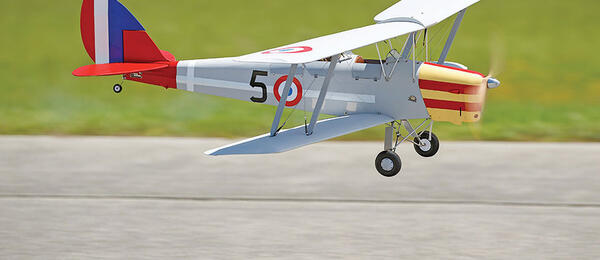
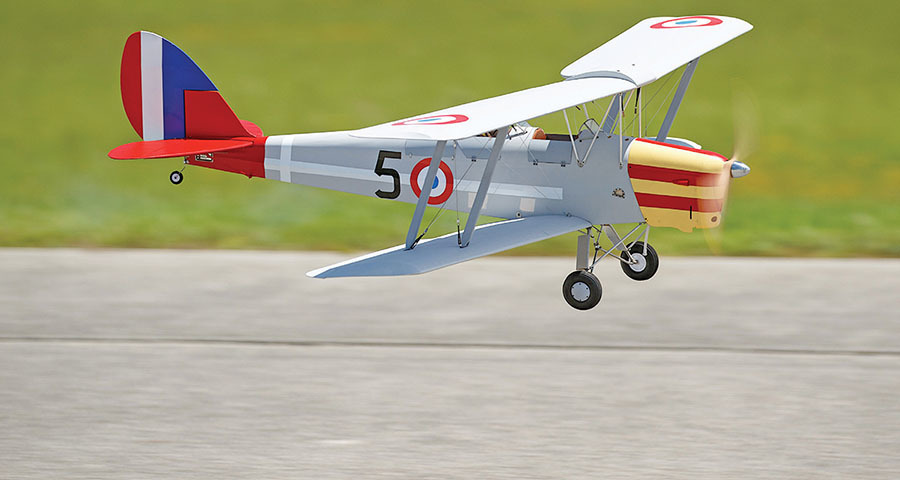
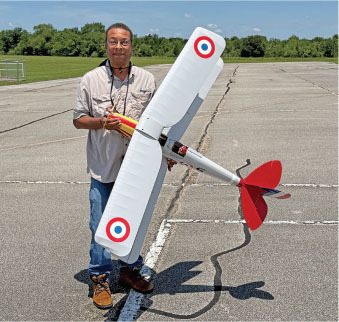
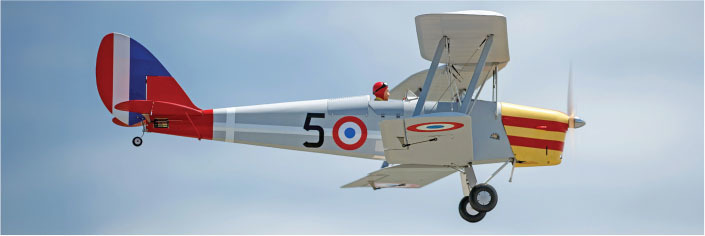
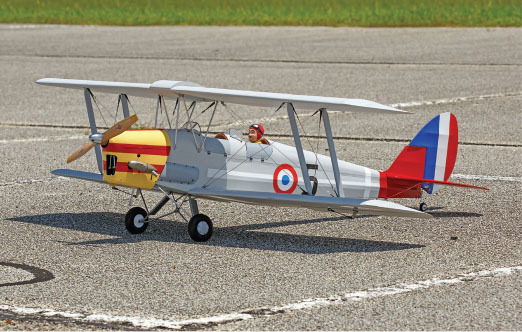
I’VE HAD THE pleasure of building a Tony Ray Aero Model kit in the past (namely, the Minimoa glider that was featured in the April 2023 issue of Model Aviation), so I was quite excited to dig into the company’s newest production (courtesy of Hobby Club), the 1/6-scale de Havilland DH.82 Tiger Moth. With a little more than a 59-inch wingspan, it could possibly qualify as a Giant Scale model at flying meetups, as long as the event’s contest director doesn’t get too hung up over the missing inch.
The model is designed for both electric and fuel power systems, which is good because I elected to go a bit old school and utilize an O.S. FS-62V four-stroke glow engine that was already in my stash and not doing anything useful. Relieved of holding its own box down, I figured the "putt-putt" sound of this engine would match nicely with the vintage airframe.
Construction
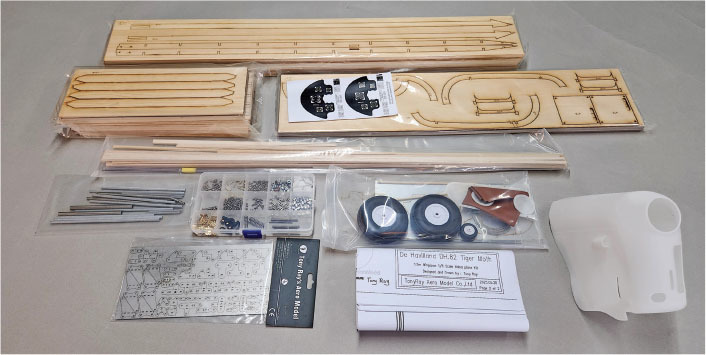
The kit is very much a mixed-media affair with laser-cut balsa, plywood, and a not-so-insignificant number of metal parts. There are also some modern advances in the form of a 3D-printed cowling, wheel hubs, and fuselage parts made out of high-fidelity resin. You also get faux leather for wrapping the seat backs (not to mention a snazzy parts box), and a lot more items and components that you don’t normally get with such a kit.
Fortunately, you are supplied with a handy sheet that cross-references the parts that are shown in the construction manual with their location on the laser-cut sheets. The manual itself has very little wording, so you will have to follow the numerous pictures very carefully because it can be easy to miss a step (or two) or fail to properly interpret what needs to be done from one image to the next.
That said, construction is generally very straightforward for this detailed kit. Fuselage pieces interlock like a 3D puzzle and do not require plans for alignment, although you do get two large sheets of construction plans with various templates. This is where you really need to pay attention to the build photos—I almost missed placing the two longerons that run the length of both sides of the fuselage.
I did have fun using the templates to cut out and form the four movable cockpit side doors. These doors are functional using the included metal mini hinges and magnets. There is also a fuselage cargo door with seemingly more hinges than you really need.
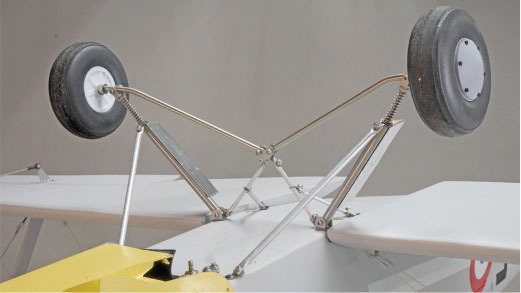
Expect to spend some quality time assembling the articulated all-metal landing gear. It’s a bit of a contraption that mostly bolts together, but you will need both CA and J-B Weld glue in some spots. While the kit comes with lots of screws, I needed to dig into my inventory of teeny-tiny wood screws to affix the undercarriage to the fuselage because there were no such screws included. I also elected to replace most of the 2 mm nuts with nylon locking nuts; otherwise, you will need to use threadlocker. That said, once it’s completed, the gear looks and functions nicely.
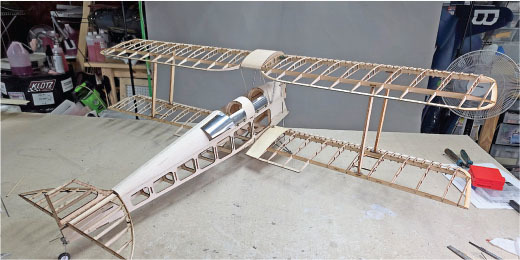
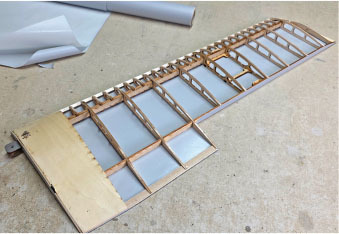
The wings are built on the plans, with the interlocking construction technique still utilized. The intricately cut wing ribs are a double-edged sword. They are lightweight and look great but are also extremely delicate. I lost count of how many times I needed to repair a rib after carelessly gorilla-gripping one too hard.
Every single piece on the wings, except for the leading edge, is laser-cut, so wing construction does go relatively quickly.
The center wing (the fuel tank on the fullscale aircraft) cabane struts are built using a handy wood fixture with laser-engraved template lines. You will also need to crimp and drill 4 mm aluminum tubing, so pay close attention to the lengths that you need to select. There are also several metal attachment points that need to be screwed or glued into the wing’s structure.
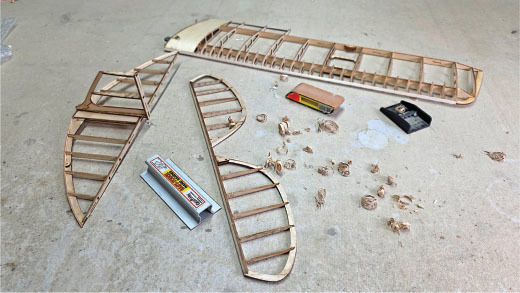
Similar to the fuselage, the tail pieces are constructed without needing any attachment to the plans. All of the control surfaces have the hinge slots already cut into them, which I thought was a nice touch. With just a bit of sanding, everything was ready to cover.
The kit includes uncoated braided wire for all of the rigging, but no clevises because you are expected to crimp the wires to length by looping through the eyelets. I wanted to be able to adjust the tension of the rigging, so I used Du-Bro pull-pull cables and fittings. Du-Bro cables use coated wire and have adjustable clevises. These are not required, but they are my personal preference and the only real deviation from the kit instructions. All of the clevises attach to metal fittings throughout the wings.
Looking for a paint scheme that was interesting yet simple, I came across the World War II Vichy French livery. Basic yet somewhat colorful, it would be easy to implement. I selected Oratex fabric from Horizon Hobby as the covering. This was my first time using iron-on fabric covering, and I found that it went on very easily and shrunk well. I was also impressed at its tensile strength and tear resistance. Plus, it is very easy to paint.
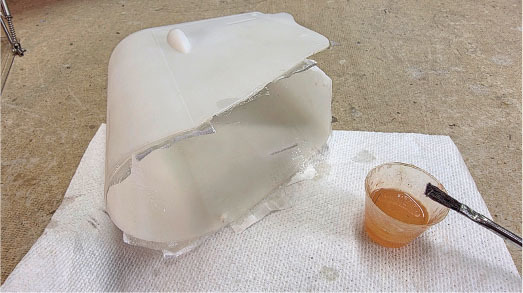
Speaking of painting, prepping the cowling for colorization required me to first reinforce the insides with fiberglass cloth and finishing resin. My cowling came a bit warped inward, but a heat gun was used to push it back into shape. For painting, I used Rust-Oleum spray paints from the local home improvement store. These paints adhered well to both the cowling and the fabric.
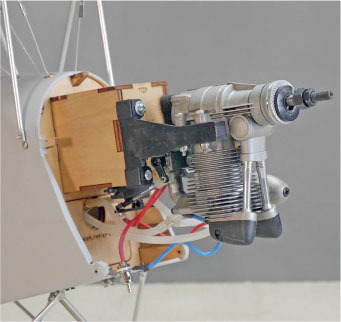
I was happy to find that the inverted-mounted O.S. engine fit quite nicely inside of the cowling with minimum holes needing to be cut for the muffler and needle valve (no issues with engine cooling). With a receiver battery in the engine compartment, I still needed to add 6 ounces of nose weight.
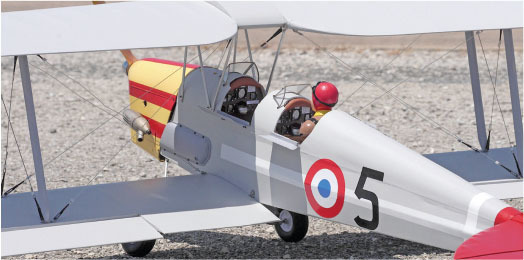
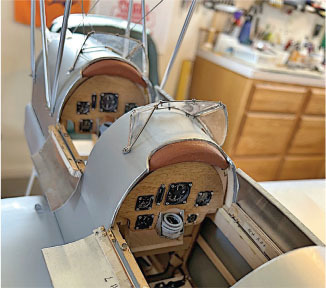
The last part to assemble was the cockpit instrument panels. These need to be assembled from about a dozen or so parts and a couple dozen screws. It might sound a bit daunting (and it is a bit fiddly), but it ended up being quite entertaining, and the results were fantastic. Clear plastic with printed instrument decals that act as the bezels are sandwiched between wood pieces. I brushed on wood stain for the panel faces and painted the instrument frames black. It’s a very fine rendition of the Moth’s instrument cluster—including warning labels.
Pilot backrests and head bumps are wood forms wrapped in supplied simulated leather. This was my first attempt at wrapping "leather" seats, and it came out pretty good. A pilot bust that was found in my parts box finally adds some humanity to the cockpit.
Flight
All dressed up and ready for flight, one of the first things I noticed was that the landing gear position, as shown in the manual, seemed too far back, so I repositioned the gear as far forward as I could to prevent the airplane from nosing over.
All of my flights were from a paved runway. The first one was quite a bit more exciting than I had planned. The good news was that the O.S. FS-62V engine with a 13 × 6 propeller had plenty of power to get the airplane up in the air quickly. The bad news was that the model was way out of trim. In fact, I ran out of aileron trim and still needed to manually hold in some roll input just to fly straight. Something was clearly amiss.
Fortunately, I was able to make a very nice landing (the model slows down quite well). Back on the workbench, I checked the wings with an incidence meter. Yep, one of the wings was off significantly in the angle of incidence. Correcting this error took some trimming of the struts and adjustment of the wing rigging (the advantages of using clevises that was mentioned before), but I was eventually able to get better symmetry with the other wings.
The next flight went much better. I still needed more aileron trim than I would have liked, but at least the airplane was flying hands-off (some more rigging adjustments should improve the trim situation). Now I could relax and get a better feel for how the model handled—and handle well it did.
This is a very easy and relaxing model to fly. Other than takeoff, I never felt the need to go past half throttle, and I generally just had it set at about 1/3 throttle. I could lazily cruise around the sky with the "putt-putt" condition that I had aimed for!
Roll authority was better than I had expected considering the outboard ailerons on only the bottom wing, yet it was still quite mild and not overly sensitive. The same went for rudder and elevator authority— it was good enough to get the job done without needing more.
Loops, wingovers, and low-and-slow passes could all be done with ease and in a scalelike fashion. The model has a fairly low wing loading, which shows in how floaty it is. The only thing missing was a wing-walker.
For landings, I like to fly the model in with a bit of power, which should come as no surprise because the airframe is light and draggy with all of those struts and bracing wires exposed to the air. You need a little bit of throttle to keep some ground speed almost until the flair, especially if there is any wind. If you can, three-point landings are the best so that you can keep the tail planted on the ground. The spring-loaded landing gear works quite well to soften the touchdown.
Summary
The Tony Ray de Havilland DH.82 Tiger Moth from Hobby Club is a moderately complicated model kit that builds into a fine and unusually well-detailed model. I suspect that with a few modifications, it could make a Scale competition-worthy aircraft. My initial wing alignment errors notwithstanding, it exhibits excellent flight qualities with an easy and sedate feeling. While I cannot recommend it for beginner builders, if you have a few kits under your belt, you will find the Tiger Moth to be a joy to build and fly.
Spektrum
Oratex
Electrified Tiger Moth
When I was asked to build a Tiger Moth kit for the magazine, it brought back memories of seeing the full-scale Tiger Moths flying at the Imperial War Museum Duxford in Cambridge, U.K. They were so magnificent using the grass runway next to the hard-surface runway that was being utilized by the Spitfires and Hurricanes.
The de Havilland DH.82 Tiger Moth is a 1930s British biplane designed by Geoffrey de Havilland and built by the de Havilland Aircraft Company. It was operated by the Royal Air Force and others as a primary trainer aircraft. Access to the front cockpit was made possible by shifting the upper wing forward while sweeping it back to maintain the same center of lift.
This kit is designed and manufactured by Tony Ray Aero Model. Tony outdid himself on the design and detail. The wood selection and precision laser-cutting is top notch. Even the steel fittings are laser-cut and very precise. A generous plastic tray of hardware is included.
The building instructions include 100-plus pictures that are available for download online. I loaded them onto my iPad, and from there, I could expand the pictures for more-detailed views.
The kit was furnished compliments of Alberto Doña, the owner of Hobby Club, which sells the kit and many other topnotch ones similar to it.
The instrument panels are made up of a sandwich of balsa overlaid with a sheet of instrument markings with clear plastic, which is then overlaid with a nice wood panel (which I stained). Finally, the individual instrument bezels are put on. Each of these parts are precisely laser-cut and are all held together with tiny M1.2 × 4 screws.
My build is electric-powered, with components provided by Innov8tive Designs (BadAss Power Systems). Lucien Miller, the company’s owner, is a wonderful resource for all electric model aircraft components and performance data.
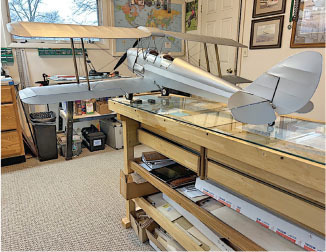
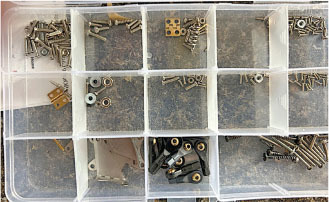
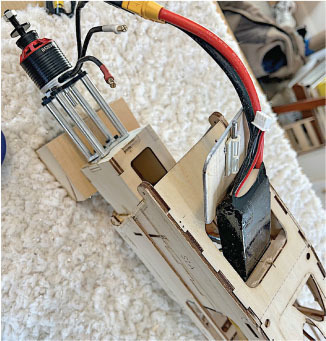
I made a battery box from 1/8-inch balsa wrapped in fiberglass. Because of the length of the battery, it was mounted diagonally, upward from just aft of the underside hatch between bulkheads F1 and F2 under rear instrument panel F3. This required relocation of the servo mounting bracket aft to under the aft cockpit. It makes for a tight fit but allows the battery to be moved forward after it is hooked up to adjust the center of gravity (CG). The suggested CG is on the leading edge of the lower wing. I was able to find a motor mount extender on eBay that the BadAss mounting plate bolted onto.
I found a note late in the build that said, "Strengthen the inner side of the cowling using 0.3 mm to 0.5 mm fiberglass fabric and resin." I did this, and it sure made it less fragile. The model was then covered with silver Solartex. What a great covering material! Sadly, it is no longer available for purchase. Mark Freeland, from Retro RC, was kind enough to let go of a 5-meter roll. Thanks, Mark!
Fitz Walker also built this model. I’ll leave his build and the fuel-power details to his portion of this article.
—Phil Calvert
SOURCES:
Spektrum




Comments
Add new comment