
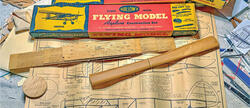
By Donald Brooks; photos by the author As seen in the February 2006 issue of Model Aviation “Stuff happens,” my pessimistic friend argued. “You just cannot prevent all accidents. [The concept of] zero accidents is a myth!” As much as I like my friend, I disagree with his opinion on safety and particularly on aeromodeling safety. He is partially correct in that some accidents are beyond our control. However, we can anticipate these and lessen the risk of accidents we can’t prevent. The many accidents for which we alone are the source can be prevented. I have written a four-article series on safety at the urging of Aeromodeling Editor Bob Hunt and because I take safety in building models and flying seriously. I have been a flying-club safety officer, I have helped with three model-building clinics, and I am a club instructor for radio-controlled flight. I have seen some strange happenings. There is inherent risk in using sharp and high-energy tools and in the conduct of model-flight operations. I will concentrate my discussion on radio-controlled models and try to write simply enough to be understood by those who are new and not so new to the hobby. I have two goals for these discussions, the first of which is to make you aware of safety hazards you may encounter while building, performing flight preparations, and flying your model. Second, I hope to arm you mentally with tools to avoid the pitfalls that can lead to mistakes and getting someone hurt. I will try to keep these discussions straightforward. I visualize aeromodeling safety as a defensive effort. This defense recognizes the safety risk: a combination of the probability of an accident happening and the possible consequence of that accident. Generally the consequence of an accident may be on one of three levels.
- A first-aid injury—a minor inconvenience.
- A significant injury that requires medical help, such as stitches to repair a wound.
- A debilitating and possibly life-threatening injury.
- Attitude
- Prechecks
- Backup
- Isolation
- Barriers

A building board was made from a 2 x 4-foot piece of ceiling tile glued to a 1/4-inch backing of plywood, with the smooth back side of the tile available for pinning. Sometimes you may be tempted to hurry and hold the balsa pieces together with your fingers rather than pin them, such as when laminating balsa pieces or gluing fuselage sides at the tail post. You may think pinning takes too long. Such hurrying places you at greater safety risk. The thin CA wicks through balsa easily and can reach your fingers. If you have only a couple minutes before an appointment and think you can quickly finish that gluing job by using your fingers to clamp the work, reschedule the modeling work for another time. You would look kind of funny going to that appointment with a fuselage glued to your fingers. Sometimes a drop of glue will harden in the delivery spout of a CA glue bottle. Before using the CA, check to make sure that the delivery spout is unclogged. Otherwise, nothing happens when you squeeze the bottle to deliver a drop of glue. I know of someone in a model-building class who tried to push a pin down into a clogged tip of a CA bottle while tightly gripping the bottle. When the clog cleared, the pressure he was applying to the bottle caused adhesive to squirt across the room. Fortunately no one was in the glue-wetted path. After that occurrence, CA was applied by an instructor if it needed to be used. To clear a clog in the spout of a CA glue bottle, it’s better to carefully unscrew the cap to work on removing the clog. Be careful not to spill the glue from the open bottle if you use this technique. When using CA glue, you need a backup—or a third level—of safety defense. Have a bottle of debonder readily available to unstick your fingers if the need arises. The debonder won’t help your clothes if you spill glue on them; they will be ruined. The debonder should be available at any hobby shop that sells CA.

CA glues are a mixed blessing for the model builder. CA debonder can save the day if you glue your fingers together. A final level of safety defense—a barrier—is necessary when using CA. Wear glasses or goggles for eye protection. Some of the glues get hot and fume as they set. If you drop the bottle, glue will splatter everywhere. If you get a drop of CA in your eye, your condition will require medical help. I wear prescription glasses. As careful as I am when I use CA, I have still had to clean my eyeglass lenses with debonder. It may attack some of the new coatings on plastic lenses, so if you wear glasses, you may want to use goggles to protect you and those expensive lenses. Stressed: Have you ever had a problem with soldering? You may be stressed out because you can’t get that wire lined up correctly with enough solder on the connector. And after three tries of holding the wire with pliers, the solder joint still isn’t right. You decide to hold the wire with your fingers for better control. However, 30 seconds later, you are frantically looking for the burn ointment because you overheated your thumb and forefinger with a hot wire or a hot blob of solder. There is a better solution. If you are getting frustrated, recognize it and don’t push your luck. Don’t reach for that soldering gun again; take a break. Find a path to relieve your frustration. Beat on a punching bag. Ride your bicycle around the block. Come back to the shop work when you are not feeling frustrated. You will be much less likely to hurt yourself and much more likely to succeed. By the way, there are better ways to hold pieces to be soldered, as shown in the soldering-station photograph.

Proper tools for soldering can make the job much safer and easier. Notice the holder for the hot soldering iron and the clothespins that make it simple to hold small parts in proper alignment. Fatigued: Today we modelers have an easy solution for covering our models; there are many adhesive-backed, iron-on coverings. You can purchase a covering iron that is designed specifically for this job or you may use an empty steam iron with a temperature control to apply the covering. Are there safety risks in covering a model? Yes, there are. After all, we have a good energy source: a hot iron. If you are tired, you are more likely to make errors during this task. Your goal may be to finish the covering job before turning in for the night, but it could take longer than you thought. If you are getting tired, the longer you work, the more likely you are to slip and burn yourself. You are also more likely to lose your grip on that wing and punch a hole in the covering or in your hand while trimming the edges with a sharp hobby knife. If you are tired or getting tired, get some rest and do the shop work later. Distracted: Hobby saws are sharp, and they make cutting thick balsa or thin plywood much easier than using a hobby knife. I have several handsaws and a Dremel jigsaw I use regularly. For the handsaw work, you need a backing surface, such as a substantial wood block, that is sacrificial. You shouldn’t care if you cut into it while cutting the work piece. For the jigsaw, you may need a piece of sacrificial wood to aid in pushing something through the saw. As when you are using any sharp tools, your attention needs to be focused on the tool and the working piece. You cannot afford to be distracted. You should not be thinking about how to fly a Split-S maneuver, how to solve problems at work, or how to get your son or daughter to take a stronger interest in his or her schoolwork. Not paying full attention to the task at hand can be hazardous to your hand—particularly your fingers and thumb. If you get distracted, stop the cutting for a moment and refocus. Keep your mind and eyes on the work. Worry about those other concerns later. Commodore Syndrome: This is a dangerous attitude. Unwarranted overconfidence in your ability to control the working situation without safety-barrier protection is inherently dangerous. One of the best devices I ever bought was a handheld Dremel power tool. It can drill, grind, sand, or cut. It will, with the right disk attached, grind through landing-gear wire quickly and easily. Those little ceramic grinding disks work great, but they occasionally shatter if they are overheated or if you get them in a slight bind. Let’s say you are ready to work and can’t find your safety glasses. What do you do? You may be tempted to say to yourself, “If I’m careful and don’t stress the wheel by bending it, it won’t shatter. I can do this.” I implore you to learn to identify this unjustified confidence for the danger it is. Recognize this safety risk. Use the barrier safety defense with a pair of goggles, and you will go a long way toward making your model-building experience more enjoyable and free of injury. Ensuring the right attitude in preparing for shop work is the first level of safety you need to achieve. Then, don’t sit on your laurels. You need a second level of safety—a precheck of your tools—before beginning your work. If the device is electrical, such as the soldering gun or Dremel hand grinder, make sure the tool heads are in good mechanical condition and tightly clamped, and that the power cord is not frayed, worn bare, or nicked. If you are using a hand tool, look at the condition of the handle to ensure that it is tight and not going to come loose or crumble in your hand while you work. If the tool is flawed, repair or discard it. Get rid of damaged tools that cannot be repaired.

Shown are common workshop tools. Having and using the proper device for a specific job is a safe practice. Learn to use all your tools in a safe manner. In regards to attitude, I have discussed gluing, soldering, covering, sawing, and grinding. Now I’ll cover the risks and levels of safety defense for cutting, wire bending, sanding, assembling, and painting. With the right attitude and after having performed prechecks of your tools, it’s time to work. There are some valuable lessons learned that I can share to help you minimize the blood and gore. Cutting: Before I bought my self-healing cutting mats, I used cardboard, wood blocks, or newspaper as a backing for balsa I was slicing. None of these was ideal. The wood blocks and cardboard were dangerous because if I applied much pressure, the knife blade would follow the grain of the material. The knife could cut somewhere I did not intend. A new #11 blade in a hobby-knife handle can make a wicked slash in your arm if you slip. Cutting against a backing of newspaper was a bit better, but I had to apply a great deal of pressure to compress the layers of newspaper before the cutting was effective. The extra pressure is not good. Using these materials as a backing for your cuts raises your safety risk. You need a firm, nongrained, self-healing surface for cutting. Several sizes of these mats are shown in one of the photographs.

Self-healing cutting mats are available in a variety of sizes. They make cutting balsa parts trouble free. The mat’s composition will not guide the blade, allowing you to make accurate and safe cuts. Bending: This is a setup where gravity can hurt you. I needed to bend a 5/16-inch wire for a landing gear. This was too big a job for pliers. I needed to bring out the big artillery: a 5-pound vise. Did I bolt the vise to the worktable? Nah! I was in a hurry. I clamped the wire securely in the vise, held pressure on the end of the wire, and formed the bend by hammering on the wire where it exited the vise. Having completed the 90° bend in the wire, I pulled the vise to the edge of the table to free the wire. I was so eager to inspect the bend that when I loosened the jaws, I didn’t bother to push the vise back from the edge of the table. With no human control applied, it sought a more stable position by rolling off the edge of the worktable and onto my shoeless foot. The arch of my right foot cushioned the vise’s fall. It rolled off of my foot to the concrete floor, undamaged. However, the almost immediate appearance of red on top of my white sock told me that my foot had suffered in this event. I really didn’t want to take the sock off to look at the damage. Fortunately, I didn’t break any bones and just had to hobble around with a sore foot for several days. Don’t repeat my foolishness. If you are going to use a vise for any purpose, don’t rush. Clamp or bolt it to a bench. In addition, when working in the shop, please provide the appropriate safety barrier for your feet; wear shoes. Sanding: There are two aspects of this simple chore that can be of concern for your safety, the first of which is that using folded sandpaper can be rough on your fingers. I was in the midst of building a model once when I had to get fingerprinted for a security clearance. I had been doing a lot of sanding to lighten the model and get a smooth finish. I got the smooth finish on the wood all right, but my fingertips were smoothed as well. The officer asked me if I had been trying to get rid of my fingerprints for some reason. I had to come back several weeks later to get the job done. A good sanding board can save your fingers and provide a better tool. Most hobby shops have aluminum channel-backed sanding boards or you can make a serviceable one by gluing a piece of sandpaper to one side of a straight section of 2 x 4-inch wood. Second, if you use a power sander such as a sanding disk or drum on the Dremel tool, you should have barrier protection: goggles for your eyes and a dust (painter’s) mask for your nose. When you need to do power sanding, you can minimize the dust you breathe and the particles that get into your home’s ventilation system by running a vacuum cleaner with the inlet in the vicinity of the work surface. Assembling: The screwdriver shown in one of the photographs looks innocuous enough. How could it be dangerous? Look at the end of the inserted working head, with the Phillips-type end. It comes to a sharp point.

This multihead screwdriver is handy and safe when used correctly. Slips need to be prevented to protect your hand and arm. Let’s say you are holding a board to mount servos for your model. Using the Phillips screw head, you may apply 4 pounds of force to drive the screw into the wood. This force is concentrated at the small tip, which makes it effective in turning the screw. Four pounds of force applied to an area measuring approximately 1/16 inch square translates to a pressure of roughly 1,000 pounds per square inch at the tip. If the tip of the driver slipped off the screw, you could easily nick or punch your thumb, finger, palm, or arm. Painting: If you are using spray paint to put the final touches on your model, please remember to use the appropriate barrier; wear a painter’s mask. The hazard is breathing materials into your lungs that are not intended to be there. I know it can be tempting to do small spray jobs in the shop, but that is not a good idea. Do it in the garage or some other well-ventilated place, or fix yourself up with a spray booth such as the one presented in the November 2005 MA. I learned the value of the simple spray mask when I painted a green chalkboard for my children in the wintertime. I opened the kitchen door adjoining the garage to allow the garage to warm up a bit. Then I sprayed four coats of flat green paint on a piece of plywood to make the marking surface for the chalkboard. I didn’t even think about using a mask at the time. After all, it was a large garage. As a result of my painting exercise, I was blowing green goo out of my nose and lungs for nearly three days. It was not pretty. I hope this discussion has made you aware of some common workshop hazards, prepared you to adjust your attitude for safe work, and armed you to put up a strong safety defense. Consider these thoughts, take them to heart, and make them part of your shop work ethic. Apply the appropriate levels of safety defense in your shop work. Good luck and good flying.


Comments
Add new comment