
An airplane that deserves to be called more than "ugly!" By Jay Smith | [email protected] - Photos by the author and Jennifer Alderman As seen in the August 2023 issue of Model Aviation.
Image

Assembly
The E-flite Slow Ultra Stick is the easiest Stick airplane I have ever built, with the Hangar 9 Ultra Stick PNP 60-inch coming in at a close second. With this model, the servos are preinstalled, as are the motor and ESC. Assembly requires no glue, no rubber bands, and no headaches. The first step involves connecting the rear fuselage section. The two sections slide together and click into place, and then the two included Phillips M2 × 14mm button-head screws ensure that they won’t come apart. On mine, the holes were almost perfect for the screws but did require slight pressure on the side of the screwdriver to make sure that they threaded straight and tightened all the way down. The servo leads for the rudder and elevator are marked, with one having a silver stripe to make sure that you plug them in correctly the first time. A nice touch is a plastic retainer on the fuselage to hold the servo extensions out of the way. The landing gear is next, and it only requires each strut to be slotted into the landing gear assembly until it snaps into place. I found that it took a bit of force to get the retaining latch to lock in on the flat spot on the strut, so I used my screwdriver to slightly flex the latch, and then it snapped in without any force required. The vertical stabilizer slides onto the rear fuselage tube until the hole aligns for the retaining screw. The horizontal stabilizer then slides onto the rear fuselage tube until the bottom screw hole also aligns. The vertical and horizontal stabilizers are secured using the included M3 × 22mm thumb screw. Interestingly, the three thumb screws (two for the wing) also included a grommet for each, but they weren’t mentioned in the instructions. I installed the grommets on the thumb screws. The elevator and rudder pushrods with Z-bends are then installed. The manual provides details regarding which holes to use on the servo arm and control horn.Image

Image

Image

Image

Image

Flying
The Slow Ultra Stick flies great! Ground handling is good and the rudder has plenty of authority to keep it straight down the runway for the 5 to 10 feet it is on the ground. I tend to ease into the throttle as opposed to giving it full throttle, so my takeoff runs are roughly 10 feet. You can get it airborne in 3 feet with full throttle and a little up-elevator.
I set up the rates according to the manual, which gives you high, mid, and low rates. I keep the rudder at a high rate and use mid rates for aileron and elevator when flying for fun. I use high rates when flying aerobatics. I don’t use the low rates at all.
The combination of the semisymmetrical airfoil and AS3X makes for a super-stable aircraft, with no bad habits. The power-off glide is good, and stalls drop the nose slightly, but you have to give the Stick a lot of up-elevator to make it drop the nose with the power off.
It is happy to perform sport aerobatics, such as loops, rolls, and stall turns. As expected, knife-edge flight is slightly more challenging with this aircraft because it doesn’t have a fuselage side area like a typical model airplane.
Point the nose up at full throttle and it climbs well, but it is not a rocketship nor should it be. It has plenty of power on tap to get you out of trouble if you need to climb.
Depending on throttle usage, you can get 5 to 6 minutes of flight on the 1,300 mAh battery. When it is time to land, I gently hold a slight amount of up-elevator, while slowly decreasing altitude using the throttle for a gentle landing.
The Slow Ultra Stick is a fun, relaxing model to fly and does offer some flexibility in the batteries it will accept. I think 1,300 to 1,800 mAh batteries are the best options because, although still flyable, 2,100 and 2,200 mAh 3S batteries make the aircraft nose-heavy and the battery covers the entire area between the back of the motor and the front of the landing gear. If using a larger battery, I would recommend adding a second Velcro strap to ensure that it stays put.
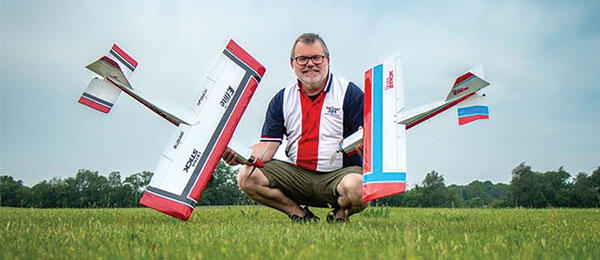
Whether you are looking for your first stick or your fifth, the E-flite Slow Ultra Stick 1.2m BNF Basic is a great option that can be flight-ready quickly and transports easily, with or without the wing attached. To me, it is not an "ugly" Stick; it is a great aircraft that excels in simplicity!
At a Glance
 Specifications
Type: Electric foam Stick
Wingspan: 46.77 inches
Length: 40.98 inches
Radio: Spektrum AR630 receiver (included); three Spektrum A345 digital servos (included)
Components needed to complete:
Four-plus-channel DSM2/DSMX transmitter; 2S or 3S 1,300 to 2,200 mAh LiPo with IC3 or EC3 connector; charger
Minimum flying area: Medium-size park
Power system: Spektrum brushless outrunner motor (included); 11 × 5.5 electric propeller (included); Spektrum Avian 30-amp brushless Smart ESC (included); 3S 1,300 mAh battery
Flying weight: 28.2 ounces
Flight time: 5 to 6 minutes with 3S 1,300 mAh battery
Engine: $199.99
Specifications
Type: Electric foam Stick
Wingspan: 46.77 inches
Length: 40.98 inches
Radio: Spektrum AR630 receiver (included); three Spektrum A345 digital servos (included)
Components needed to complete:
Four-plus-channel DSM2/DSMX transmitter; 2S or 3S 1,300 to 2,200 mAh LiPo with IC3 or EC3 connector; charger
Minimum flying area: Medium-size park
Power system: Spektrum brushless outrunner motor (included); 11 × 5.5 electric propeller (included); Spektrum Avian 30-amp brushless Smart ESC (included); 3S 1,300 mAh battery
Flying weight: 28.2 ounces
Flight time: 5 to 6 minutes with 3S 1,300 mAh battery
Engine: $199.99

At a Glance
Image

Image
Image
Image

Image
Pluses
- Versatile aircraft that will fly comfortably nearly everywhere.
- Sturdy wing that can accommodate one or two aileron servos.
- Can be flown on 2S or 3S batteries without modifications.
Image
Manufacturer/Distributor
Horizon Hobby www.e-fliterc.comSOURCES:
Spektrum RC
www.spektrumrc.com


Comments
Add new comment