
Get back in the air quickly By Terry Dunn [email protected] | Photos by the author As seen in the June 2023 issue of Model Aviation. Molded foam RC airplanes often use what is called a "live" hinge on the control surfaces. It’s basically just an area of thin foam that can flex freely. Live hinges are convenient but not always very durable. In fact, one of my foamies had a workshop "incident" that completely ripped apart the entire rudder hinge.
Image

Image

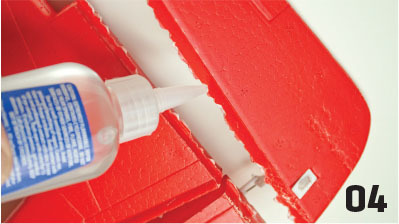
The Fix
To prepare for using the Foam-Tac method, I verified that the hinge could be realigned along the ripped edge. The two parts mated together well. Following the instructions on the bottle of Foam-Tac, I applied a thin bead of glue to both parts. I then pressed the parts together and immediately pulled them slightly back apart.Image
Image
Image

Image

Image
Image

Other Uses
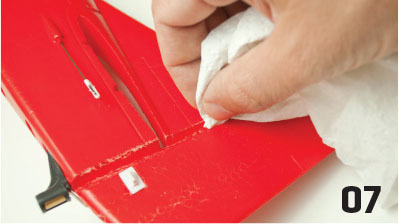
Following my initial positive use of Foam-Tac, I experimented with other applications. My primary goal was to determine whether the glue’s solvent was incompatible with any of my usual types of foam. I glued together pieces of extruded polystyrene (XPS) in varying densities. I also tried expanded polystyrene (EPS) and other foam scraps of which I don’t even know the genesis. There were no instances of the Foam-Tac dissolving any of these materials. With each of my test samples, I laminated two pieces of the foam together. There was no detectible flexibility of the glue joint in this configuration—at least not that I could tell. This suggests that Foam-Tac could also be used for rigid structures, in addition to intentionally flexible joints. One of the problems that I often run into when working with foam is that the adhesive is harder than the foam itself. This is especially true with epoxy and CA. When I sand the completed part, the foam surrounding the glue erodes faster than the glue. Creating a smooth surface can be a real challenge. I sanded a couple of my Foam-Tac test samples to see what effects the glue joint would have. I admit that it wasn’t a very comprehensive evaluation. I basically used 150-grit sandpaper to round off edges along the glue joints. Overall, the results were encouraging. The glue joint appears to lose material at the same rate as the foam. There were a few areas where the glue balled up when sanded, but we’re talking about tiny balls of glue—well within my tolerance level.Image

The Limits
I’m sure there is a limit to the forces that this type of hinge repair can endure. I just have not found it yet. I know that many of you savvy modelers already use the Foam-Tac repair method. Send me a note describing your fastest and/or biggest model that uses this fix. Maybe there is enough tribal knowledge for a follow-up article to share more tips and tricks for this often-overlooked adhesive.SOURCES:
Beacon Adhesives
(914) 699-3400
www.beaconadhesives.com


Comments
Add new comment