
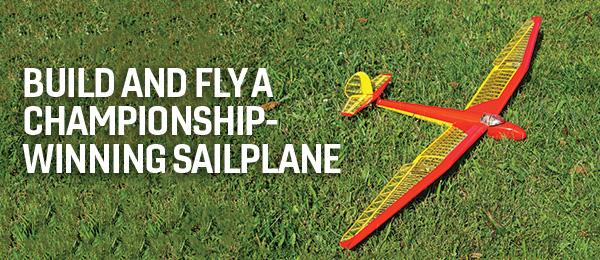
An aerobatic and easy-to-build project
DOWNLOAD FREE TR-260 PLANS!
Document
Document
Document
Document
 01. The finished model is ready for another flight. It weighs 3 pounds, 9 ounces.
I have been looking for a scalelike model to build and didn’t want to build another Extra 300. It seems like there are lots of those on the market today. I was looking for something unusual that would build quickly and still have the good flight performance that I was looking for in an electric-powered model.
I stumbled upon some information from the 1986 World Aerobatic Championships. I noticed this unusual French, mid-wing airplane with a cool color scheme and, after a bit more research, I decided to build my version of the Feugray TR-260.
I wanted a slightly larger model, something in the 3.5-pound range that would fly with my Hacker A30-10 L V4 motor using a standard 12 × 6 propeller on a 2,200 mAh battery pack. I have built quite a few models throughout the years, and this one was going to be a combination of foam and balsa. I call it my hybrid technology.
The fuselage is all 1/4-inch foam, as is the stabilizer, fin, and rudder. The wing is built up with balsa spars, but I also used foam ribs and decided to build it with a two-piece, plug-in wing. I have been building foam models for the past few years using foam that I purchased from Model Plane Foam. It is 1/4-inch polystyrene foam, similar to Depron, but not quite as smooth. It works great, is inexpensive, and produces a high-quality model. Let’s get started building.
01. The finished model is ready for another flight. It weighs 3 pounds, 9 ounces.
I have been looking for a scalelike model to build and didn’t want to build another Extra 300. It seems like there are lots of those on the market today. I was looking for something unusual that would build quickly and still have the good flight performance that I was looking for in an electric-powered model.
I stumbled upon some information from the 1986 World Aerobatic Championships. I noticed this unusual French, mid-wing airplane with a cool color scheme and, after a bit more research, I decided to build my version of the Feugray TR-260.
I wanted a slightly larger model, something in the 3.5-pound range that would fly with my Hacker A30-10 L V4 motor using a standard 12 × 6 propeller on a 2,200 mAh battery pack. I have built quite a few models throughout the years, and this one was going to be a combination of foam and balsa. I call it my hybrid technology.
The fuselage is all 1/4-inch foam, as is the stabilizer, fin, and rudder. The wing is built up with balsa spars, but I also used foam ribs and decided to build it with a two-piece, plug-in wing. I have been building foam models for the past few years using foam that I purchased from Model Plane Foam. It is 1/4-inch polystyrene foam, similar to Depron, but not quite as smooth. It works great, is inexpensive, and produces a high-quality model. Let’s get started building.
 02. The wing is builtup over the plans with the ribs pinned to the rear balsa jig.
Wing
Cut all of the ribs from 1/4-inch foam. This is a standard built-up wing. Pin the 1/4-inch square spar to the plans and add the 1/4-inch doubler between ribs 1 and 2. Pin down the ribs to the 1/2-inch balsa trailing edge (TE) jig then add the top 1/4-inch square spar. Make sure that rib 1 is straight because this rib will be mated against the fuselage side. Add the 5/16-inch balsa leading edge (LE) and TEs. After things are dry, add the 1/4-inch balsa cross stringers from the main spar to the TE. Add the 3/32-inch sheer webs to the front of the spars as shown on the plans. Repeat the procedure to build the other wing half. When both are finished, set them aside until the fuselage is framed. 03. Be sure to keep rib #1 at 90° so that it joins correctly with the fuselage.
Tail
The stabilizer, elevator fin, and rudder are a 1/4-inch foam center with balsa LEs and TEs added for stiffness. Glue the balsa in place and make sure that the pieces stay flat on your building surface as they dry. After it is dry, sand it smooth and set it aside.Fuselage
Cut two fuselage sides from 1/4-inch foam. Using the plans as a guide, draw lines on both sides for the location of your firewall and formers 3 and 4. Cut the fuselage side doubler from 1/8-inch plywood and carefully measure the slot in the doubler to accommodate the wing spar joiners. 04. Install the 3/32 balsa sheer webs to the front of the wing spars.
Carefully measure the sides and glue the doubler in place. This is the most important part of the fuselage; this doubler will determine the alignment of the wing as it is attached to the fuselage. Draw the lines on the sides where you will be cutting the top canopy hatch from the side.
04. Install the 3/32 balsa sheer webs to the front of the wing spars.
Carefully measure the sides and glue the doubler in place. This is the most important part of the fuselage; this doubler will determine the alignment of the wing as it is attached to the fuselage. Draw the lines on the sides where you will be cutting the top canopy hatch from the side.
 05. A slot cut in rib #1 accommodates the plywood wing spar joiner.
Using your motor as a guide, measure the distance from the front, epoxy your firewall in place on the right fuselage side, and add the balsa triangles at this time.
Add former 3 along with the 1/4-inch plywood landing gear plate and 1/8-inch plywood landing gear doubler. Add former 4 to the right side. Let everything dry and make sure each former is at 90° to the side. When dry, epoxy the left side to the formers and firewall. Carefully align the sides together, making sure there is no twist in the body. Tape the sides together and keep it flat on the top view to avoid any twist. When dry, add a balsa triangle to the left side of the landing gear plate. Add the 1/4-inch balsa bottom stringer for the battery floor support.
05. A slot cut in rib #1 accommodates the plywood wing spar joiner.
Using your motor as a guide, measure the distance from the front, epoxy your firewall in place on the right fuselage side, and add the balsa triangles at this time.
Add former 3 along with the 1/4-inch plywood landing gear plate and 1/8-inch plywood landing gear doubler. Add former 4 to the right side. Let everything dry and make sure each former is at 90° to the side. When dry, epoxy the left side to the formers and firewall. Carefully align the sides together, making sure there is no twist in the body. Tape the sides together and keep it flat on the top view to avoid any twist. When dry, add a balsa triangle to the left side of the landing gear plate. Add the 1/4-inch balsa bottom stringer for the battery floor support.
 06. The plywood side joiner and former #3 and #4 are installed on right side along with landing gear plate.
Hatch/Canopy
From 1/4-inch foam, cut the hatch floor and glue the hatch sides to it. Add the hatch back, keeping things aligned on the fuselage as you build this section. Fill in the top of the hatch with foam and let it dry. Cut two laminations of foam for the fuselage rear turtledeck and glue them in place. 07. In this picture, the firewall is epoxied in place.
Cowling Front
The front of the cowling is made from three laminations of foam, and the back part is 1/8-inch balsa. Glue this front together and when it is dry, attach it to the fuselage front. Build the two side cowling cheeks from foam and attach to each side of the fuselage. After everything is dry, you can sand the fuselage to shape. 08. The fuselage sides are glued together and show battery tray rails.
Fit the Wing to the Fuselage
Test-fit the 1/8-inch wing joiners to each wing half. The joiner on the left wing goes between ribs 1 and 2 and is flush with the front part of the wing spars. The joiner on the right half is flush with the rear edge of the wing spars. As the joiners slide through the fuselage side cut mark, they slide next to each other and into the opposite side of the fuselage, forming a 1/4- inch main spar in the middle of the fuselage. Draw a line on the outside of the fuselage for the thrustline near the TE of the wing. When you slide both wing halves into the fuselage, the TE will be centered on the thrustline so that the wing incidence comes out to zero with no upthrust or downthrust if you have measured correctly. 09. The removable hatch is framed up and shows the 1/4-inch hardwood dowel on the hatch.
 10. Sullivan pushrod tubes are installed to prevent flexing.
After some trial-fitting, epoxy the wing joiners into each wing panel. Install the 8-32 hold-down bolt in each wing half. Slide the wing panel back through the fuselage side, make a mark on the outside of the fuselage that lines up with the bolt, and then drill that hole. Do this for both sides. This bolt will keep the wing firmly tight to the fuselage side. Do the same on both sides. Drill the 8-32 hole in the wing joiners to hold things perfectly tight at the center.
Install the pushrods and cut your servo tray to fit your servos. I would hesitate to install the servos in the rear of this model. With my setup, I had the servo tray as far forward as possible in order to balance it properly. Add the fuselage foam bottom and sand the fuselage to shape.
10. Sullivan pushrod tubes are installed to prevent flexing.
After some trial-fitting, epoxy the wing joiners into each wing panel. Install the 8-32 hold-down bolt in each wing half. Slide the wing panel back through the fuselage side, make a mark on the outside of the fuselage that lines up with the bolt, and then drill that hole. Do this for both sides. This bolt will keep the wing firmly tight to the fuselage side. Do the same on both sides. Drill the 8-32 hole in the wing joiners to hold things perfectly tight at the center.
Install the pushrods and cut your servo tray to fit your servos. I would hesitate to install the servos in the rear of this model. With my setup, I had the servo tray as far forward as possible in order to balance it properly. Add the fuselage foam bottom and sand the fuselage to shape.
 11. This shows the tail surfaces framed up.
Finishing
The wing can be covered in the material of your choice. I used UltraCote for this model. The fuselage and tail needed to be prepped for paint. I added two coats of Minwax Polycrylic liquid to the fuselage and tail. This is the key to using this type of foam. The liquid firms up the foam and seals it, allowing you to sand in between coats and making for a stiff, smooth surface. I brushed on the wax directly from the can—no thinning needed. 12. An 8-32 rear wing hold-down bolt is used to secure the wing.
Apply light coats. You need to seal the foam but also be mindful of adding weight. Remember to keep the tail as lightweight as possible. I painted the model with water-based hobby paint—nothing special here.
I needed two coats of white, and then I let that dry before I added the red sections. I brushed on the paint, but you could spray it on if desired. I found out through practice that you can pinstripe over the paint with strips of UltraCote if you turn the iron temperature way down. I carefully cut the pinstripes and ironed them on the fuselage and tail for a pretty, sharp, final finish. I added one final coat of Minwax to seal the paint and also to help keep the stripes attached.
12. An 8-32 rear wing hold-down bolt is used to secure the wing.
Apply light coats. You need to seal the foam but also be mindful of adding weight. Remember to keep the tail as lightweight as possible. I painted the model with water-based hobby paint—nothing special here.
I needed two coats of white, and then I let that dry before I added the red sections. I brushed on the paint, but you could spray it on if desired. I found out through practice that you can pinstripe over the paint with strips of UltraCote if you turn the iron temperature way down. I carefully cut the pinstripes and ironed them on the fuselage and tail for a pretty, sharp, final finish. I added one final coat of Minwax to seal the paint and also to help keep the stripes attached.
Final Set-Up
After everything is painted, install your motor, battery, and all of your servos and double-check the center of gravity location. Mine balanced nicely with a 2,200 mAh battery pack and the servo tray in the location noted on the plans. 13. The servo tray is installed and shows the center 8/32 holddown bolt.
 14. The model is framed up and ready for covering.
Flying
This model really flies well with this motor and propeller combination. Coming in at 3 pounds, 9 ounces, with a wing loading of 11.3 ounces per square foot, it is light enough to take off quickly and the landing speed is slow. The roll rate is quite fast, and it can do nearly any maneuver that you can think of. For me, it is a great sport flyer. It is big enough to handle the wind and small enough to get in and out of a small field. With a little bit of work, you can have a great-flying model that will get some attention at the field, while also saving a bunch of money within your hobby budget.SOURCES:
Model Plane Foam [email protected] www.modelplanefoam.com
At a Glance
 Specifications
Wingspan: 51 inches
Length: 51 inches
Wing Area: 725 sq. in.
Weight: 3 pounds, 9 ounces
Wing Loading: 11.3 ounces per sq. ft.
Motor: Hacker A30-10 L V4 500-watt electric
Battery: 3S 2,200 mAh
Propeller: 12 × 6 APC electric
DISCOVER MORE CONTENT!
Full Plan Sheets for Purchase
Specifications
Wingspan: 51 inches
Length: 51 inches
Wing Area: 725 sq. in.
Weight: 3 pounds, 9 ounces
Wing Loading: 11.3 ounces per sq. ft.
Motor: Hacker A30-10 L V4 500-watt electric
Battery: 3S 2,200 mAh
Propeller: 12 × 6 APC electric
DISCOVER MORE CONTENT!
Full Plan Sheets for Purchase
Document
Document
Document
Document


Comments
Build article
Was pleasantly surprised to see a "BUILD" article in Model aviation again.
I'm not much for electric powered airplanes. But, maybe I will give this one a try?
Downloading free plans now.
Add new comment