Build the Illinois Science Olympiad FF Model
By Chuck Markos; Photos by the author | [email protected]
As seen in the April 2020 issue of Model Aviation.
Bill of materials and tools
Balsa wood strips (usually come in 36-inch lengths)
(2) 1/16 x 1/8
(1) 1/16 x 1/4
(1) 1/8 x 3/8
• (1) Gift-wrap tissue
• Superglue
• Glue stick
• Straight pins
• Modeling clay (for ballast and center of gravity adjustment)
• Masking tape
• Waxed paper
• Propeller and hangar assembly
• Single-edge razor blades
• 1/16-inch wide rubber strip (FAI Model Supply)
• Scissors
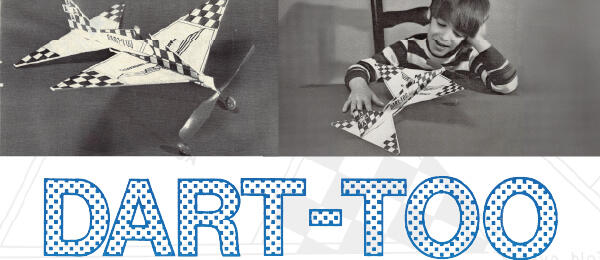
The inspiration for this airplane is many people’s favorite starting kit: the famous Delta Dart. Taking advice from Henry David Thoreau to “simplify, simplify,” basic changes to the Delta Dart design were made.
The most significant change in the model was to move away from Delta Dart-style dihedral and wing-mounting procedures. Additionally, most flying surfaces are rectangular, so cutting balsa wood sticks at precise angles is unnecessary. Simplification is made possible by the availability of adhesives that did not exist when the original Delta Dart was first conceived. The construction method is to attach balsa wood to the covering in roughly the same way as a Delta Dart is constructed.
The design meets 2020 Science Olympiad specifications for the Wright Stuff event. It was used for building sessions at a Coaches’ Clinic sponsored by the Illinois Science Olympiad in November 2019.
Specific goals were established for the application. Rules included no special tools, no building boards that would accept pins, no potentially toxic spray adhesives, and no special materials. All of the mate-rials, with perhaps the exception of a propeller, can be found at hobby dealers, craft shops, office supply stores, party stores, or hardware shops.
The prototype, shown in one of the photos, was a stable flier. It successfully flew in clockwise circles or counterclockwise circles, which provided bonus scoring. If the model is not intended for Science Olympiad competition, the propeller does not need to be reduced from the 14-cm (5.5 inches) diameter to 8 cm.
The prototype required 1.5 grams of ballast to bring it to the 8-gram competition specification. Without those two specifications, the airplane might be capable of 60-plus-second flights indoors.
Construction:
Construction starts with simple plans—not plans in the ordinary sense of the word for building a model aircraft—but a guide to make sure that prefabricated parts end up in the correct place. Photos 01 and 02 show the wing and tail end of the fuselage and the stabilizer. A felt-tipped pen, straightedge ruler, and a drafting triangle can be used. The plans are on two sheets of 8.5 x 11-inch paper joined along the short edge to form an 8.5 x 22-inch sheet.
The wing diagram shows the location of balsa wood for the aircraft’s leading edge (LE), ribs, and stabilizer. The fin diagram is a trapezoid that shows the location for a tailboom, as well as three balsa wood parts for its LE, trailing edge (TE), and bottom edge.
To speed things up at the Coaches’ Clinic, where time was limited, all of the pieces were prefabricated to the correct dimensions except for the fin bottom that is trimmed to size after construction (Photo 03). Much use is made of 1/8 x 1/16 wood strips similar to what are used on the Delta Dart.
The airplane is built on top of its covering material. In this case, it is gift-wrap tissue (Photo 02). It is best to use a lighter tissue color so that the underlying diagram remains visible. The plans are taped to a flat surface at four corners.
Use masking tape to attach the tissue to the plans. Each balsa component is coated with a glue stick on its wide side then placed on a line of the tissue-covered plans (Photo 04). A felt-tipped pen is used to identify which side of the balsa is coated with glue.
After the wing’s LE is in place, ribs are added using a glue stick. The best procedure is to place a rib end against the LE with no space in between. When this step is completed, the structure is in a “comb” con-figuration. All of the ribs are glued in place before the TE is added, again with no visible space between the rib end and the TE. Gluing the ribs to the edges will come later.
For the fin and tailboom, no glue is used on the forward part of the tailboom. The fin’s wide TE will allow the addition of a moveable rudder to help adjust the flight circle direction. It was made from 1/16 x 1/4-inch balsa glued to two short lengths of #24 copper wire hinges.
The structures are shown in a “ladder” configuration after all of the pieces have been attached with a glue stick. Other locations will be glued later. Just a small drop of glue will do (Photo 06). Avoid large drops that could seep through the covering and stick your construction to the plans. Place a thin sheet of plastic between the tissue and plans before gluing to avoid that.
Use a scrap of balsa wood to help force the superglue into the joint immediately after the drop is placed (Photo 07). Waiting will allow the glue to set before it is spread. Cut away excess balsa from the fin tip. Try not to cut into the work surface (Photo 08). A partial cut, followed by breaking away the unneeded part, works well.
As tape from the corners of the tissue is removed, hold the balsa structures down to avoid damage. Carefully remove all three structures from the plans in case any adhesions might have occurred. Cut away excess tissue with a new, sharp razor blade while holding the structure away from the work surface.
Trim away tissue starting in the middle of a section and not from the ends. Hold the structure with one hand and insert a corner of the blade into the tissue where it meets the balsa wood. Hold the blade at a 45° angle and draw it immediately adjacent to the balsa wood to trim away tissue.
If you feel any resistance, it means that your blade is cutting into wood. Stop before you go too far. After the blade travels to the end, put it aside. Grip the structure at its opposite end, reinsert the blade at the location where the previous cut started, and draw to the other end.
All paper has a grain direction that can be deter-mined by how it tears. It will tear in a reasonably straight direction with the grain but will travel side-ways when tearing against the grain. The supplied tissue for this project was chosen so that its grain travels in the long direction of each part. It is also easier to razor-trim the tissue going with the grain than it is going against the grain. When going against the grain, it is best to use a sawing motion when moving the blade through the tissue.
Use the dull edge of a razor blade to crush a dent (Photo 09) at four places into the wing edge that is adjacent to a rib at its outer side (closest to the wingtip). Bend the wingtips up by gently breaking the LE and TE at the crushed locations. Hold the wing with your finger and thumb from both hands on either side of each dent while bending.
The covering is finally on top as you work (Photo 10). Up until now, all of the work has been done on the bottom side of the wing. Support the wing center with two blocks of 3/4-inch wood. Use another block to hold the wing on the two blocks. Wingtips are held flat on the work surface with another block at each tip.
Glue the broken joint and adjacent rib with superglue. A dusting of baking soda will accelerate the curing process. Excess baking soda can be blown away.
The wing rail is glued to the center of the wing only at the juncture of the rib to the LE and TE. Make sure the overlapping rail is equal for both sides. It will be used to hold the wing to the fuselage with masking tape. Glue the tailboom and fin to the bottom side of the stabilizer at the juncture of the stabilizer’s center rib and the LE and TE. Finally, all of the junctures of ribs and edges have been glued together!
The rear hook and spacer block are assembled on the fuselage (Photo 12). There are tiny holes in both the spacer block and the rear of the fuselage to accept the hook wire that was fabricated from a straight pin. The hole in the end of the fuselage has been marked.
Put some glue into any gaps and quickly push the assembly together before the glue cures. Add more glue wherever the wire meets the wood. The tailboom contains the fin and stabilizer and is glued onto the fuselage.
If the full-size propeller is to be cut to an 8-cm diameter, the propeller blade is marked to show where to cut it (Photo 13). A pair of scissors can be used.
To attach the wing, use two pieces of 5- to 6-cm lengths of masking tape. Attach the tape to waxed paper to split it in half (Photo 14). Start the tape on the fuselage as shown. Place the wing rail on the fuselage next to the tape. Wrap the tape tightly around the rail and fuselage. Repeat for the front of the wing.
To adjust the wing incidence, remove the tape from either end to insert a shim between the wing rail and the fuselage. Use fresh tape to rewrap it (Photo 15). If the airplane dives or does not gain altitude, the shim goes in front. To correct a stall, the shim goes in back. Shims can be made from various thicknesses of cardboard.
Flying the Model
To fly this airplane, you need a room that is roughly the size of a school gym. Make sure the HVAC fans are turned off. Power is obtained from a rubber strip tied into a loop. For an 8-cm diameter propeller, use FAI Model Supply 1/16-inch rubber strip; for a 14-cm propeller, use 3/32-inch rubber.
It’s always best to lubricate the motor before winding it. Spray the inside of a plastic bag with silicon oil then lubricate the rubber inside the bag so that your hands stay clean. Many brands of silicon oil can be found in big box stores such as Home Depot, Menards, and Lowe’s.
A good winder and propeller are available in the AMA ALPHA kit that is sold by AMA.
Additional information regarding building and flying Wright Stuff model airplanes can be found at the address listed in “Sources.” Of special interest is an article that describes using grocery-store plastic bags as covering using water-soluble contact cement.
SOURCES:
Science Olympiad/Wright Stuff
www.soinc.org/wright-stuff-c
FAI Model Supply
(440) 930-2114
www.faimodelsupply.com
AMA ALPHA
(800) 435-9262
https://shop.modelaircraft.org/product/6090-alpha/835?cp=true&sa=false&sbp=false&q=false&category_id=15


Comments
Add new comment