
Written by Greg Gimlick
A capable aerobatic and 3-D trainer
Product review
Photos by the author
As seen in the January 2016 issue of Model Aviation.
Bonus video
Specifications
Model type: Sport scale 3-D ARF Skill level: Intermediate pilot Wingspan: 48 inches Wing area: 496 square inches Airfoil: Symmetrical Length: 48 inches Weight: 40 to 45 ounces Wing loading: 11.6 to 13.08 ounces per square foot Power system: 450- to 500-watt brushless motor; 40-amp brushless ESC; 3S or 4S 2,200 mAh to 2,650 mAh LiPo battery; 13 x 6.5 (3S) or 12 x 6 (4S) propeller Radio: Minimum four channel Construction: Wood, EPS, and EPP foam Requires: Minimum four-channel transmitter and receiver; LiPo battery; motor; ESC; propeller; foam-safe CA; regular CA; and contact glue Street price: $129.99Test-model details
Power system: Hacker A30-14L V3 800 Kv outrunner motor; Hacker XB-55-SB-Pro 50-amp brushless ESC Battery: FlightPower 2,450 mAh 3S 11.1-volt 30C LiPo Propeller: APC-E 13 x 6.5 Radio system: Futaba 14SG transmitter; Futaba S3117 servos; Futaba R617FS FAAST receiver Ready-to-fly weight: 46.3 ounces Wing loading: 13.44 ounces per square foot Flight duration: 5 to 8 minutesPluses
• Easy assembly. • Innovative cowl design. • Lightweight construction. • Excellent parts fit. • Great color scheme for orientation. • Nice flight characteristics.Minuses
• No assembly manual. • Build blog doesn’t show the most current model or cowl detail.Product review
The first word that came to my mind when I opened the box was colorful! This model’s preprinted EPP foam cover really stands out and, as I found out later, helps a lot with orientation. One of my neighbors walked by as I was loading it in the car and she said, “That’s beautiful—a work of art.” Aside from the striking paint job, the airplane itself gave the impression of being extremely lightweight and quick to build as I unboxed it. Everything was well protected and arrived without any damage or marks to the foam. Then I noticed—no instruction manual. No problem; I’d just download the PDF version, but there isn’t one. There is a well-illustrated build blog in its place though. I couldn’t wait to get started.Image

All of the parts are laid out and ready for assembly.
Assembly
Before assembling the model, read through the manufacturer’s build blog and familiarize yourself with the process and pieces. The blog doesn’t show the latest version, but there aren’t any significant changes not mentioned in the narrative. The whole build shouldn’t take more than two or three hours. If you haven’t ordered your motor system, you’ll need to do that and acquire the appropriate glues. I chose the recommended Hacker A30-14L motor and ESC. I also purchased the optional USB Hacker X-Pro Interface for programming the ESC. It can be done with the transmitter, but I prefer a computer interface that also allows me to update any firmware. My success with Hacker motors and controllers in the past made me glad to see it was the recommended system. Quality motors and controllers pay big dividends over time. Pay close attention to the gluing recommendations in the blog. Although the airplane is covered with a layer of EPP foam, the core of the wing is actually EPS foam. If you use regular CA glue on the aileron hinges, you will damage the wing core. Be sure to use foam-safe CA there.Image
All of the surfaces use CA-type hinges. It’s important to pay close attention to the gluing recommendations.
The company also recommends contact-type glue for the tail assembly. I opted for Bob Smith Industries Foam-Cure cement, which is easy to use and dries quickly. Apply it to both surfaces, mash them together and pull them apart for roughly 30 seconds, then stick them together again. This stuff is quick to dry and holds like crazy! I used BSI’s Super Gold+ foam safe CA and Insta-Cure thin CA for the rest. Assembly begins with gluing the motor box to the front of the fuselage. Preinstalled carbon-fiber rods align with holes in the firewall and sit firmly along the corners of the fuselage box. CA glue holds it all in place. Aerobeez recommends reinforcing the joints with CA glue for security. I added a touch of 15-minute epoxy along the edges where the carbon-fiber rods rested. The landing gear bolts are already in the blind nuts under the EPP fuselage covering. Pull the covering back along the cut line and you’ll see them hiding there. Don’t remove the flap of EPP because it will be taped down to cover the bottom of the gear after it’s bolted on. Don’t miss the part about the foam gear braces that sandwich over the carbon-fiber legs. They add to the aesthetics and the Foam-Cure adhesive is perfect for this job.
Image

After the gear is bolted in place, the flap covers the hardware.
Most of the hinged surfaces use regular CA hinges, but again, be sure to use foam-safe CL glue for the aileron hinges. The precut surfaces accept the hinges on both the wing and tail. Before you install the horizontal stabilizer, you need to remove a small piece at the rear of the fuselage. Be sure to keep that because you’ll glue it back in place when the stabilizer has been secured. The tail wheel assembly is nice and fits into predrilled holes. Futaba S3117 servos fit in the precut holes and are bolted down without any modification. I needed a couple of 6-inch extensions for the ailerons and 12-inch extensions for my tail surface servos. I mounted the Futaba R617FS FAAST receiver on the radio deck toward the rear of the fuselage. The kit comes with servo arm extensions that screw to your regular servo arms or wheels to give the extra throw required for the 3-D setup. Mine aligned with existing holes and screwed on without drilling. The motor and cowl installation is where you’ll spend most of your build time. Nothing difficult here, but there isn’t any mention of how the cowl is opened or fastened to the firewall. It’s a shame because it’s probably one of the more innovative design ideas I’ve seen in a long time and deserved some attention in the build blog. Four L-shaped wood hooks align with holes in the firewall and when fully inserted, they will slide down to lock in place. When the front of the canopy tabs slide into their retention holes, they also lock in the top of the cowl plate so it can’t come loose. It’s secure, yet easy to disassemble if ever the need arises. The cowl is a combination of EPP foam and wood structure that has been laser cut and assembled at the factory. Before it can be installed, you’ll have to cut away some of the foam and wood to open it up so it fits over the motor box. It’s self-explanatory with a bit of studying, but some information in the blog would be helpful. It’s an innovative idea that deserves notice. I drilled the premarked lines on the front of the motor box to fit the Hacker motor mount and it aligned perfectly. I used a couple of spacers to adjust the spinner distance to the cowl and attached the ESC to the bottom of the box with foam tape and zip ties. The fuselage interior is cavernous so there is plenty of room for equipment and flight battery. Carbon-fiber rod and retaining bolts fastened to the inside of the fuselage sides attach the wing.
Image

The front of the motor box shows the Hacker A30-14L motor with spacers for a perfect fit. The Hacker S-55-SB-Pro speed control is mounted to the bottom of the motor box.
Image

The fuselage has tons of room to locate equipment and adjust the CG.
Control Throws and CG
I set the center of gravity (CG) at the recommended 3.5 inches and adjusted the battery position to achieve it. After you’re comfortable with it, you can move it back to the 4-inch point, if desired. I used the recommended control throws for the 3-D setup, including the suggested 60% exponential. I later reduced the exponential to 30% in the low-rate settings. It was slightly flat for me, but fine for the high rates. I also set up a mid rate on my three-position switch to allow for finer tuning.Flying
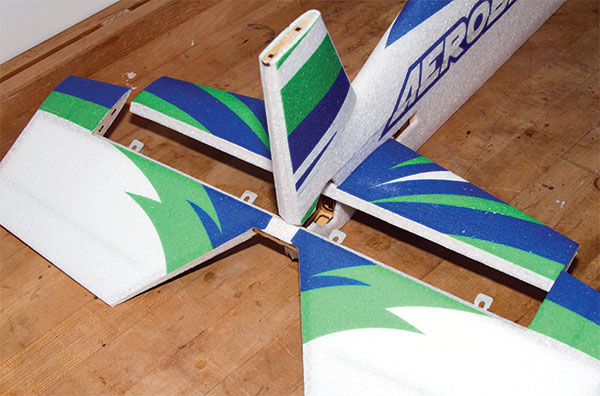
I couldn’t wait for the moment of truth and it didn’t disappoint. I made the test flight on low rates and the recommended 60% exponential. Everything was fine at the forward CG mark of 3.5 inches, but there is plenty of room to move the battery aft. After a quick shakedown flight, I landed and adjusted the low-rate exponential to 30%, but left the high- and mid-rate settings at 60%. This is the happy zone for me right now. Stalls are easy to recover from, but it occasionally likes to drop to one side or the other seemingly without preference. Recovery is almost instant; as long as you’re aware of it, it’s not a problem. Power is available for anything you want to try and the control throws allow for it all. This is no speedster, nor is it meant to be; it’s a pure aerobatic machine. High-alpha descents and all manner of inside and outside maneuvers are there for you to discover. It’s limited only by your ability and radio programming skills. The color scheme offers excellent visibility, which helps with orientation. I flew all of my maneuvers on the 3S setup and was more than satisfied with the power available, but 4S is within the capabilities of the power system if you want more. During hover maneuvers, it held its position with the normal application of throttle, yet had enough power to climb out at the end. The 4S setup is probably more to your liking if hovering is your main interest.Image

The color scheme offers excellent visibility and the model is more than capable of performing aerobatics and 3-D maneuvers.
During square outside loops, you can almost stop at each rotation point and pause, which adds to the visual effect. Knife-edge flight is easy with the amount of rudder throw and mine only pulled slightly to the canopy side. I’ll never be a Quique Somenzini, but watching his slow, precise 3-D maneuvers makes me long to be better at it. The Aerobeez 330 excels at slow-speed flight and recovers easily from mistakes with the stock power system and control setup. This made trying new maneuvers easier, knowing it would power out of a mistake if needed. One thing it does exceedingly well is high alpha, extremely slow rolls. Keep in mind that all of these high-power, slow maneuvers will shorten your flight time considerably. The Aerobeez 330’s stability is excellent throughout its flight envelope and when it comes time to land, you have a wide range of speed options. On low rates, it lands like a trainer with a nice rollout, but if you prefer, flip it over to high rates and take the elevator down to a full-stop, zero rollout spot landing. Controllability is excellent throughout the entire speed range. I put my rate selections all on one switch so it acts like a flight mode because I never found that I wanted high rates on one control and low on the other. One flip of the switch changes them all for me.


Comments
Add new comment