
By Louis Joyner | [email protected]
As seen in the June 2025 issue of Model Aviation.
HOW DO YOU get started or restarted in Free Flight (FF)? Start with something simple, such as a Hand-Launch Glider. These are inexpensive and quick to build. They don’t require a large flying site. If your throwing arm is past its prime, add a hook on the nose and use a rubber band catapult to launch the model. Catapult launching is also a good option for young modelers. You might also want to track down plans, a kit of one of your favorite FF models, or design your own. That is the most challenging and rewarding option.
No matter what you decide to build, it requires the right tools, skills, and, most importantly, patience. Parts must fit together perfectly. Materials, usually balsa, should be carefully selected for maximum strength and a minimum weight. Use lightweight wood for wingtips and for tails. If you are building from a kit, you might need to substitute lighter-weight balsa for some of the kit wood.
High-stress areas, such as the wing center section and the nose, might need reinforcement with thin plywood or basswood. Carbon fiber is another option for local reinforcement. Models with undercambered wing airfoils should be built on a jig, if possible.
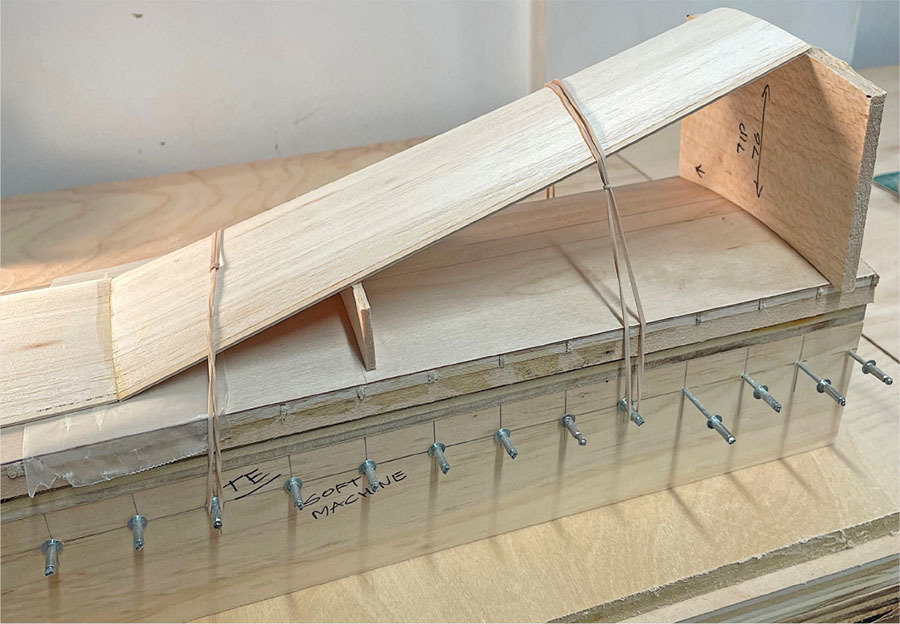
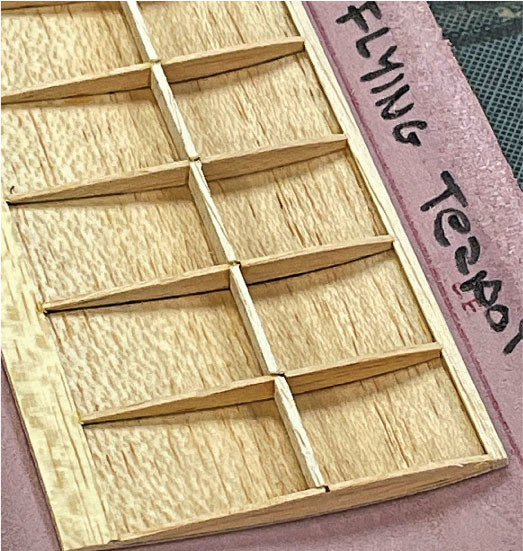
I’ve been using jigs I’ve made from wood for years. Here is how I make mine. The base is cut from 1/2-inch plywood and doesn’t need to be longer than the wing’s longest panel. However, it does need to be an inch or two wider than the wing chord. Next, I cut two pieces of 1/2-inch plywood the same length as the plywood base and approximately 2 inches high. These panels are glued to the bottom of the base at the front and rear.
I cut a dozen or so ribs from 1/8-inch balsa to match the undercamber of the wing that I am building. The ribs are glued to the top of the base. Small holes are then drilled every inch along the front and rear panels. The holes are for small pins.
Next, a sheet of 1/16-inch plywood is cut to the size of the base. The tops of the ribs are coated with epoxy. The sheet of 1/16 plywood is placed over the ribs and anchored with a lot of rubber bands stretched over the top of the 1/16 plywood sheet and attached to the small pins in the front and rear panels. The final touch is a strip of 1/4-inch square hardwood glued to the top front of the jig. The strip helps to locate the leading edge (LE) of the wing during assembly. If necessary, temporary shims can be used to position the LE of a tapered or swept-back LE.
Each wing panel is assembled one at a time. If full-size plans are available, I cut each wing panel out of the plans and position it on the jig. If you don’t want to cut up the plans, you can photocopy or trace the individual panels. Another option is to draw the ribs, LE, and trailing edge (TE) locations directly on the jig.
You could also notch the LE and TE to fit the ribs. Although it is a bit of trouble, it can speed up assembly and make rib alignment easier. I usually use a file of the right thickness to make the notches. Be careful not to make the notches too deep, which might weaken the LE and TE.
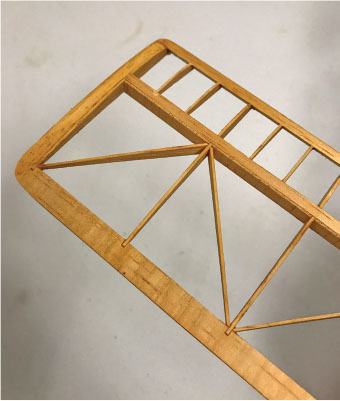
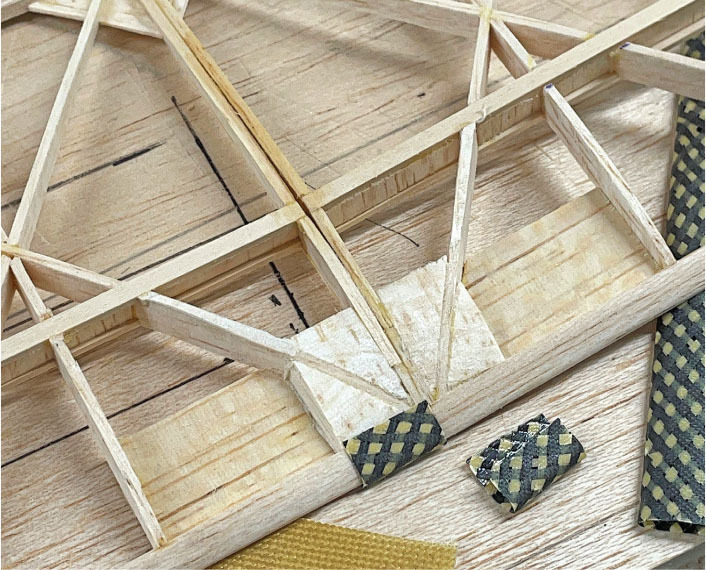
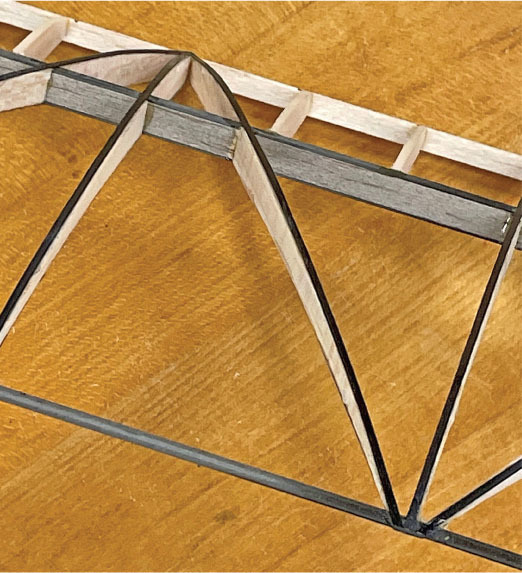
For additional strength, you can add triangular gussets at the joints between the LE, TE, and the ribs at dihedral joints. Note that the grain of the gusset should run diagonally.
A simpler alternative that I have also used is to make a wing or stabilizer jig from foam. You can cut the foam with a hot wire to either the undercamber shape or the upper surface and build the wing/stabilizer upside down. Cutting foam with hot wire is quick and simple.
SOURCES:
National Free Flight Society (NFFS)
National Model Aviation Museum
(765) 287-1256
www.modelaircraft.org/welcome-national-model-aviation-museum


Comments
Add new comment