
Horizon Hobby E-flite Carbon-Z Cub SS 2.1m BNF Basic With AS3X and SAFE Select
Written by Jay Smith
Review
As seen in the April 2020 issue of Model Aviation.
Bonus Video
At a Glance
Specifications Model type: Giant Scale foam aerobat Skill level: Intermediate Wingspan: 84.6 inches Wing area: 1,130 square inches Wing loading: 16.6 to 19.3 ounces per square foot Length: 56.3 inches Weight: 8.15 to 9.48 pounds Power system: E-flite BL50 brushless motor (included); E-flite 60-amp ESC (included) Radio: Four 26-gram digital MG mini servos; two 13-gram digital MG micro servos (included) Flight duration: Six-plus minutes Price: $429.99 Pluses- Thumbscrews with decorative gas caps and snap-on antennas to easily install/remove the two-piece wing without tools.
- Articulated, shock-absorbing landing gear.
- Soft tundra tires for good ground handling.
- Highly visible color scheme.
- Inexpensive Giant Scale option.
- A few parts bags are mislabeled.
Binding Your Radio
For this review, I used the Spektrum iX20 transmitter. I was able to download the radio setup file for the Carbon-Z Cub from the Spektrum website, making setup a breeze. E-flite even makes the binding process easier by having a servo extension in the bind port. It can be accessed via the top-mounted hatch. You are given the option of binding with or without enabling Safe Select. Although I don’t use Safe Select, Jason Merkle at Horizon Hobby made a great point about enabling it so that he could let others fly the airplane and get comfortable with it before taking full control of the model. It could also be helpful if the model was ever lost in the sun. Safe Select can be enabled or disabled at will.Image

Horizon Hobby has perfected safely fitting model aircraft in the smallest box possible and has done so damage free.
Assembly
Horizon Hobby has perfected safely fitting model aircraft in the smallest box possible; however, because this is a Giant Scale aircraft, the box is still substantial. Going over the manual and confirming all of the parts, I was happy to see parts bags individually marked, but be aware that a few are mislabeled. Fortunately, it is easy to determine the correct hardware needed because it is all detailed in the manual. In addition to standard tools, to fully assemble the Cub, you will need threadlocker for the wheel collars and thin CA to glue the hinges on the rudder to the vertical stabilizer. Assembly starts with getting the Cub on its wheels. The landing gear fairings, tires, and suspension springs are easily bolted on. The tail wheel is already attached to the rudder, and the rudder attaches to the stabilizer with three CA hinges and a screw from the bottom. I had to use an X-Acto knife to clean the glue from one of the slots in the stabilizer, after which the rudder was easily attached and glued in place. The horizontal stabilizer slides over a rod and is held in place by four screws. The ball links for the rudder and elevator can then be attached to the control horns. Although not common on most E-flite aircraft, the Cub requires that the motor be bolted to the firewall and the motor wires are attached to the ESC. The process is easy; however, tucking the motor and ESC wire into the fuselage takes a little care because the ESC takes up a good portion of the available space. I found it easiest to push the ESC to one side then slide the wires beside it. This also helps keep the wires from sitting on the ESC’s heat sink. The cowling can then be screwed onto the aircraft and the collet, spinner backplate, propeller, propeller nut, and spinner can all be attached. The wing comes with six vortex generators that need to be installed using double-sided tape. In the bag with the vortex generators you will find black tape, but clear tape was also provided separately. In trying to complete the model and fly it the same day, I inadvertently used the black tape, which works fine, but it makes the attachment of the vortex generators more obvious because the tape can be seen through them. It is then time to install the struts on the wing halves so that they will be ready to be attached to the model. The wing halves slide over a carbon-fiber wing tube and the aileron and flap servo leads must be connected. The female ends of the plugs are captured in the fuselage, but you still need to plug them in. This model doesn’t automatically connect them when attaching the wing. When initially installing the left half of the wing, I found that it did not want to seat fully in the plastic pocket in the fuselage. It required minor sanding on the front to remove a small amount of flashing that was not present on the right half of the wing. The wing halves are retained by four thumbscrews (which is a huge improvement), allowing the wing to be attached and removed without tools. I keep the thumbscrews in one of the parts bags inside the battery area when not in use. Although I didn’t see it mentioned in the manual, the Cub includes two stickers that represent landing lights and can be added to the front of the wing near the location where the struts attach to the wing. I was provided a 6S 5,000 mAh LiPo battery to power the Cub and, thanks to the removable, multiposition tray, balancing the model on the center of gravity (CG) range of 105 to 120 mm was not an issue. I put a small piece of Velcro on the bottom of both wing halves to mark the CG. Even after attaching the two Velcro straps as tightly as possible, the battery was still able to move slightly in the tray. I cut a piece of nonslip shelf liner to match the battery and put it at the bottom of the tray, which stopped the battery from shifting.Image

Horizon Hobby has perfected safely fitting model aircraft in the smallest box possible and has done so damage free.
Flying
It is likely clear from looking at the tundra tires that this model is happy to fly from paved and unpaved surfaces. In fact, the softer tires even minimize the bounced landings that were associated with the previous Carbon-Z Cub. I really appreciate the versatility because I fly at the International Aeromodeling Center at AMA Headquarters in Muncie, Indiana, and the Cub can be easily flown at several of the sites. It is capable of short-takeoff-and-landing (STOL) operation if you want to get airborne quickly. I typically use half flaps and slowly advance the throttle to get in the air with a scalelike look. I increased the flap, mixing a bit from the stock setup because the Cub still wanted to balloon with flaps deployed. When it is in the air, the orange scheme really stands out and helps with orientation if you are flying in lower light conditions. The low rate setting provides plenty of throw for basic aerobatics and comfortable flight. The rudder is effective and, as with all Cubs, coordinating rudder with your turns is not mandatory, but it sure makes them look better. The Cub is stable and, with the help of AS3X, it doesn’t have any bad tendencies when forced into a stall. It simply drops the nose slightly and keeps on flying. Knife-edge flight can be done in both low or high rates, and the model does pull slightly to the canopy. This is easily corrected with slight down-elevator. Slight down-elevator is also required for inverted flight and the Cub makes it easy to maintain. Snaps, rolls, stall turns, and just about anything you want to throw at it all fall within the Cub’s repertoire. If you feel the need to hover the Cub, it is capable of doing so; however, the vertical performance doesn’t rocket out of a hover, so you have to stay on top of it. Vertical performance is good, but not unlimited. The Cub has enough in reserve to get you out of trouble, but I find slow flight, touch-and-gos and one-wheel landings the most fun. It also provides a longer flight, which is great if you don’t have several larger batteries. When it’s time to land, I find half flaps or no flaps are my go-to options. Simply line up the Cub and slowly reduce the throttle while holding slight back pressure on the elevator. The Cub, with its softer tires, will reward you with nice landings. I keep my flight times at 6 minutes for aerobatic flights and 7 minutes for more relaxing flights on the 5,000 mAh LiPo battery.Image

The wing halves slide over a carbon-fiber wing tube and the aileron and flap servo leads must be connected. The female ends of the plugs are captured in the fuselage, but you still need to plug them in.
Image
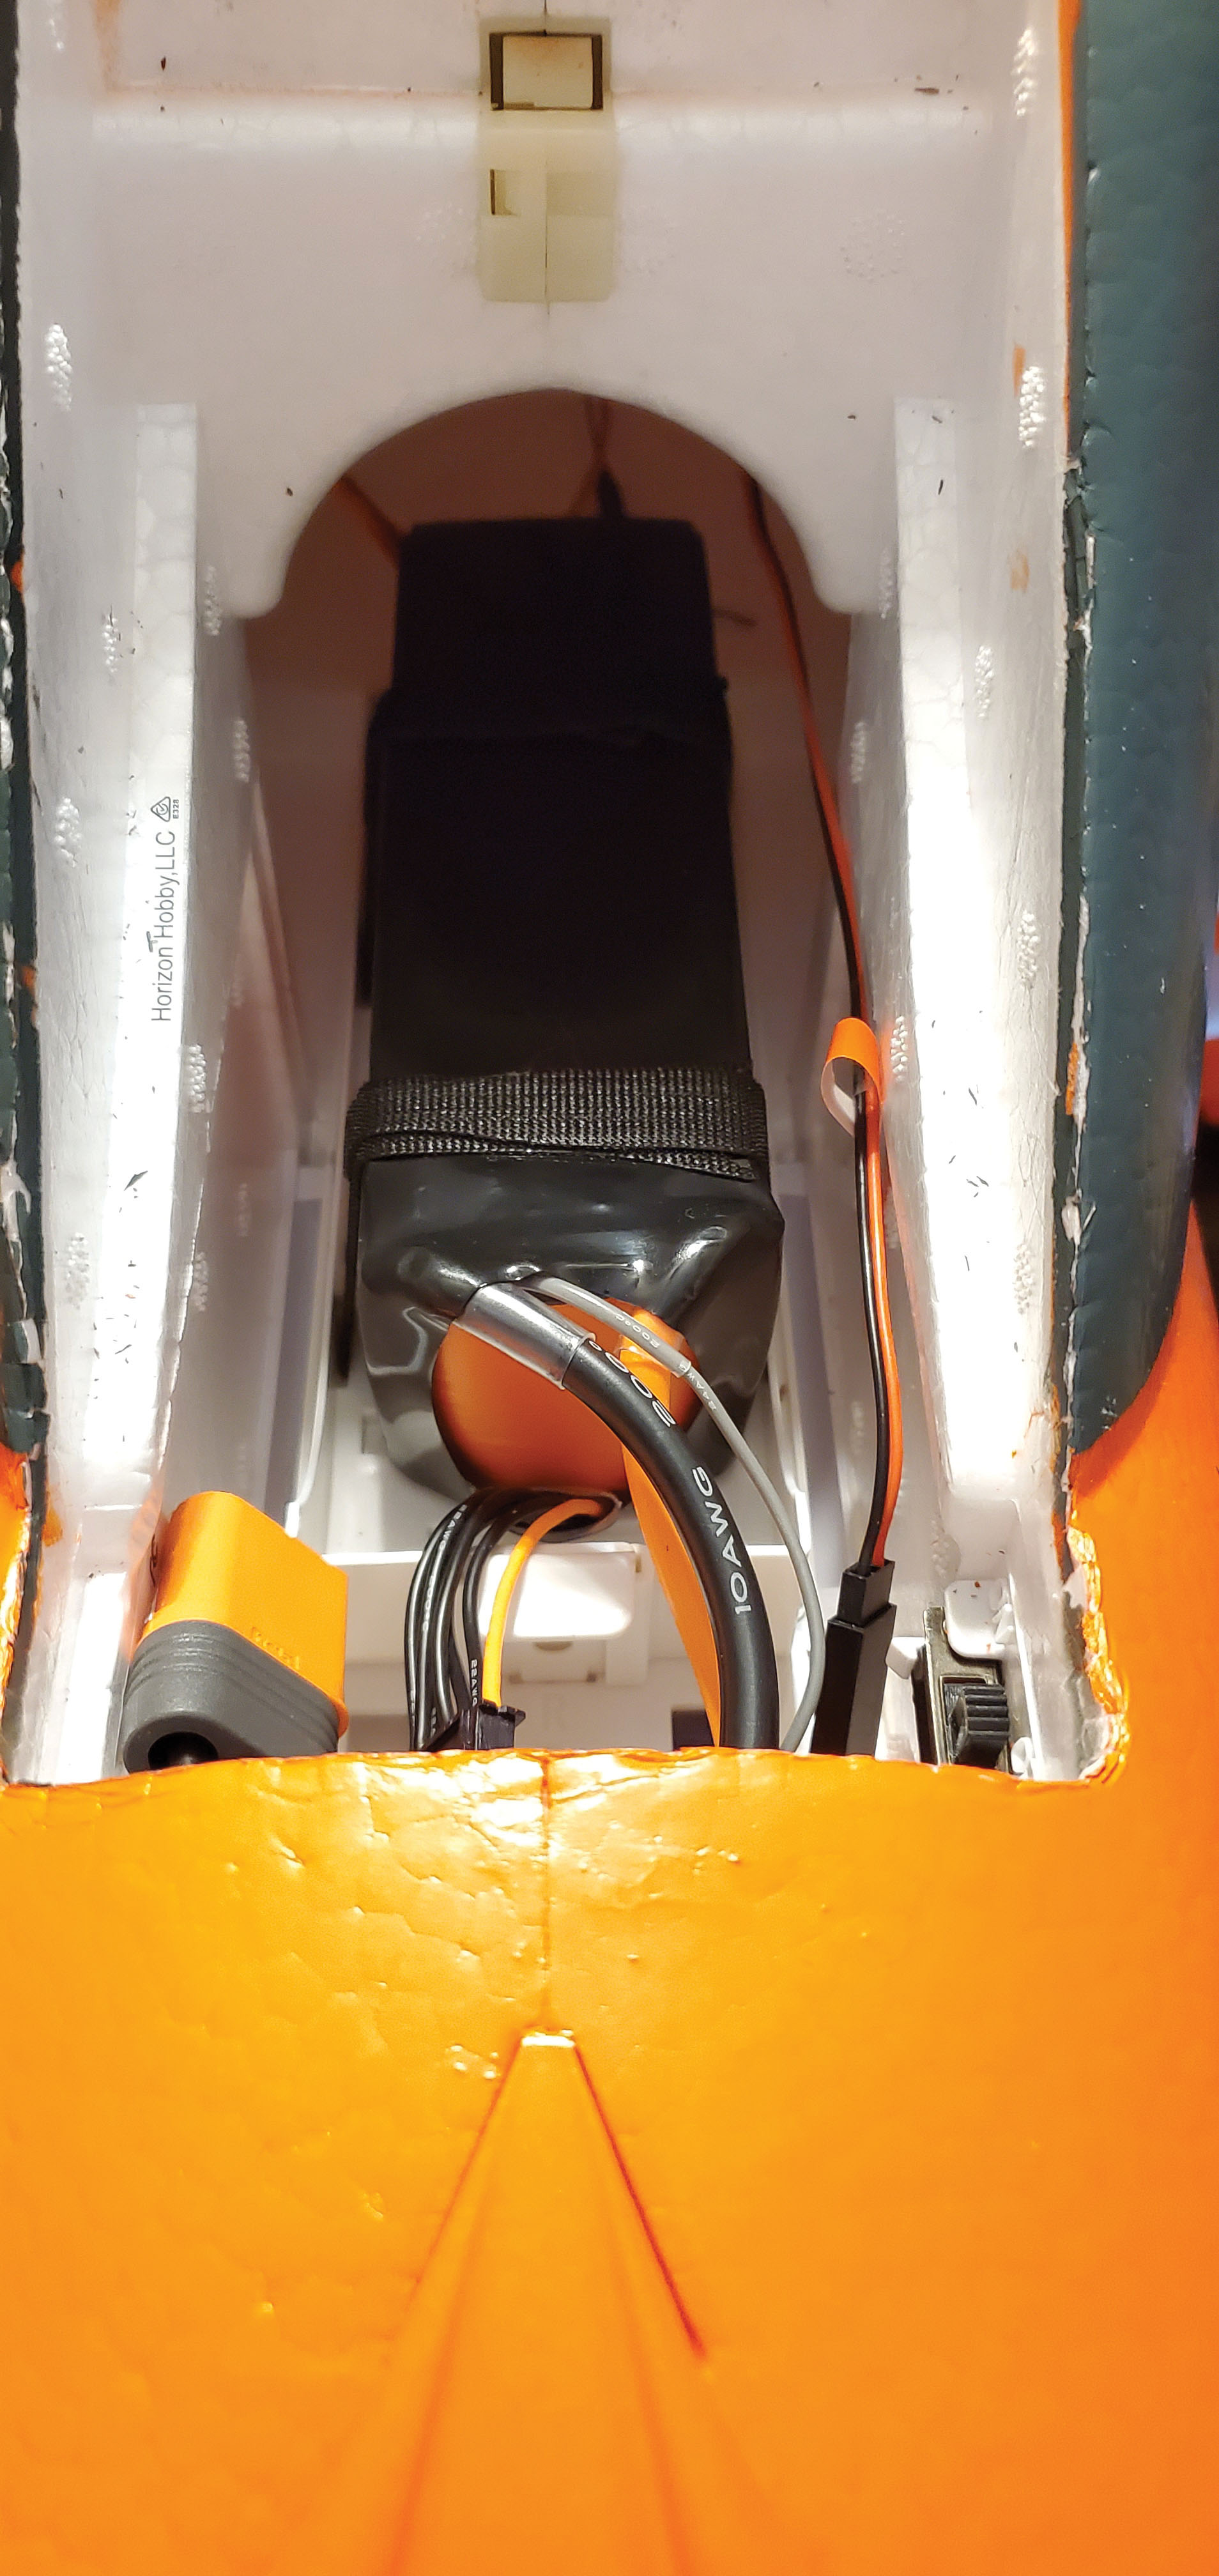
A multiposition, quick-release battery tray makes battery swaps easy. Nonslip shelf liner was put at the bottom of the tray, which stopped the battery from shifting.
Image

A combination of articulated, shock-absorbing landing gear with large tundra tires ensures that the Cub can stand up to imperfect landings or less-than-ideal flying sites.
Image

The Cub requires that the motor be bolted to the firewall and the motor wires be attached to the ESC. The process is easy; however, tucking the motor and ESC wire into the fuselage takes a little care because the ESC takes up a good portion of the available space.
Conclusion
As someone who previously owned the blue Carbon-Z Cub, I find the new version to be a good upgrade and appreciate things such as the removable battery tray, toolless wing assembly and removal, and the color! The Carbon-Z Cub is my go-to airplane for flying from grass, dirt, or less-than-ideal surfaces. It also makes a great Sunday flier. The Horizon Hobby E-flite Carbon-Z Cub SS would make a nice option for someone who is looking to move up to a Giant Scale model without the expense and complexity that can sometimes be associated with larger aircraft.Image


Comments
Add new comment