
Insta360 GO 2 Action Camera
Bonus Video
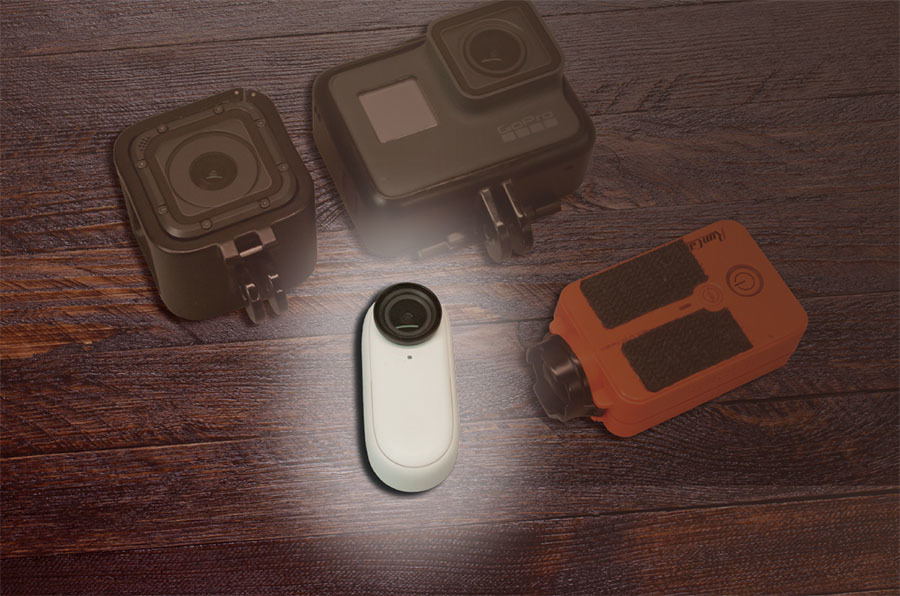
How Big Is It?
The bare GO 2 camera weighs slightly less than 1 ounce (27 grams). Placing the camera in an adjustable mount bumps the weight up to 38 grams. Those numbers might not mean much without comparison to other cameras. My usual onboard camera of choice is the RunCam2. It weighs 49 grams alone and 68 grams in a mount. That is a significant weight difference! Many of my other cameras weigh more than 100 grams. They are practically anvils compared with the GO 2. Weight savings afforded by the GO 2 can be utilized in a few ways. As previously mentioned, this camera will have less of a negative impact to a model’s flight performance than a heavier camera. The light weight of the GO 2 also opens up options for placing the camera on different areas of a given model, while still maintaining an acceptable center of gravity (CG). Finally, the GO 2 can be carried aloft on models that simply can’t carry anything heavier. Another important aspect of the GO 2 is that it has a relatively small profile. Some action cameras have a broad face, which makes them about as aerodynamic as a bulldozer. That could be another source of performance loss for an RC model. The aerodynamic drag of the thumb-sized GO 2, however, is usually not noticeable.About the GO 2
The GO 2 features a sealed housing that is waterproof up to a depth of 13 feet. Although I have never taken mine diving, I have used it on RC boats without worry. Similarly, you can drive through puddles with the GO 2 attached to a monster truck or film a dawn patrol flight while dew still clings to the grass runway. A protective carrying case is included with the GO 2. This clamshell-style case is also used to charge the internal 210 mAh camera battery. It takes roughly 35 minutes to fully charge. The case itself has a built-in 1,100 mAh battery, so you can charge the camera up to five times without requiring an external power source. The case battery is recharged via a USB-C plug and requires 65 minutes to charge. Removing the GO 2 from the case requires you to grasp it by the lens cover and pull against the built-in magnets. This is far from ideal. I would much prefer an option that does not apply stress to the fine screw threads on the lens cover—not to mention fingerprints on the glass. The maximum video resolution of the GO 2 is 2560 × 1440 pixels. It can also shoot at 1920 × 1080 pixels. At either resolution, you can choose to shoot at 30 or 50 frames per second (fps). There are many, many other video options that I do not have the space to address here, so I will summarize by outlining my typical settings. I prefer to shoot in Pro Video Mode at 1440 pixels/30 FPS. Each clip can be up to 10 minutes long. I am able to record approximately 45 minutes of footage to the camera’s integrated 32-gigabyte memory.Mounting the GO 2
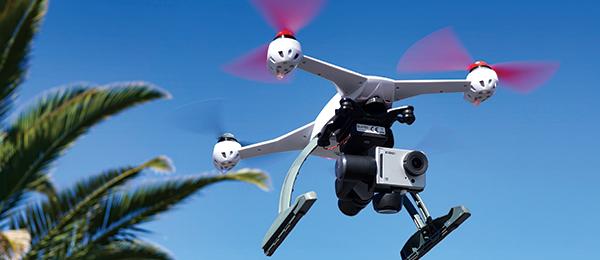
There are countless ways to mount action cameras to airplanes and other types of RC models. You might want to check out my article about that subject in the July 2017 issue of Model Aviation. My favorite mount to use with the GO 2 is included with the Mount Adapter Bundle ($19.99) that is offered by Insta360. It has a ball-joint base that allows the camera to be positioned in various orientations, yet the mount does not budge during highspeed passes and aerobatics. Magnets secure the camera into the mount, but I add a small rubber band as extra insurance. The base of the mount has female 1/4-20 threads. With my foam models, I simply drill a 1/4-inch diameter hole through a wingtip or fuselage panel using a sharpened brass tube and attach the mount with a 1/4-20 nylon screw. This method might seem crude, but it is secure and lightweight. Believe it or not, the holes are surprisingly discreet when the camera is not installed. You can mount the GO 2 (and other cameras) to balsa models as well. One popular option is to use the self-adhesive GoPro-style mounts, which stick well to iron-on model coverings. The Insta360 Mount Adapter Bundle includes some of these types of mounts as well.


Using the GO 2
There are no obvious buttons for operating the GO 2. In fact, the entire bottom part of the camera is a stealthy button. It is up to you to program how that button works. This programming is done through the Insta360 phone app, which connects to the camera via Wi-Fi. A long press of the button will turn the camera on. I have my camera configured so that a quick, single press begins video recording. Two taps of the button will initiate a time-lapse video. It is easy to accidentally press the button during normal handling of the camera, so I make sure to leave the camera powered off until I am ready to use it. The app can be used to provide a realtime preview through the camera lens. I use this function when mounting the camera to a model to ensure that I frame the shot exactly the way I want it. I never have to guess what the camera is seeing. With the camera mounted and the airplane armed, I power on the camera and begin recording immediately before takeoff. I then fly with no special considerations for the camera. Most of my models fly as though the GO 2 is not even there. To use a well-known reference point, an airplane such as the E-flite Timber wouldn’t even break a sweat while hauling around the GO 2 on one wing and a counterbalance on the other. I have flown the GO 2 on models weighing as little as 8 ounces with no trouble. I am sure I could go even smaller. Insta360 claims that the GO 2 has a battery life of 30 minutes per charge. My experience has been that it is closer to 20 minutes. The camera also gets quite warm during use. It will even stop recording if it gets too hot. Because of these limitations, it is not practical to use the camera for back-to-back flights. I have learned to allow a few minutes for it to cool down and recharge between each use.


Editing the GO 2 Footage
The GO 2 and the Insta360 app are designed to let you capture video and immediately upload it to social media with your phone. Although convenient for other users, that workflow doesn’t jibe with the way I like to use onboard RC footage. I prefer to edit videos on my home computer before sharing them. Uploading video from the GO 2 onto my computer is easy. I place the camera in the case and connect it to my laptop with a USB-C cable. I can then drag and drop the files. After the video files are on my hard drive, they must be processed through the Insta360 Studio program. I then export the processed clips as MP4 files, which can be viewed or edited the same as any other video file. Insta360 Studio does allow you to do some basic editing, such as trimming the length of a clip, adjusting the aspect ratio, or changing the resolution. The most powerful tools in Insta360 Studio are the stabilization options. These allow you to damp out jitters in the footage and often make it more enjoyable to watch. Two of the stabilization options are FlowState and FPV. FlowState stabilization keeps the horizon level, even as the airplane banks and rolls. FPV stabilization allows the horizon to change with the bank of the airplane. Depending on the specific footage, I might prefer to enable FlowState stabilization, FPV stabilization, or none at all. You can export a clip all three ways if you choose. The video quality from the GO 2 is impressive. The focus is crisp and colors appear natural. I think that direct sunlight usually provides the best results, but I have achieved nice footage during cloudy days and sunsets. Although there are other action cameras that weigh the same or less than the GO 2, I have not seen any that can produce comparable video quality. It is not even close! Unless you like wind noise, the GO 2’s built-in microphone is usually pointless for onboard flights. You just get a lot of wind noise. The mic can be useful when using the GO 2 on surface vehicles or other RC applications (see the Hat-Cam Option).Final Approach
Recording onboard video is a fun way to gain new perspectives from your RC models. The Insta360 GO 2 offers a lightweight camera option that also provides excellent high-definition video quality. Although it is necessary to keep a close eye on the charge state and temperature of the camera, those facets are easily managed. Overall, the GO 2 is an impressive camera that opens up new possibilities for in-flight video.


SOURCES:
"How To Mount Action Cameras to Your Model" Model Aviation, July 2017 www.modelaviation.com/mounting-action-cameras By Terry Dunn | [email protected]Photos by the author


Comments
Add new comment