Written by Terry Dunn
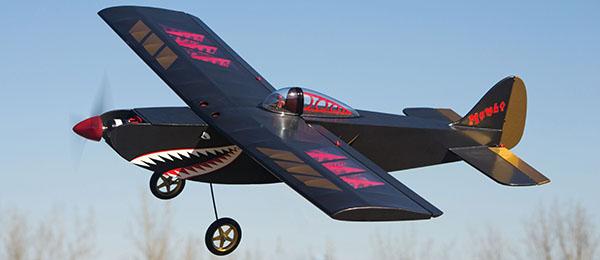
Old School Model Works Mambo
As seen in the June 2020 issue of Model Aviation.
Bonus Video

At a Glance


- Uses E-flite Apprentice parts.
- Great balsa.
- Sporty performance.

- Some challenging build areas.

Image

Building the Mambo
A kit for beginners deserves to be seen through the eyes of someone new to the hobby, so I passed the kit to my friend, Mark Gustas. He caught the RC bug approximately a year ago, and his affliction appears to be incurable. Mark is the type of eager, motivated newcomer who keeps the hobby alive and interesting for the rest of us. In addition to giving Mark the kit, I offered to help him if he hit any trouble spots along the way. He returned two weeks later with the Mambo completely framed up and ready for covering. He did an excellent job of putting the aircraft together. Mark relayed that he was particularly impressed by the quality of the kit’s balsa and the overall clarity of the instruction manual. Although he never asked me for help during the build, he did confess to a few head-scratchers that he was able to sort out on his own. He had trouble installing the kit-supplied CA hinges on the tail feathers. The stabilizers and control surfaces are made by laminating two pieces of balsa. Creating slots for the hinges required Mark to cut entirely within the glue joint where the top and bottom laminations meet, which wasn’t easy to do. After a few false starts, he ditched the supplied CA hinges and switched to Robart Manufacturing hinge points. Another area that slowed Mark down was installing the rudder and elevator pushrods. He used Du-Bro Lazer Rods, which worked perfectly. His issue was that the manual did not provide specific guidance for mounting any type of pushrods. It took some time to figure out an acceptable configuration. One final hiccup that Mark mentioned regarded the optional canopy. The included vacuum-formed piece is a nice accent on the finished model, especially with the decorative internal framework. His concern was that the canopy must be split into front and rear segments. Doing so required some precise cutting, fitting, and gluing that might be challenging for some new builders to handle. Mark took the Mambo back to his workshop with a selection of covering materials. He downloaded three-view drawings from the Old School Model Works website to sketch out ideas for the color scheme. He knew that he wanted to show off the Mambo’s unique wing ribs, so he sealed and painted a section of ribs in each wing half. He then covered those areas with clear, iron-on film. The rest of the Mambo received flat black covering with gold accents. All of the lettering and shark’s teeth graphics are made with iron-on covering that Mark cut with a Cricut cutting machine. The completed model is quite stunning. My sessions with Mark before and after he applied covering allowed us to discuss a few different topics to expand his modeling knowledge. For instance, he originally had the elevator and rudder set with excessively large hinge gaps. I relayed the potential pitfalls of such gaps and offered a few strategies to correct the Mambo. Although the Mambo can be built (and built well) by a relatively new hobbyist, I think the overall experience and the end product can benefit from a little coaching by a mentor. The manual can’t possibly cover all of the variables that a rookie might encounter. A small, corrective nudge can create a positive impact. At this rate, it will not be long before Mark is advising me!Image

Image

Image

What About SAFE?
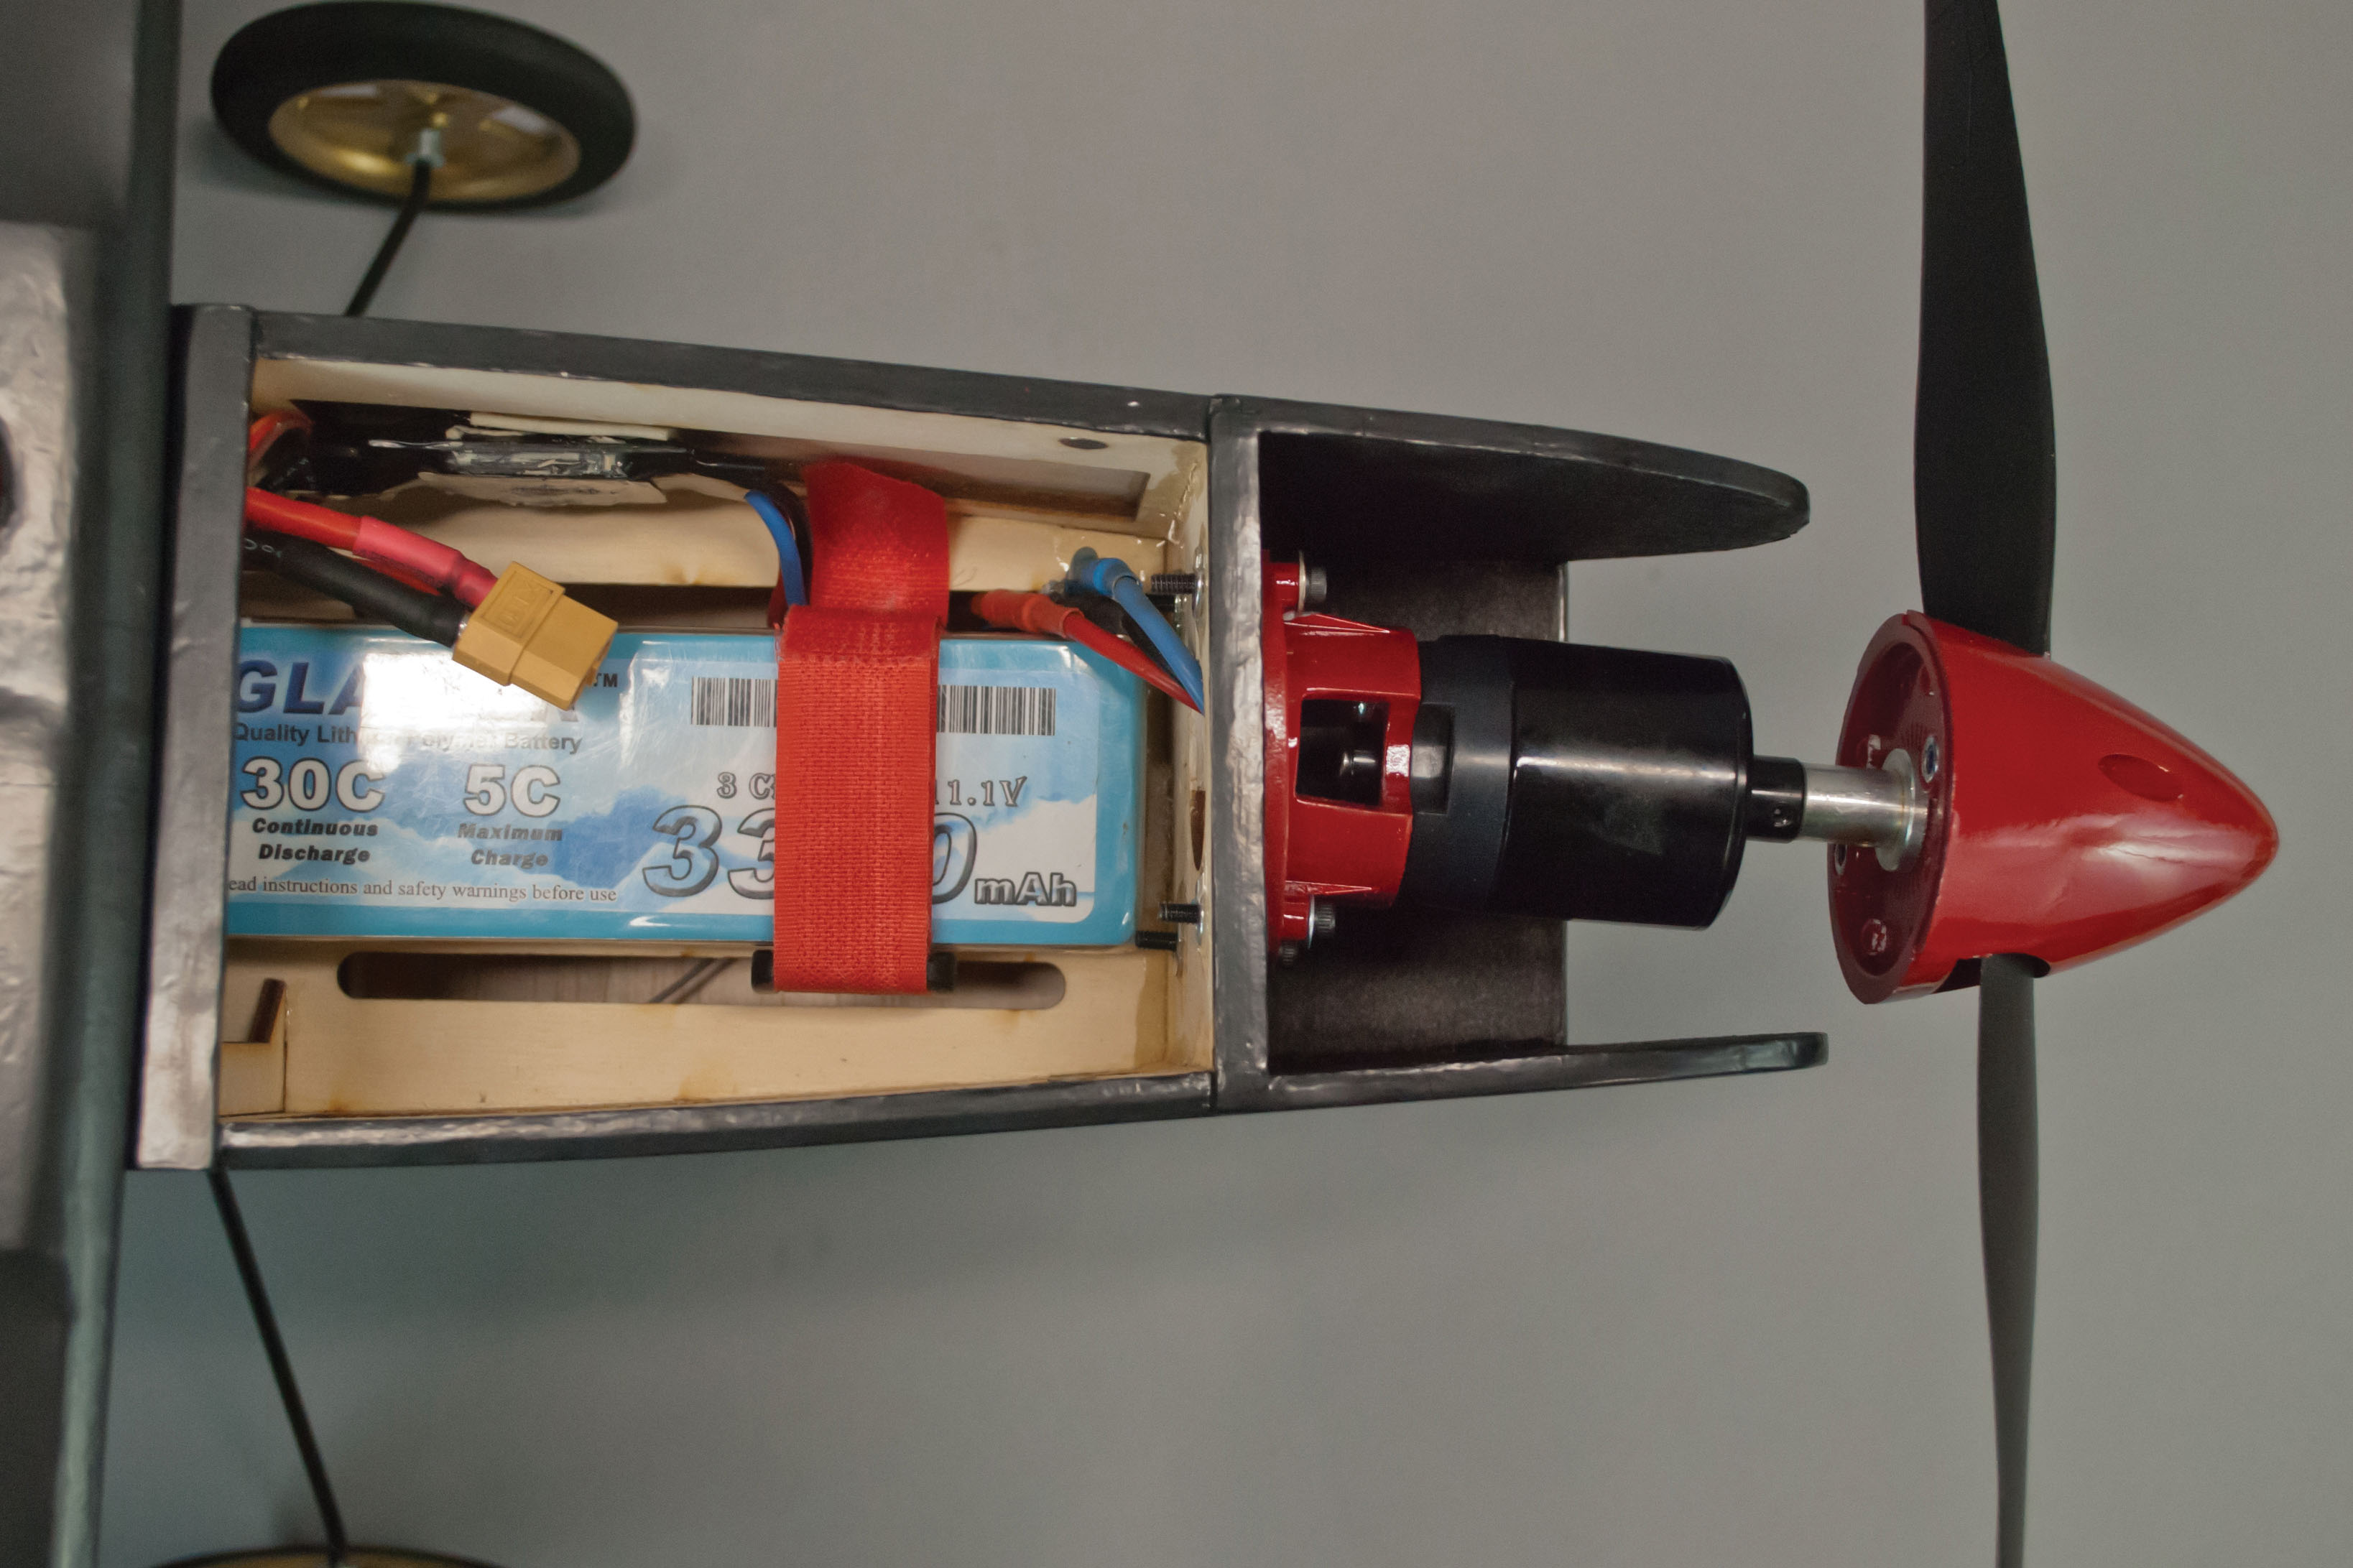
The electronics used in Mark’s Mambo were pulled from a first-generation Apprentice. Modern variants of the Apprentice are equipped with receivers that have SAFE Select flight stabilization. Although a SAFE-equipped receiver can certainly be transplanted into the Mambo, doing so requires greater attention than using a typical "dumb" receiver. If you wish to keep SAFE active, you must ensure that the receiver is mounted correctly and that all of the servos react in the proper direction. You might also choose to adjust the gyro gains or disable stabilization completely. Adjustments can be made to the SAFE system with Spektrum’s programming app and a programming cable (part SPMA3065) or Bluetooth interface (part SPMBT1000). Because Mark did not use a SAFE-equipped receiver, we have no specific setup advice to offer.More Power!
The stock power system for the Apprentice includes an 840 Kv brushless motor, 30-amp ESC, 11 × 8 propeller, and a three-cell 3,200 mAh LiPo battery. This setup produces approximately 250 watts of power. That would be sufficient to fly the Mambo with a respectable amount of zip, but there is headroom to safely produce significantly more power. The easiest way to get additional power is a simple propeller swap. Mark and I experimented with several propellers. Our best results came with an APC 12 × 8E propeller that boosted the power output to 342 watts at 29 amps. It’s a nice setup for the Mambo.Image
Image

Flying the Mambo
With wide-track main gear and a steerable tail wheel, ground handling poses no problems. I think the Mambo will make a good first tail-dragger aircraft for many pilots. There’s no need to be dainty with the throttle on takeoff. A smooth and relatively quick transition to full throttle results in a rapid, straight departure with little rudder correction necessary. Using the 12 × 8 APC propeller, the Mambo is capable of strong climbouts. With that noted, this airplane is certainly not overpowered. The model’s top speed is a few notches above an Apprentice. The Mambo settles into a comfortable groove at 1/2 to 3/4 throttle. It flies at a moderate speed with smooth, positive control response. Turns look best when they are coordinated with rudder. That should encourage new pilots to loosen up those left thumbs! You can also set up an aileron-rudder mix to do the work for you. I configured a mix in Mark’s Spektrum DX9 transmitter. It’s fun to engage the mix for relaxing, lazy circuits with the Mambo. The suggested center of gravity location has been working well. Stalls are gentle and predictable. In fact, you really have to throw the sticks around to coax the Mambo into a spin. Although the Mambo is no RC Aerobatics aircraft, it is fun to toss around through basic aerobatics. Rolls are surprisingly quick, but not quite axial. Loops are stress free. Inverted flight is also in this model’s repertoire. We noticed that Mark’s Mambo requires different pitch trim at various throttle settings. The manual recommends using washers to remove some of the down-thrust built into the Apprentice’s motor mount. I suspect that making this suggested thrust-line adjustment will cure the trim issue. Flying with the four-cell battery setup provides a nice performance boost. Climbs are brisker, and top speed creeps up a bit as well. It’s like adding a dash of spice, but frankly, if you can’t have fun flying the Mambo on three cells, you’re just not trying.Final Approach
The Old School Model Works Mambo was designed to be an ideal second airplane. It is not, however, limited to newer pilots. The Mambo can be enjoyed by anyone who is looking for an introduction to sport airplane performance and the joys of traditional balsa building. I love the fact that it makes use of electric components that might otherwise go unused and forgotten. Remember this: Old trainer models never die; they just get cannibalized to equip sportier new airplanes. SOURCES: E-flite (800) 338-4639 www.horizonhobby.com Spektrum (800) 338-4639 www.spektrumrc.com Cricut (877) 727-4288 www.cricut.com Robart Manufacturing (630) 584-7616 www.robart.com Du-Bro (800) 848-9411 www.dubro.com APC Propellers (530) 661-0399 www.apcprop.comImage


Comments
Great review! Looking forward
Great review! Looking forward to building one!Thanks.
Add new comment