E-flite Ultimate 3D Smart BNF Basic With AS3X and SAFE
Image
Written by Jay Smith
If You Enjoy Biplanes And Aerobatics, This One Is For You!
As seen in the June 2021 issue of Model Aviation.
Review
Image
The E-flite Ultimate might have 3D in its name, but it is more than capable of suiting those looking for a sport flier, precision aerobat, or 3D aircraft.THE E-FLITE ULTIMATE BIPLANE IS not the first foam-constructed Ultimate to be released by Horizon Hobby, but it appears to be the best one yet, with more power and motor reversing. It is based on the E-flite Ultimate 2 that was released in 2015. Beyond some upgrades to the power system and electronics, I think the color scheme is more to my liking, especially the checkerboard pattern on the bottom of both wings.
The model comes well packaged and with a high level of completion right out of the box. Assembly requires only a Phillips screwdriver and a wrench. I opted to remove the propeller for safety until the model was complete and found that the propeller nut would have needed to be tightened slightly.
Installing the landing gear is the first step. The premounted wheels and wheel pants offer a giant head start. The parts bag includes the three screws to mount the gear, as well as the screw for the spinner.
After it is on its wheels, it is time to install the horizontal stabilizer. At this point, a decision must be made as to which of the tail tubes will be used. The Ultimate 3D includes two tail tubes to accommodate the use of a 3S or 4S LiPo battery. The lightweight composite tube is recommended to achieve the correct center of gravity (CG) when using a 3S battery. The metal tube (which is .6 ounce heavier) is recommended to achieve the correct CG when using a 4S battery.
Image
As is common with E-flite aircraft, the Ultimate comes out of the box with little assembly required. Only a Phillips screwdriver and a wrench are needed to assemble the airframe.
Image
The hatch is accessed using the button behind the opening. The battery compartment accommodated the 3S and 4S Spektrum Smart 2,200 mAh LiPo batteries without issue, but larger-capacity batteries might present a problem.
I decided to go with the metal tube, but I found it to be a tight fit. The composite tube fit easier, so I pushed it through a couple of times then inserted the metal tube. The horizontal stabilizer halves are easily installed and held in place by the included clear tape. If you don’t want to get fingerprints on the tape, you can stick the edge of the tape to the side of a hobby knife. It can make placing the tape easier because it is smaller than using fingers.
The next step is to attach the elevator linkage and ball link; however, I decided to wait and install them when I connected the top and bottom wing ailerons.
Attaching the wings is super simple. Starting with the bottom wing, connect the two aileron servo connectors to the Y harness then align the bottom wing mounting pins with the mounting plate, ensuring that you don’t pinch the servo wires. The locking pin is all that is required to secure the wing, turning it 90° to lock it into place.
Before installing the bottom wing, be sure the bind plug extension is routed into the battery compartment. Mine was not and I had to remove the wing to make that happen. The top wing aligns with the center mounting post and uses the same locking pin with a 90° twist to lock it into place.
The left- and right-wing struts are easily put in place, but the pins (they are called wing pins in the manual but are listed as strut wire clips on the website) that secure them are not as simple to attach. If you watch Jason Merkle’s overview video of the Ultimate on the product page on the Horizon Hobby website, you will see him struggle to get one of the pins in after removing it. I experienced the same issue.
Although not difficult, it does take some effort to get the pins to lock in properly. After they are correctly installed, they should be roughly in the middle of the opening that they slide into vertically from top to bottom. The struts should be firmly attached to the wings with no gaps between the two. I appreciate the effort that was made to allow the wings to be more easily removed if required. Linking the ailerons was next, and I also connected the elevator pushrod at this point.
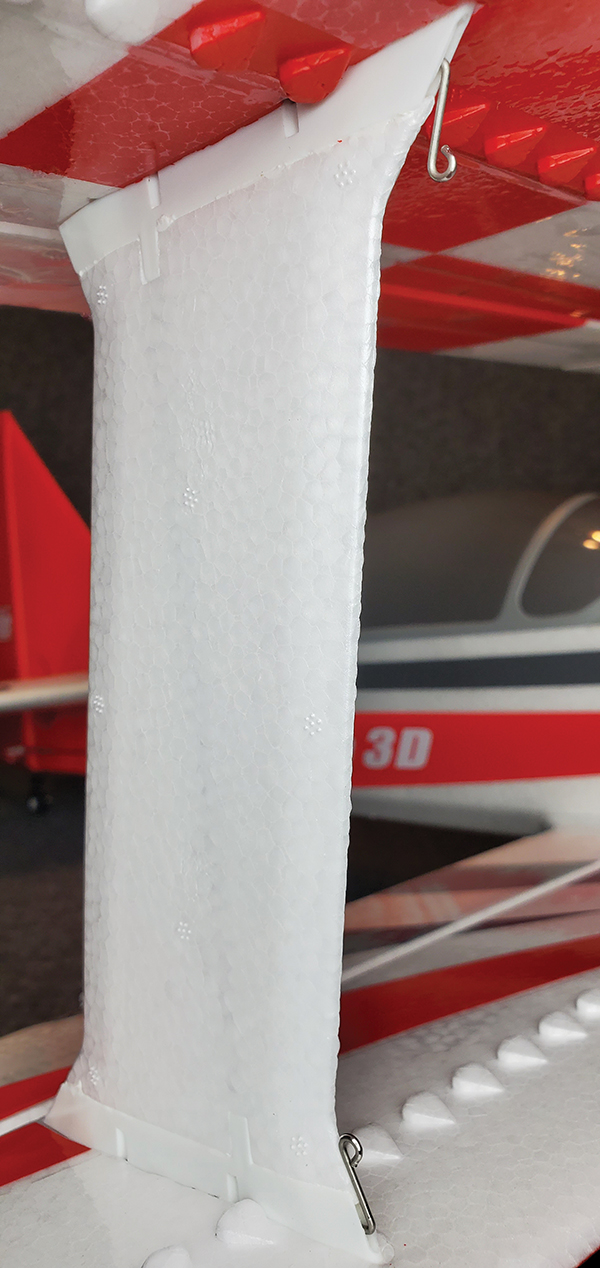
Image
The pins that secure the wings and struts together require attention when installing them. They should be roughly in the middle of the opening that they slide into vertically from top to bottom. The struts should be firmly attached to the wings with no gaps.
Image
Included are two tail tubes, one of which will be selected to attach the horizontal stabilizer halves. The lightweight composite tube is recommended to achieve the correct CG when using a 3S battery. The metal tube (which is .6 ounce heavier) is recommended to achieve the correct CG when using a 4S battery.
I opted to download the radio setup file for the Ultimate from the Spektrum website. You have two from which to choose: one with motor reversing and one without. I downloaded both but received an error when trying to import the file without motor reversing. This might have been resolved if I had downloaded it again, but I opted to use the other file with servo reversing.
One thing that I appreciate is having the throttle cut already enabled and assigned to a switch in the setup file. I highly recommend using the throttle-cut feature when flying electric aircraft to prevent accidentally activating the motor.
When you bind the aircraft, you have two options, depending on whether you want to enable SAFE. Optional-use SAFE Select offers pitch and bank angle limits along with automatic self-leveling that can be turned on and off at the flip of a switch.
I installed the propeller and spinner, which are a great match to the airplane, then it was time to check the CG. The battery bay can accommodate the 3S or 4S 2,200 Spektrum Smart batteries; however, fitting anything larger than 2,200 mAh 4S batteries could be challenging.
Flying
The setup file for the Ultimate comes with three settings for dual rates: 50%, 75%, and 100%. I highly recommend having triple rates because the low rate is plenty for sport flying and precision aerobatics. The higher-rate settings are only needed for 3D flying or if you enjoy a fast roll rate.
If you are looking to fly the Ultimate as a sport flier and don’t need the extra power of a 4S system, I would recommend the 3S battery to keep the model roughly 2.5 ounces lighter. It also makes the batteries less expensive and you might already have some on hand. It is still fully capable and, depending on the surface throws, it can be tame or extremely aerobatic. The vertical performance is acceptable with 3S power.
The aircraft flies happily upside down, right side up, or in any other orientation. It locks into knife-edge flight quite well. Mine pulled slightly toward the canopy, but not enough to worry about using mixing to correct it.
The Ultimate performs nice stall turns and is comfortable in upright and inverted harriers. Uplines and downlines track well and it was easy to become comfortable flying this model and putting it through its paces.
Using the 4S battery provides unlimited vertical climbs and lets you pull out of a hover with authority. I typically opt for the lighter-weight setup, but I prefer flying the Ultimate on 4S power and, because it’s a biplane, there is a little more drag. The extra wing loading keeps a pilot from noticing the minor weight difference.
Stall-testing found the Ultimate to be well behaved, with no tendency to drop a wing. It simply dropped the nose slightly and kept on flying.
When it comes to landing the Ultimate, I have seen some people chop the throttle completely before landing. I prefer to slowly reduce the throttle with slight up-elevator and keep airflow from the propeller over the control surfaces until landing. You definitely don’t need to worry about it rolling too far after landing if you use the motor reversing.
Conclusion
The E-flite Ultimate 3D is an enjoyable aircraft to fly, and its size makes it easy to transport and store the model. Although it has 3D in its name, the Ultimate would also serve biplane fans well as a sport flier or to fly precision-type aerobatics.
The power system is versatile with 3S and 4S capability, allowing pilots to outfit the model to meet their needs. The Smart power system allows pilots who have a Spektrum transmitter easy access to telemetry features that many will find useful. On one occasion, it prevented me from flying with a battery that was only 60% charged with a helpful warning.
If you enjoy biplanes and flying aircraft with good aerobatic capabilities, the Ultimate is a solid contender.
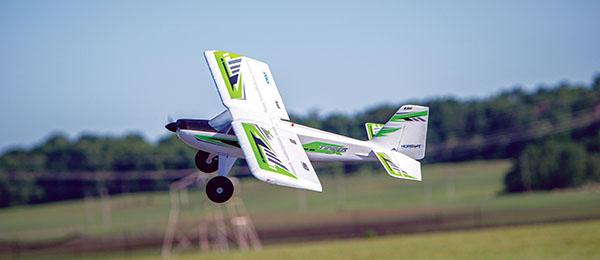
Image
The E-flite Ultimate, with its attractive color scheme, stands out on the ground and in the air. The checkerboard pattern on the bottom of the wings is a nice touch.
Written by Jon Barnes A durable aerobatic biplane to grow with Abridged product review Photos by the author Read the full product review in the April 2016 issue of Model Aviation. Specifications Model
Written by Jay Smith Horizon Hobby E-flite Timber X 1.2m BNF Basic with AS3X and SAFE Select Review As seen in the September 2019 issue of Model Aviation. At A Glance Specifications Type: Foam
Written by Terry Dunn Everyday aerobatics with two wings Abridged product review Photos by the author Read the full product review in the January 2016 issue of Model Aviation. Bonus video
I’m on my second Ultimate 3D Bi plane. I glued my first one back together about a half dozen times. It’s a tuff plane. I did a cart wheel on its wing tips down the runnyway. It landed on its wheels and was heading for the fence. I gave it full throttle and full up elevator, and it was back in the air. My new one flies so much batter. No glue. Yet.


Comments
I’m on my second Ultimate 3D
I’m on my second Ultimate 3D Bi plane. I glued my first one back together about a half dozen times. It’s a tuff plane. I did a cart wheel on its wing tips down the runnyway. It landed on its wheels and was heading for the fence. I gave it full throttle and full up elevator, and it was back in the air. My new one flies so much batter. No glue. Yet.
Add new comment