
Written by Paul Kohlmann and Derek Micko
Scratch-building and flying opposing aircraft
Construction
As seen in the December 2018 issue of Model Aviation.
Bonus Video
Derek Micko and Paul Kohlmann have designed a pair of 60-inch built-up balsa warbirds representing aircraft that met in combat. Derek chose the Polikarpov I-16 Rata while Paul selected the Curtiss P-36/Hawk 75. This is the third and final installment of the series. Part One can be found here, and Part Two can be found here with free, downloadable plans. In this article, Derek will complete the framing of the Curtiss P-36’s wing so that he can focus more on the retracts and details that are specific to the aircraft.
Download free plans
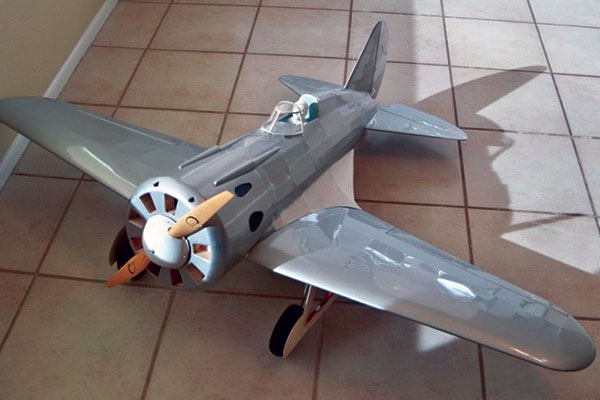
Image

Polikarpov I-16 Rata
Full-size plansDocument
Document
Document
Document
Tiled plans (8.5x11" pages)
Document
Document
Document
Document
The I-16 Rata
Last month, I covered building the horizontal stabilizer and most of the fuselage. This month I will finalize the construction and finish.Framing the Wing
The wing is built in three sections: the center and the two outer panels. Prepare for the build with several subassemblies by gluing the wing mounting plates together, A/Bs to W-1 (making sure to make a left and a right version), retract plates, the TE (a composite of balsa and 1/8-inch square basswood glued to the “inside” edge to allow for more rigidity and less warping), and the wing spar 3 (also of composite construction, a 1/8-inch balsa spar with an 1/8 x 1/4-inch basswood plank glued to the bottom). The ribs and spars have tabs to help create a warp-free wing while building in the correct washout.Image

Image

Left panel framing and sheeting of the wing.
When viewing the I-16 in the “front” view, the top of the wing is flat. The dihedral is made from the bottom wing line. Because of this, the wing is built upside down as one piece, flat over the board. There is a 1/8-inch square stringer that is used for alignment on the plans. Cut and pin this to the board. Dry fit all of the ribs into wing spars 1 and 2 and set them on the 1/8-inch square stringer over the plans. The retract plates “key” into W-2, WS-1, and W-3. Bevel the front edge and the rear edge to match the angles on WS-1 and to mate flush with WS-3 (to be added later). Titebond was used on all of the main wing assemblies and construction. Add the 1/4-inch square basswood stringer between W-2 and W-3 in front of WS-1 and the retract plate. Mark WS-1 where it needs to be trimmed for the retract and cut this away with a Zona saw. Drill the holes for the retracts and temporarily mount them. Fill in with block balsa scrap around the retract unit and then sand to match the rib contour. This will allow for a better surface when sheeting later. Next to build are the outer panels. Test fit the ribs into WS-3, fit the spar assembly into the center section, and slide the aileron pieces into place with scrap 1/32-inch balsa between them. When satisfied with the fit, glue and pin to the board. Add the 1/8-inch square basswood stringers to the top and bottom.
Image

The main wing construction is complete.
The outer LE “keys” into the ribs and is glued in place. It is sanded to match the contour of the ribs. The top and bottom of the wing are sheeted from WS-3 forward with 1/16-inch balsa. Cut a rough shape that is approximately 1/2-inch to 3/4-inch wider than what’s needed. This allows for overhang and can be taped/pinned down when gluing to the ribs. Mark the cutout area for the retracts and remove this area before gluing in place. Use Windex on the top surface when gluing. The ammonia helps make the balsa pliable and if you wet the “outside,” it curls in the correct direction. The TE is slid and glued into place at this time. The other panel is built the same way. Glue wing mounting plate-3 (WMP-3) in place and remove the wing from the board. Add the remaining 1/8-inch square basswood stringers, top outer sheeting, LEs from 1/2-inch balsa triangle stock, and wingtips from laminations of 1/4-inch balsa. The remaining bottom sheeting is now added and the wheel wells are cut out. The LE center section bottom is blocked in with scrap, as is the wing mounting bolt area in the front. The LE is then sanded to a round contour per the plans.
Rudder and Cowl
The rudder and cowl are straightforward and built by referring to the plans. Before gluing the cowl rings in place for final sanding, test fit the motor, a Turnigy 42. (A 42-58 500 Kv was used on the prototype and provided plenty of power.)Hatch and Belly Pan
The wing was set in place over the fuselage and checked for alignment. When squared, drill holes for the four 4-40 bolts and their brass inserts that are mounted in the battery mounting plate (BMP) and WMP-3. With the wing mounted, the hatch work is next. The hatch rail is made from three pieces glued together using the plans. Lay waxed paper over the battery/wing mounting plate and align the hatch rail with some plastic tubing or dowel (this will be removed when the 1/8 x 1/4-inch magnets are added).Image

Image

Framing of the hatch and belly pan details.
Next, F-2A and F-3A are set in place and glued. Add F-1A and the hatch keel. When it is dry, remove and epoxy the magnets in place. They will be mounted in both the hatch rail and the battery/wing mounting plate, so polarity will need to be checked. The hatch is placed back in place and the 3/16-inch stringers are added. At the bottom, between F-2A and F-3A, there is a piece of 1/8-inch balsa that is cut using a template on the plans. The hatch is sheeted with 1/16-inch balsa using a template. Some fitting is required so the wheels can clear the sheeting when extending. Take time to ensure that there is a fair amount of clearance. The belly pan construction is similar to how the hatch was built. Review the plans for construction and utilize the templates when sheeting with 1/16-inch balsa.
Wheel Wells and Retracts
The wheels used for the prototype need to be 4.5 inches in diameter and as thin as possible to be scale and to fit into the wing. Dave Brown Products Lite Flite Wheels (part # WR45-5745) are the right diameter but are still too thick. They are roughly 1.5 inch and need to be closer to 1 inch. The wheels need to be “thinned.” Separate the hub into two pieces (one slides over the other) and trim these parts to allow them to be narrower. Using the treads on the tire as a guide, shave off approximately 1/4 inch of the outer foam from each side using a large kitchen knife. Sand the foam tire with a large sanding block until the face of the tire is smooth and reassemble the hub. The details on the plans will help you visualize this process.Image

Image

Center-section and retract details.
The retracts used are 3.5 kg no-name clones with a 5/32-inch piano wire strut and axel (Great Planes GPMQ4281). This strut is the “functional” strut and does all of the work. The rear strut is cosmetic and for that reason, it does not need to be overly strong. This rear strut was made from three sizes of soda straws or aluminum tubing—one 7/32 inch, one 5/32 inch, and one short piece of 5/64 inch. The 7/32 and 5/32 size are not overly critical, as long as the smaller one slides into the larger one freely. The ends of the outer and inner straws have holes punched in them and their ends are rounded. The outer straw has the mounting bolt for the axel passing through the punched hole and is secured with that bolt. There is a small assembly of plywood, balsa, and a screw that the inner straw mounts to. Then the smaller one slides into the larger one and the entire assembly is set in place. Review the plans for additional clarification.
Image

“Thinned” tire and strut assemblies.
Gear Doors
To help the gear doors stay in line during flight when extended and lie flat against the wing when retracted, the doors need to be mounted in a nonconventional manner. The main door is still connected to the strut, but it allows the door to swivel/rotate during extension and retraction. When extended, the door will push against a tab or fence that aligns it with the direction of flight, and during retraction the wheel well pushes it flat. There are two 1/8-inch Lite Ply door-mounting tabs for each strut that have a 5/32-inch hole in them. Glue a 5/32-inch wheel collar to this and remove the setscrew.Image

Image

The gear-mounting tabs are in place and the door is attached.
With the strut retracted into the wing, the door mounting tabs slide into place approximately 3/4 inch in from each end. These tabs were intentionally cut too long, and a straightedge was laid across the wheel well to mark the correct height. Then these were cut. The main gear door was made from two pieces of 1/32-inch plywood glued together cross-grain with epoxy. This resulted in a lightweight, but stiff door. Titebond was added to the tops of the door mounting tabs and the door was set in place. The rear strut (plastic soda straw) has a door that is similarly mounted. Review the plans details. The alignment tab/fence was made per the plans from the 1/8-inch Lite Ply parts and was customized to fit each side to ensure a good fit.
Fillets and miscellaneous items
Using scrap 3/32-inch balsa, “in-fill” between stringers behind F-4A and behind the wing saddle (per the plans) to provide some additional strength and more surface area for the covering to attach to. The wing fillets are added next. The main piece is cut from cardstock and set in place between the wing and fuselage, with waxed paper over the wing to prevent any wandering glue from making this a one-piece model. Next, there are five balsa “ribs” that were made from 1/8-inch balsa and glued in place. I also added a 1/8-inch square stringer. The plans provide both the cardstock and the rib templates. These are starting points that a builder will need to fine-tune for his or her model.Image

Image

A cardstock wing fillet with ribs and the completed top section.
Starting at the rear, add the three main top pieces, allowing them to overlap if needed. The last bit at the front was made from balsa scrap sanded to shape. The model was then flipped over in the stand and a scrap piece of 1/8-inch balsa was added just behind the wing TE and flush with it. The bottom rear fillet piece was added, and now the fillet blends with the wing. Mount the two 17- to 25-gram servos in place and cut the ailerons free. Sand to shape and hinge. CA hinges were used for simplicity on the prototype, but there is enough surface if you want to use “pinned” hinges. The tail wheel assembly was built according to the plans, glued in place, and the tail cone pieces were added. The last bits of construction are the gun blisters and the canopy. The blisters are made from balsa block capped with plywood parts (from the IP) as a guide. The canopy frame is built from three pieces of Lite Ply (precut and on the same sheet as the IP) and is assembled according to the plans. Before attaching it to the fuselage, add thin, clear plastic sheet.
The Great Russian Cover-Up!
The Rata received a thorough sanding over its entire airframe. Remember that any bumps or excess glue will show when covered, so take your time with this step. Should a stringer snap (as it did with me), fear not. Merely glue the parts back together with a “splint” stringer on the backside.Image
Image

The plastic film covering and the re-covering of the fuselage in silkspan.
Those who followed my online build thread saw the struggles I had with painting over film. For this reason, after initially covering the model with MicroLite, I later finished most of it with silkspan. This might take longer to apply, but the results are worth it. With the airplane covered, I made final preparations before flight testing. All control surfaces were glued in place and connected to the servos. The center of gravity was set at 20% Mean Aerodynamic Chord and the model was balanced. With the 4,000 mAh 4S LiPo battery pack in place according to the plans, surprisingly, no additional ballast was needed!
Image

The Rata in color with its “Black Lusi” dog badge.
The retracts and gear doors were tested to ensure smooth operation before the model was painted. Behr house paints were used on the prototype and Callie Graphics supplied the insignia and nose art.

Image

Finished and ready for flight.
First Flights
With the model balanced and final checks complete, it was time to test-fly. When aligned on the runway, gently but quickly advance the power to approximately a quarter. This raises the tail and makes the rudder effective for tracking. From there, advance the throttle smoothly and at roughly half throttle, you are flying. Trim the model as needed and test out its stall characteristics.Image

The airplane is off and looking for Hawks.
The prototype was gentle and dropped its nose and one wing half slightly but did not snap. Landings are straightforward, with a gradual reduction of power until just before the wheels touch the ground.
Curtiss P-36/Hawk 75
Framing the Wing
The wing is built on the board in the conventional way. The feet are on the ribs and the spars set the correct washout. Begin by locating all of the parts for the wing assembly. Four 1/8 x 3/16-inch main spars are needed. I used balsa main spars on the prototype, but you can use basswood if you are concerned about strength. Pin the lower main spar to the board after shimming up from the board with 1/16-inch scrap. Raising the spars will place them deeper in the ribs, allowing the sheeting to cover the main spars later.Image

Detail of the aileron also shows the basic layout of the wing structure.
Pin rear spar (RS) perpendicular to the board using ribs W2 and W10 to space it back from the main spar’s position. Glue the rest of the ribs to the lower main spar and RS. Use the dihedral angle gauge printed on the plans to set the angle of rib W1. Now glue the trailing edge (TE) to the pads at the back of the ribs. Install the upper main spar, two 1/8-inch square balsa stringers, and shear webs S2 through S7 to lock the ribs together. The ailerons are next. Build the aileron pocket in the wing by gluing parts A1 through A3 into place. A2 is a doubler to beef up the rear spar. Glue it to RS. Now pin aileron leading edge (LE) A4 into place, but don’t glue it. This will form the aileron’s parting line. Glue the riblet parts A5 through A16 into place. These are positioned to replicate the construction of the full-scale Curtiss.
Image

Coloring the front of the LE with a marker makes accurately shaping it easier.
Main Retracts and Sheeting
Unpin the assembly to install the parts that create the main retract bay. Epoxy plywood shear web S1 securely to the back of the main spars and to ribs W1 through W4. Epoxy plywood half-ribs G1 and G2 to the main spars and to S1. Use LE to ensure that the ribs are aligned at their LEs. Glue LE into place after the gear bay parts have cured. Stack and glue parts WT to form the wingtip.Image

The retract bay is constructed from plywood shear web S1, and plywood half ribs G1 and G2. The LE is temporarily pinned in place to align these parts.
Pin the assembly to the board and allow the pads under the retract ribs to hang over the edge. Now sheet the upper wing surface from the main spar to the LE while the assembly is true to the board’s flat surface. Also sheet the rest of the area between ribs W1 and W2. When the sheeting is fully cured, unpin and check for straightness. Sheet the lower surfaces, including the space between W2 and W3 for the main wheel cutout. The retract bay is now a rigid assembly of plywood parts tied together by the upper and lower sheeting. Double up parts G3 and G4 and epoxy them to the outsides of ribs G1 and G2 and to the sheeting to form the retract mount bosses. Finish the wing assembly by completing the LE. Sand any overhang from the sheeting back flush with the front of part LE. Now glue a strip of 1/4-inch soft balsa to the front face of the LE. Tape over the sheeting to protect it while shaping. Now sand the nose profile in the LE with 60-grit sandpaper.
Image

A perfectly round hole for the main wheels was created by sanding with a bottle wrapped with 60-grit sandpaper.
Open the lower sheeting for the main wheel and strut where shown on the plans. Start small and fine-tune by installing your retract assembly. I used a bottle wrapped with sandpaper to make a perfect radius. When fitted, drop the retracts into place to mark and drill the retract bosses. Thread the holes with the retract mounting screws and harden the holes with CA adhesive.
Image

Kevlar lines from the doors to the strut pull the door shut as the tail wheel retracts.
The Belly Pan
After joining the wing with the plywood dihedral brace and fitting it to the fuselage, the belly pan can be built in place. Start by gluing the keel B1 and front former B2 together. Pin these into place with B1 running along the parting line between the wing halves, and B2 against the back of fuselage former F2. Put waxed paper between the wing and the belly pan to prevent the belly pan from being glued to the wing. Now glue formers B3 through B5 into place. Plank the belly pan with 1/16-inch balsa. Wetting the strips and using carpenter’s glue make this task simpler than it might sound. Although there will be more of them, narrow strips are easier to work with. When planked, install a pin in pan former B2 to engage into F2, and magnets in the back of the pan to make it removeable.Image

Planking the belly pan after assembling the pan framework.
Plastic Parts
The canopy, tail gear fairing, and main gear doors are provided as plastic parts in the short kit from Manzano Laser Works. For those who are hand cutting, these parts will be available from Park Flyer Plastics for a limited time. The tail fairing is a small project on its own when rigged with functioning doors. Start by marking and cutting the doors free. Ensure that the opening is long enough for the tail wheel to clear the back and for the strut to clear the front. Sand the opening and the doors carefully so that there is a small and even gap between them. A spare fairing is included in case you don’t get it right the first time.Image

Tail wheel fairing with tube and wire hinges and wire springs.
The door hinges are made from 1/16-inch aluminum tubing and music wire. The tubing was cut into three parts for each door. Two were epoxied to the inside of the fairing and one to the door itself. The music wire was inserted through all three tubes to serve as the hinge pin to align them. Roughening the plastic helped the epoxy stick. Next, springs were made by wrapping a broken guitar string around a wire clamped in a vise. One string has made 20 springs so far. When captured by the wire hinge pin, two of these tiny springs flipped each door open. A bit of Kevlar fishing line tied to the tail wheel strut was used to pull the doors closed. Drill a small hole in each door. Tie the line to the strut with several inches to spare on each side. Thread the line through the holes in the doors from the inside. Retract the tail wheel. Close the door and pull the line tight. A dab of 5-minute epoxy on the outside of the door will hold the line in place. Open the retract and confirm that the door opens properly. Another small dab of epoxy on the inside of the door will hold the line in place for life. Trim the excess line and repeat on the other side. For the main doors, I departed from the scale design for the sake of simplicity. The P-36 had a three-piece door system that included a door mounted to the rotating strut, a middle door hinged at the wing, and a third small door that dropped between the wing fairing and the middle door. I like a challenge, but this was too much for this model.
Image

A simplified gear door arrangement made from one fixed and one rotating part.
The system on the prototype was simplified to two doors: a door mounted to the rotating strut and a fixed cover that was notched to make clearance for the strut when it was extended. By making the parting line curved, the gap was kept small. Balsa scrap was used for the brackets between the strut and the door. A bead of silicone fastened the parts together. This allowed the parts to be fitted perfectly while providing a flexible joint.
Covering and Finishing
My prototype was covered in Polyspan and sprayed with household latex paints. These topics were covered in detail in the October 2015 issue of Model Aviation. The article can be found at www.modelaviation.comhttps://modelaviation.s3.us-east-2.amazonaws.com/ma-construction-series…. Narrowing down the choices for paint schemes for your Hawk can be the toughest part of this project. Options for U.S. Army aircraft range from aluminum with colorful prewar markings to the solid olive drab and grey of the defenders at Pearl Harbor. There are also some wild experimental camouflage schemes used during war games before hostilities erupted.Image

This is what the author’s Sussu looks like when it’s hungry for some Ratas!
The export models of the Hawk offer an incredible range of options including the beautiful Vichy French aircraft that flew against the allies in North Africa. The striking red and yellow stripes, tricolor camouflage, and French roundels were a close second choice for my Hawk. Ultimately, I was drawn to the schemes of the Finnish Air Force (FAF) for some time. The black and green camouflage patterns, combined with generous yellow identification bands, make for a pretty aircraft that offers excellent visual orientability. And of course, it was the Finnish Hawks that were pitted against the I-16s that form the counterpart of the “Fighter Face-Off.” And now a word on the markings. Finland adopted the blue hakaristi as a national insignia in 1918. This came to be after an early benefactor of the FAF donated an aircraft adorned with what was once recognized as a symbol of good luck. Finland discontinued the use of the hakaristi as an insignia after World War II because of its negative association with the Nazi swastika.
Image

The Hawk zooming into a big warbird loop.
The markings are vinyl and were printed by Callie Graphics. As usual, they are perfect. Callie Soden has the file for those interested in finishing their Hawks in FAF colors.
Flying the Hawk
The maiden of the prototype was flown after the covering was complete, but before it was painted. Although bigger than my other projects, the Hawk floated off of the ground during taxi testing, similar to other infield models. All-up weight was 56 ounces with a 3,800 mAh 4S LiPo battery installed. Ground handling with the wide track was good. The transition between tail wheel and rudder steering wasn’t particularly noticeable as the tail came up. At half throttle, the Hawk was pulling strongly and climbing at a scale angle. The gear pulled up as planned and we were away.Image

Distinctive Curtiss landing gear dropping down for landing.
The somewhat large elevators and rudder were effective, but the more modest scale ailerons were more so than I expected. Scale flight was a breeze, with majestic maneuvers and appropriate speeds. The Finnish pilots who flew the Hawk 75 called it the Sussu, or “sweetheart.” I found that the personality of the model was consistent with the full-scale version. But when the stick went all the way forward, the Hawk took on another tone. It’s no pylon racer, but the airplane scoots! The landing was challenging only in the sense that the Hawk didn’t want to come down. I floated by the runway on the first attempts. For me, 60 inches is a large model and seeing it float just like my 10-ounce aircraft was astounding. But after the turn to final approach was moved out, the landings were featherlight.


Comments
The hawks three blade propeller
Can you tell if and where the three blade propeller the hawk model is flying with can be purchased?
Hi William,
Hi William,
FMS carries the prop blades and hubs that are shown in the photos. Use the ones for the F7F Tigercat.
Paul
Congratulations! Fantastic! I
Congratulations! Fantastic! I<3IT
Curtiss P-36
Very cool subject! Just one question, what retracts were used for the main gear? didn't see anything in the article, unless I missed it. Thanks!
Hi Rick,
Hi Rick,
Sorry for the delay--just saw your question. The prototype used the retracts from the FMS 55" P40.
My best,
Paul
Add new comment