Written by Gordon Buckland.
Extended Digital Content from the March 2013 RC Soaring Column.
Also featured in the March 2013 Model Aviation tablet app.
The Xplorer F3J model, produced by NAN Models in Bulgaria, is considered to be the most popular molded F3J/Thermal Duration model in the world since its introduction to the US market in mid-2008. The Xplorer had success in 2007 in the hands of European pilots, including Benedikt Feigl, who won the F3J World Championship in 2008 with a v-tail version.
The model has evolved because the original D-box iterations were slightly fragile under the heavy winch foot of some US pilots.
NAN redesigned the wing structure with a full carbon version in 2009, and in 2010 a new, lighter Spread Tow version was introduced with an average flying weight of 70 ounces. This ST version has seen major success in its three span variants of 3.5 meters, 3.8 meters, and 4.0 meters. It has proven to be reliable and robust. With a wing loading between 7.2 and 8.5 ounces per square foot, this model’s dead-air performance is not easily matched by similar F3J models.
The Xplorer’s floating characteristics make it docile and easy to fly, while providing many pilots with a solid platform to outlast opponents in light lift. The exaggerated “in section” undercamber of the NAN F3J airfoil contributes greatly to its excellent floating and low-speed performance. This is also its Achilles heel, as it makes the Xplorer more difficult to get moving into the wind for the all-important run home from a long downwind jaunt.
Many pilots have misjudged their returns and landed their Xplorers out. Often the “higher drag” section at moderate and higher air speeds was to blame. Nevertheless, the Xplorer has certainly seen a lot of airtime in the US and won many contests while the popularity of other legendary models, such as the Sharon and the Pike, has waned.
It seemed apparent that any new version of the Xplorer would need to sport a more slippery airfoil if it were to be an improvement. In April 2012, Bob Breaux of SoaringUSA announced the arrival of a batch of the new X2s and they indeed featured a new airfoil which promised better legs than the original.
Bob promised the new X2 would be significantly lighter while maintaining full strength. I placed an order for a 3.5-meter X2, because I had flown four different Xplorers during the last two years and am fond of the lighter, more nimble 3.5-meter span as opposed to the larger Xplorer variants.
The model was delivered from SoaringUSA in a nice, wood-reinforced box to make sure that no crushing occurred.
This tracing of the old and new airfoils shows a sharper LE on the X2 combined with a thicker airfoil at the hinge line while retaining the same thickness at the spar.
The parts for the model included a bag of hardware with everything required to assemble the model except the adhesives, wiring harness, and electronics.
I carefully weighed all of the components including the MKS electronics, seen here with six servos, trays, horns, and screws at only 5.74 ounces.
The model arrived from SoaringUSA nicely packaged in a timber-reinforced box. I weighed each of the components and, including all of the supplied hardware, the entire airframe weighed slightly more than 50.5 ounces.
This bodes well for a potential build to finish in the low 60-ounce range using quality electronics. This would be a 7-ounce improvement over my previous Xplorer, which flew off the bench at 67.5 ounces. At 1,176 square inches, this should build out with a wing loading of less than 7.5 ounces per square foot, which would be similar to the lightest of the renowned 4.0 ST Xplorers.
One of the greatest improvements with lighter building techniques by NAN in recent years has been the lighter tails. The cross-tail X2 is no exception, with these standard X2 tails coming in at 1.6 ounces with joiners. The rear of the new fuselage has also been somewhat lightened, leaving almost no requirement for nose ballast with a build using industry standard electronics.
I chose my electronics based on reliability, precision, and light weight, using MKS Ds6125 Minis in the ailerons, MKS Ds6125s for flap, the MKS Ds6125H for elevator, and the lighter MKS Ds6188 for rudder. I selected the MKS wooden wing trays and the standard SoaringUSA wiring harness.
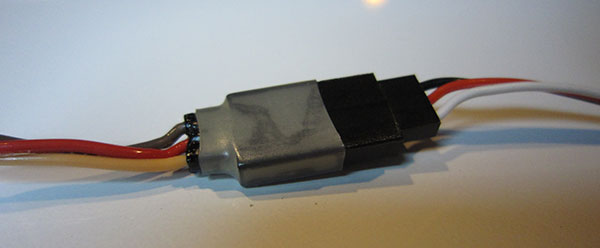
With a four-cell 2/3A battery, the Spektrum Carbon AR9310 receiver, and using “trick” clear servo covers from Merrill Brady, the all-up weight of all components was 61.43 ounces.
The first step was to prepare the wings and servos for gluing in the servo trays. The brass control horns need to be carefully trimmed to length before screwing them in or they can mar the lower face of the control surfaces when they bottom out. The long horns for the ailerons and the short ones for the flaps accommodate the larger surface movement. Slots for each pushrod were marked and Dremeled into the wing’s top surface aligned with the control surface horns.
Next, the servo trays were covered with plastic wrap and the servos attached, ready for gluing in the trays. The pushrods were made to length (with some extras for spares, while I was at it.) For the spares, I used a pair of 2mm clevises that have been glued with CA to the appropriate length of 1.6mm carbon rod.
The length is easily determined at this point during assembly with the components in place in the wing and the servos arms positioned for the required travel of each surface. Position the servo carefully in the wing so that the screws can be removed after the trays are glued.
The inner surface of the wings was then scuffed with 250-grit sandpaper to ready it for epoxy. I laid the wing components out on a blanket and applied slow-cure, full-strength West Systems epoxy to each of the wooden trays before positioning them in the wings. I used metal weights sitting on a bottle cap to hold each servo assembly tight against the wing skins while the epoxy set up. This gave me time to position the servos correctly with the pushrod at 90° to the hinge line and the servo screws accessible.
The pushrod exit slots need to be carefully marked and cut into the upper surfaces in line with the control horns. This also requires filing a slot in the trailing edge spar for the pushrod.
By spreading plastic wrap over the servo trays before screwing the servos in, the trays can be glued onto the wing surface skin without fear of permanently affixing the servos.
A plastic bottle cap and a steel weight are used to apply the necessary load on the servo tray while epoxy is bonding it to the wing skin. Place a blanket between your wings and your bench.
With the trays now epoxied in, the servos can be temporarily unscrewed to remove the plastic wrap. Before final positioning, make sure your servo screws are not too long or they will show on the upper surface of your wings.
The fuse and wing harnesses can be pulled carefully into place using a thin piece of piano wire taped to the ends.
While the wing servo installation was curing, I prepared the fuselage. First was the wiring harness, taking care to bend the wires to the fuselage side to provide clearance for the ballast rod. The provided rudder horn is a ball that is screwed in, but it really requires gluing with epoxy or CA to remain secure. A little careful work with the Dremel is required to provide clearance for the supplied plastic ball link and pushrod at the extremity of left rudder travel.
The other end of the servo installation is really pretty much of a breeze with NAN Model’s preinstalled servo tray, although I needed to fill a space at the back end of the rudder servo with a small piece of plywood for the shorter MKS 6188.
With the servos in place, I measured the pushrod lengths using the supplied clevises and threaded pushrod ends. After cutting them to length with the Dremel blade, I soldered the hypo-tube pushrods to the brass pushrod ends and attached the clevises to the servo arms. Using a few small blobs of Shoe Goo adhesive, I attached the pushrod sleeves to the servo tray near the ends and two more places back into the fuselage using a long stick. This is important to stop the pushrod sleeves from flexing.
I bent three plastic antenna tubes to shape and glued them with hot melt into the nose of the model to position the three Spektrum receiver antennas: one for each axis with a straight tube forward under the battery, a bent tube under and vertically up through the servo tray, and the third forward and across the top of the fuselage ahead of the canopy. This system is easy to install, makes accurate routing of each antennae a cinch, and works well.
The supplied rudder horn is a screw-in ball and does the job, but should be permanently glued in with CA or epoxied into its position; if not, it will probably loosen later.
These pre-bent antenna tubes have been proven to increase 2.4 GHz reliability, as well as simplify the receiver installation.
The elevator and rudder pushrods can be measured, and the stainless hypo tubes cut to length with a Dremel.
The pushrod housings are secured to the tray and inside the fuselage with small dobs of Shoe Goo adhesive.
When the wing epoxy cured, I was able to remove the servos, take the plastic wrap off of them, and install the center wing harness. A hole, large enough to pass the harness ends through, was filed in each tip.
Using 10-minute epoxy I glued the harness-plug ends into the center section, ensuring the plugs remained parallel and square to the end ribs. The two, short harness ends were plugged into the flap servos, shrink-wrapped together for security, and the servos screwed into their trays. I added short extensions to the aileron servos, secured the plugs together, and refitted the aileron servos after pulling the extension plug through the end of the tip. I used a piece of tape attached (as a tab) to the wire 4 inches from the plug end to make sure that they didn’t get lost back into the tip between flying sessions. After trimming and taping the Brady transparent servo covers to the wings, the model was ready for final assembly and balancing.
After the build, I was pleased to discover that on the scales I had only added slightly more than 1/2 ounce in adhesives, shrink wrap, antenna tubes, and tape. With the model initially balanced at 120mm from the LE, it only needed 3/4 ounce taped to the four-cell battery pack, making the final ready-to-fly weight slightly less than 63 ounces.
The servo harness to the servo plugs and tip extensions are plugged together and then shrink-wrapped for security.
I use these “trick” Merrill Brady clear covers because I can always see what’s happening with my servos and linkage without removing the covers.
While flying this model, it was immediately apparent that the new foil has made what was already a contest-winning sailplane even better. It is so light that it’s easily hand-thrown into lift and returns from downwind unballasted with far greater predictability than before.
The model provides excellent feedback to an attentive pilot in all conditions; it responds significantly to the slightest active air, yet remains gentle and very predictable to fly while turning in thermals.
A significant improvement has also been made in the way this Xplorer launches. The lighter weight contributes to much faster acceleration in the zoom. The more streamlined section appears to help the vertical climb after the zoom to go on seemingly forever (compared with the X1.)
I like the X2’s forgiving nature. You don’t need special skills to extract great performance from this lightweight glider. It has no bad habits and does everything a Thermal Duration pilot needs it to do with style. No doubt about it, this model is a big step forward from what was already a sound design—and at a very affordable price point. I love mine.
Benedikt Feigl won the 2012 F3J World Championships with a v-tail, 3.8-meter X2 specially made by NAN Models at an even lighter weight of approximately 54 ounces.
Fly downwind and soar.
SOURCES:
SoaringUSA
(626) 967-6660
www.soaringusa.com
Horizon Hobby
(800) 338-4639
www.horizonhobby.com
NAN Models
www.nanmodels.com
MM Glider Tech
[email protected]
www.mmglidertech.com
West System
(866) 937-8797
www.westsystem.com
League of Silent Flight
www.silentflight.org


Comments
Xplorer build
Thanks very much M.A.. This will help a lot on the build. Keep up the great work.
moden avioneta
buena noche por favor me pueden en vial el precio del planeador x plorer 3800
Add new comment